alone movie parents guide

Alone is a 2020 thriller about Jessica, a young woman kidnapped and terrorized by a psychopath in the wilderness. The film is tense and well-made but contains extreme violence and unsettling themes.

Rated R for violent content, language, and partial nudity. Suitable for mature audiences only, as it involves intense scenes and graphic violence directed at the protagonist.

Extremely strong violence, including shooting, stabbing, and physical abuse. Jessica is subjected to prolonged terror, making it unsuitable for younger or sensitive viewers.

Moderate profanity is present, adding to the film’s intense atmosphere. While not excessive, it contributes to the overall mature tone.

Themes of abduction, survival, and psychological terror dominate. Scenes are emotionally distressing, with Jessica’s helplessness and the predator’s brutality central to the plot.

Partial nudity is noted, but no explicit sexual content. The focus remains on suspense and horror rather than sexual themes.

Mild references to alcohol and drugs, but these are not central to the storyline. The emphasis is on survival and terror.

Multiple frightening scenes, including chases, confinement, and physical assaults. The film’s tense atmosphere may be overwhelming for some viewers.

While Jessica shows resilience, the film’s focus on survival and terror limits its positive messaging. It doesn’t emphasize traditional role models or uplifting themes.

Parents should exercise caution. The film’s graphic violence and mature themes make it inappropriate for children. Recommended for viewers 17 and older due to its intense content.

Movie Overview

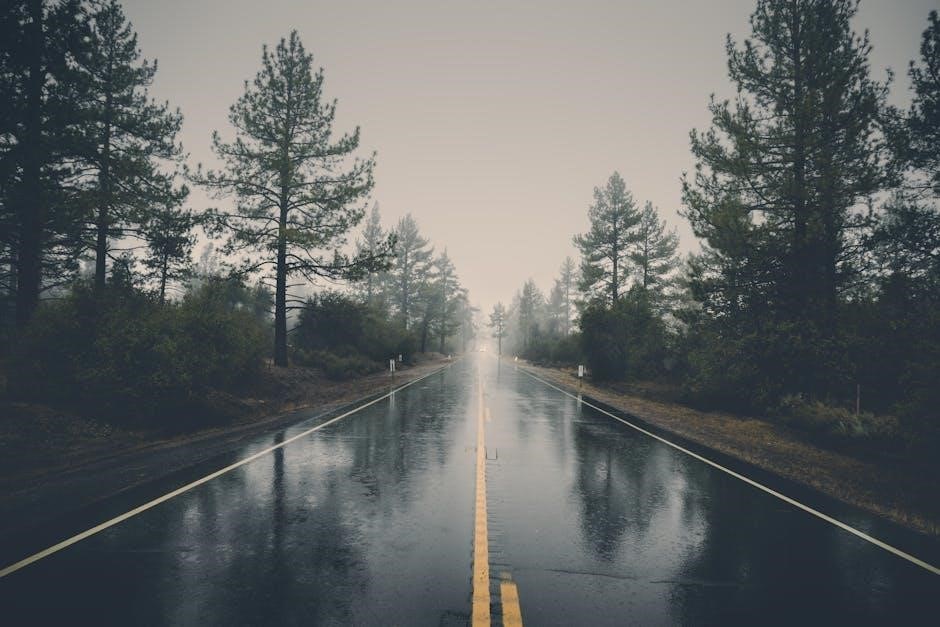
Alone is a gripping 2020 thriller directed by Johnny Martin, following the story of Jessica (Jules Willcox), a young woman who finds herself kidnapped and terrorized by a psychopath (Marc Menchaca) while traveling alone through the Pacific Northwest. The film is a tense, survival-driven narrative that explores themes of isolation, fear, and resilience. With its stark setting and relentless pacing, Alone delivers a chilling experience, though its graphic violence and unsettling tone may not suit all audiences.

Released on September 18, 2020, the movie performed modestly at the box office but gained attention for its intense performances and well-crafted suspense. While it has been praised for its technical execution, the film’s brutal content and dark themes make it a challenging watch, particularly for sensitive viewers. Parents should be aware of the extreme violence and mature subject matter before allowing younger audiences to view it.

Age Rating and Appropriateness

The movie Alone is rated R by the MPAA for violent content, bloody images, some language, and partial nudity. This rating indicates that the film is intended for mature audiences and may not be suitable for younger viewers. The extreme violence, intense suspense, and disturbing themes make it inappropriate for children or teenagers below the age of 17. Parents should exercise caution, as the graphic content and unsettling atmosphere may be too overwhelming for sensitive viewers.

While the film is technically well-crafted, its unpleasant nature and focus on terror make it unsuitable for younger audiences. The R rating reflects the movie’s mature themes, strong violence, and brief nudity, ensuring that it is only appropriate for viewers who can handle intense and distressing material. Parents are advised to review the content carefully before allowing their children to watch it.

Violence and Gore Content

The movie Alone contains extremely strong violence and gore, which is a central element of its thriller narrative. Jessica, the protagonist, is subjected to brutal physical abuse, including shooting, stabbing, and being dragged by her hair. These scenes are graphic and prolonged, making the film unsettling to watch. The violence is not only physical but also psychological, as the antagonist terrorizes Jessica, leaving her in a state of constant fear and helplessness.

The film’s violent content is intense and relentless, with moments of gore that may disturb even mature audiences. While the violence serves the story’s tension and suspense, it is graphic enough to warrant caution for sensitive viewers. Parents should be aware that the movie’s focus on terror and brutality makes it inappropriate for younger audiences or those who are easily disturbed by violent imagery.

The MPAA has rated Alone R for violent content and bloody images, further emphasizing the need for parental discretion. The film’s depiction of violence is raw and unflinching, making it essential for parents to evaluate whether it is suitable for their children.

Strong Language and Profanity

The movie Alone includes moderate strong language and profanity, which contributes to its intense and mature tone. While the film’s primary focus is on suspense and terror, the dialogue occasionally incorporates strong words to heighten the emotional tension and reflect the dire situation faced by the protagonist, Jessica.

The profanity is not excessive but is present enough to be noticeable. It is used in moments of fear, anger, or desperation, adding to the film’s realistic portrayal of a woman fighting for survival. However, the language does not dominate the narrative, and the film’s reliance on action and suspense takes precedence over verbal exchanges.

Parents should be aware of the occasional strong language, as it may not be suitable for younger or more sensitive viewers. While the profanity is not relentless, it is still a factor to consider when deciding whether the film is appropriate for children or teenagers.

Mature Themes and Intense Scenes

The movie Alone explores Mature themes of abduction, survival, and psychological terror, which are central to its plot. Jessica, the protagonist, is subjected to intense and prolonged terror, including physical and emotional abuse, by her captor. These scenes are deeply unsettling and may be distressing for some viewers, particularly due to the realistic portrayal of her helplessness and fear.

The film delves into the psychological impact of isolation and desperation, as Jessica attempts to outsmart her predator in a remote wilderness setting. The tension is heightened by the predator’s sadistic behavior, making the experience even more harrowing. While the themes are not explicitly graphic, they are emotionally intense and may leave a lasting impression on sensitive audiences.

Parents should be cautious, as the film’s mature themes and intense scenes are not suitable for younger viewers. The focus on survival and terror, combined with the psychological depth, makes it appropriate only for mature audiences who can handle such content.

Sex, Nudity, and Suggestive Content

The movie Alone contains minimal sexual content, but it does include partial nudity as noted in the MPAA rating. However, the film does not focus on explicit sexual themes or suggestive content. The storyline revolves around suspense and horror rather than romantic or sexual elements, making it less concerning in this regard compared to other films in the thriller genre.

While there are no explicit sexual scenes, the intensity of the plot and the protagonist’s vulnerability might still affect sensitive viewers. Parents should be aware that the partial nudity is brief and not gratuitous, but it is present nonetheless. The film’s primary emphasis is on survival and terror, with no significant focus on sexual content or suggestive behavior.

Overall, the minimal sexual content makes Alone less objectionable in this category, but the movie’s overall intensity and graphic violence remain the primary concerns for younger audiences.

Alcohol, Drugs, and Smoking

The film Alone contains mild references to alcohol and drugs, but these elements are not central to the storyline. While there are no explicit scenes of substance abuse, the minimal depiction of alcohol and drugs is present in the context of the protagonist’s survival situation. Smoking is not a prominent feature in the movie, and its absence further reduces concerns in this category.

Parents should note that the film’s focus on horror and suspense overshadows any material related to alcohol or drugs. The mild nature of these references makes them less likely to have a significant impact on young viewers compared to the film’s violent and intense content. However, as with any media, parental discretion is advised to ensure the content aligns with individual values and sensitivities.

Overall, the portrayal of alcohol, drugs, and smoking in Alone is minimal and not gratuitous, making it less concerning in this regard compared to other aspects of the film.

Frightening and Intense Moments

Alone is filled with numerous frightening and intense moments that may be overwhelming for sensitive viewers. The film’s suspenseful atmosphere is heightened by Jessica’s desperate attempts to escape her captor, creating a sense of relentless tension. Scenes of her being chased, confined, and terrorized are particularly unsettling, as they emphasize her vulnerability and the predator’s ruthlessness.

The psychological terror and physical threats escalate throughout the movie, making it emotionally distressing to watch. Parents should be aware that these intense sequences are prolonged and graphic, with moments of sudden scares and prolonged suspense. While the film avoids supernatural elements, the realistic portrayal of danger and survival heightens the fear factor. These intense moments make the film unsuitable for younger or sensitive audiences, as they may find the content deeply unsettling or traumatic.

Positive Messages and Role Models

While Alone focuses primarily on horror and suspense, it does highlight Jessica’s resilience and determination to survive. Her ability to think critically and adapt under extreme circumstances showcases strength and resourcefulness. However, the film’s dark and intense nature limits its presentation of overtly positive messages.

Jessica’s character serves as a limited role model, demonstrating courage in the face of terror. Yet, the film’s bleak tone and lack of supportive characters or uplifting themes make it challenging to derive meaningful positive messages. The absence of traditional role models or redeeming qualities in other characters further narrows its inspirational value.

Parents should consider whether the film’s portrayal of survival and perseverance outweighs its graphic content. While Jessica’s resilience is commendable, the overall narrative is more focused on horror than on delivering positive lessons or role models for young viewers.

Alone is a gripping yet unsettling thriller that explores themes of survival and terror. While it showcases Jessica’s resilience, the film’s graphic violence, intense scenes, and mature content make it unsuitable for younger audiences. Parents should exercise extreme caution, as the movie’s R rating is justified by its violent imagery, strong language, and partial nudity.

The MPAA rating of R for violence, bloody images, some language, and partial nudity underscores the need for parental discretion. The film’s dark and intense nature may be overwhelming for sensitive viewers, including teenagers. While Jessica’s determination to survive is commendable, the lack of positive messages and uplifting themes limits its appeal for younger audiences.

Parents are strongly advised to preview the film before allowing their children to watch it. Suitable for mature audiences only, ideally those aged 17 and above, due to its graphic and disturbing content. Viewer discretion is strongly recommended to ensure it aligns with individual tolerance for horror and violence.

ffxi scholar guide

The Scholar is a versatile healer in Final Fantasy XI, utilizing faeries and strategic magic to support allies. Known for its dual-role capabilities, it excels in both healing and magical offense, offering unique versatility in party dynamics.

Job Abilities and Traits

Scholars wield stratagems, powerful magical commands, and dual grimoires—White for healing and Black for damage. Abilities like Addendum enhance spells, while traits boost magic accuracy and MP, making Scholars versatile supports with offensive potential.

Strategems

Strategems are the core of Scholar gameplay, offering adaptable magical tactics. They are divided into two categories: White and Black. White Strategems enhance healing and support, such as boosting curing magic or granting protective barriers. Black Strategems focus on offensive capabilities, including enhancing elemental spells and increasing magic burst damage. These abilities allow Scholars to dynamically adjust their role in combat, providing either robust healing or significant magical damage. Proper use of Strategems requires understanding combat situations and effectively switching between White and Black Grimoires. This dual capability makes Scholars highly versatile, capable of adapting to any challenge, whether it’s supporting allies or dealing decisive magical blows. Mastering Strategems is essential for maximizing the Scholar’s potential in both group and solo play, ensuring optimal performance in diverse scenarios.

Group 1 Merits

Group 1 Merits for the Scholar job in Final Fantasy XI are designed to enhance the effectiveness of the Scholar’s core abilities. These merits focus on improving the Scholar’s ability to heal, support, and deal magical damage. One key merit increases the potency of curing magic, making the Scholar more effective at restoring HP to allies. Another merit enhances the Scholar’s magical attack power, allowing for stronger offensive spells. Additionally, there are merits that improve MP efficiency, reducing the cost of spells and allowing the Scholar to maintain longer durations of healing or offensive magic. These merits are essential for optimizing the Scholar’s performance in both solo and group play. By investing in these merits, players can further specialize their Scholar, making them more versatile and valuable to their party. Proper allocation of Group 1 Merits ensures the Scholar excels in their primary roles, whether focusing on healing, support, or magical offense.

Spell List

The Scholar’s spell list in Final Fantasy XI is a blend of White Magic and Black Magic, offering versatile support and offensive capabilities. Core healing spells like Curaga and Curaja provide potent HP restoration, while Esuna removes debilitating status effects. The Dia series weakens enemies with damage over time, complementing the Scholar’s offensive role. Additionally, spells like Barstonra and Barwatera enhance elemental resistance, bolstering party defense. Unique to the Scholar is the ability to summon and command faeries through spells like Summon Eos and Summon Selene, which provide additional healing and support. These spells highlight the Scholar’s adaptability, making them invaluable in both healing and combat scenarios. Mastery of the Scholar’s spell list is crucial for optimizing their supportive and offensive contributions in various game situations.

Skill Caps

The Scholar’s skill caps in Final Fantasy XI are crucial for maximizing their effectiveness in both healing and magical offense. Achieving high skill caps in White Magic and Black Magic enhances spell potency and accuracy, making the Scholar a more reliable healer and damage dealer. Additionally, capping Elemental Magic skills like Fire, Ice, and Thunder allows for powerful nuking capabilities, especially when combined with the Scholar’s unique Skillchain and Magic Burst mechanics. The Healing Magic skill cap is particularly important for ensuring optimal restoration, while Summoning Magic caps improve faerie abilities, such as the healing provided by Eos and the offensive prowess of Selene. Balancing these skill caps is key to unlocking the Scholar’s full potential in both support and offensive roles, making them a versatile and valuable asset to any party. Proper skill cap management ensures the Scholar can adapt to various combat scenarios effectively.

How to Play Scholar

Mastering the Scholar involves balancing faerie support, Stratagems, and adaptive magic. Efficiently switch between healing and offense, leveraging Skillchains and Magic Burst for maximum impact while maintaining party support through strategic ability usage.

Current Meta and Why Scholar is Important

In the current meta, the Scholar remains a highly valued job due to its versatility and adaptability. Its ability to provide both healing and offensive support makes it a crucial asset in dynamic party compositions. The Scholar’s unique capacity to switch between healing and dealing damage, combined with its powerful Stratagems and Skillchain capabilities, ensures it remains relevant in both high-tier and casual content. Its faerie companions, such as Eos and Selende, add layers of utility, enabling efficient party support and enemy debuffs. Additionally, the Scholar’s access to high-tier magic and Magic Burst damage solidifies its role as a hybrid healer, capable of adapting to the demands of any encounter. This dual-role proficiency makes the Scholar an indispensable addition to many groups, particularly in situations where flexibility is key to success.

PvP Section

The Scholar excels in PvP scenarios due to its unique blend of healing, debuffing, and offensive capabilities. With access to powerful Stratagems, the Scholar can manipulate battlefield dynamics, enhancing allies’ performance while hindering opponents. The ability to summon faeries like Eos and Selende provides consistent healing and utility, allowing the Scholar to sustain itself and its team in prolonged engagements. Additionally, the Scholar’s mastery of magic, particularly in dealing unaspected damage over time, makes it a formidable opponent in one-on-one and group battles. Its high mobility and MP efficiency enable it to outmaneuver foes while maintaining a steady flow of offensive and defensive magic. In zonal PvP, the Scholar’s ability to kite enemies and control areas with AoE spells further solidifies its strategic importance. Overall, the Scholar’s versatility makes it a valuable asset in any PvP setting, capable of adapting to both aggressive and defensive playstyles.

Advanced Strategies for Endgame Content

Mastering the Scholar job requires a deep understanding of its advanced strategies, particularly in endgame content. Optimizing faerie usage is critical, as their abilities can significantly enhance healing and damage output. Eos excels at sustained healing, while Selende’s offensive capabilities make her indispensable during magic bursts. Skillchain and magic burst coordination with the party is essential to maximize damage output, especially in high-tier content. Timing Rapture and Blank Spell effectively can prevent unnecessary damage and ensure smooth progression. Additionally, leveraging Stratagems like Casting Caps and Dalmatica to enhance spell efficiency is vital. Debuff management is another key aspect, as maintaining the right enfeebles can drastically alter encounter dynamics. Utilizing high-tier spells like Ternary Flare and Cascade ensures maximum impact in critical moments. Finally, mastering MP management through Sublimation and optimizing skill caps ensures the Scholar remains a reliable asset in demanding endgame scenarios. By refining these strategies, Scholars can elevate their performance and contribute decisively to their party’s success.

Resources and Further Reading

For those seeking to dive deeper into mastering the Scholar job, there are numerous resources available. The official Final Fantasy XI forums and dedicated community platforms offer extensive guides, such as “A Scholar’s Education,” which provides comprehensive insights into job mechanics, stratagems, and optimization. Additionally, player-created guides on sites like FFXIAH and Reddit cover advanced strategies, merit builds, and endgame content. Recent updates and discussions from experienced players highlight the job’s evolving meta and its continued relevance in high-tier gameplay. For visual learners, YouTube channels and streams often feature Scholar gameplay tutorials and analysis. Lastly, in-game linkshells and community events are great ways to connect with other Scholars and learn from their experiences. These resources collectively ensure that players of all skill levels can refine their craft and unlock the full potential of the Scholar job in Final Fantasy XI.

oasis e guidance manual

The OASIS-E Guidance Manual is a comprehensive resource for home health agencies, effective January 1, 2025, providing standardized instructions for accurate data collection and compliance with CMS requirements․

What is the OASIS-E Guidance Manual?

The OASIS-E Guidance Manual is a CMS-developed resource for home health agencies, effective January 1, 2025․ It provides detailed instructions and examples for accurate OASIS-E data collection, ensuring compliance with regulatory standards․ The manual includes sections on patient assessment, coding instructions, and strategies for addressing common challenges․ It serves as a reference for clinicians and coders to understand the intent behind each OASIS-E item, offering tips for proper data submission․ This guide is essential for maintaining high-quality, accurate data and staying updated on CMS requirements, making it a cornerstone for effective home health care operations and compliance․

Importance of the OASIS-E Guidance Manual for Home Health Agencies

The OASIS-E Guidance Manual is vital for home health agencies as it ensures accurate and consistent data collection, directly impacting reimbursement and quality ratings․ By following the manual, agencies can comply with CMS standards, reduce errors, and improve patient care outcomes․ It also serves as a training tool for clinicians and coders, enhancing their understanding of OASIS-E items and promoting adherence to best practices․ Additionally, the manual helps agencies prepare for surveys and audits by ensuring data integrity; Its guidance is essential for maintaining operational efficiency and meeting regulatory requirements, making it an indispensable resource for home health care providers․

Structure and Key Components of the OASIS-E Guidance Manual

The OASIS-E Guidance Manual is organized into clear sections, providing response-specific instructions and examples to ensure accurate data collection and compliance with CMS standards․

Overview of the Manual’s Layout and Organization

The OASIS-E Guidance Manual is structured to facilitate easy navigation, with clear sections and response-specific instructions․ It begins with an introduction, followed by detailed chapters on patient assessment and data collection․ Each section includes examples and tips for accurate reporting․ The manual is divided into key components, such as best practices for assessments and troubleshooting common challenges․ Appendices provide additional resources, including CMS updates and supporting materials․ This organized layout ensures that home health agencies can efficiently access the information they need to comply with CMS requirements and improve data accuracy․

Key Sections and Response-Specific Instructions

The OASIS-E Guidance Manual includes dedicated sections for patient assessment, data collection, and reporting, with response-specific instructions to ensure accuracy․ Key sections cover assessment best practices, coding guidelines, and strategies for resolving discrepancies․ The manual provides clear examples and tips for clinicians and coders to interpret and apply OASIS-E items correctly․ Response-specific instructions are detailed to guide accurate reporting, reducing errors and ensuring compliance with CMS standards․ This structured approach helps home health agencies navigate complex requirements effectively, improving overall data quality and regulatory adherence․

Guidance on Patient Assessment and Data Collection

The manual provides best practices for conducting accurate patient assessments and collecting reliable data, ensuring compliance with CMS guidelines for effective patient care and reporting․

Best Practices for Conducting Patient Assessments

The OASIS-E Guidance Manual emphasizes the importance of clear communication and patient-centered approaches during assessments․ Clinicians should ensure patients understand instructions and are able to answer without external assistance, as required by specific items like B1300 and C0300A․ Active observation and collaboration with caregivers can enhance accuracy․ The manual recommends using consumer-friendly terminology to avoid confusion and ensure patients grasp the information․ Additionally, it advises clinicians to document observations thoroughly and cross-reference medical records for consistency․ By following these practices, agencies can improve data reliability and ensure compliance with CMS standards, ultimately supporting better patient outcomes and effective care planning․

Ensuring Accurate and Reliable Data Collection

The OASIS-E Guidance Manual stresses the importance of precise data collection through clear instructions and standardized processes․ Clinicians must verify patient responses, especially for items like B1300 and C0300A, to ensure accuracy․ The manual recommends cross-referencing medical records and using consumer-friendly language to avoid misunderstandings․ Agencies should implement quality checks and training to minimize errors and inconsistencies․ By adhering to these guidelines, home health agencies can maintain reliable data, facilitating better patient care and compliance with regulatory standards․ Accurate data collection is foundational for effective care planning and outcomes measurement, making it a priority for all clinicians involved in the OASIS-E process․

Troubleshooting Common Challenges in OASIS-E

Troubleshooting Common Challenges in OASIS-E

The OASIS-E Guidance Manual addresses common coding and reporting issues, offering strategies to resolve discrepancies in data collection and ensure compliance with CMS standards effectively․

Addressing Common Coding and Reporting Issues

The OASIS-E Guidance Manual provides detailed strategies to address common coding and reporting challenges, ensuring accurate data submission․ It emphasizes the importance of understanding specific item intent, reducing discrepancies, and adhering to CMS guidelines․ Clinicians and coders are advised to collaborate closely to verify patient responses and ensure consistency․ The manual also highlights the need for ongoing training to stay updated on coding conventions and regulatory changes․ By following these guidelines, home health agencies can minimize errors and ensure compliance, ultimately improving patient care and operational efficiency while maintaining high standards of data integrity․

Strategies for Resolving Discrepancies in Data

Resolving data discrepancies in OASIS-E requires a structured approach to ensure accuracy and compliance․ Clinicians and coders should prioritize clear communication and thorough documentation reviews․ Cross-referencing patient records with assessment data can help identify inconsistencies․ The manual recommends verifying ambiguous responses through follow-up questions or consultations with healthcare providers․ Standardized procedures for data validation, such as double-checking entries, are essential․ Additionally, agencies should implement processes for tracking and addressing discrepancies promptly to prevent submission errors․ Regular training and updates on CMS guidelines can further enhance data integrity and minimize conflicts, ensuring reliable outcomes for patient care and agency compliance․

Additional Resources for OASIS-E Compliance

Access CMS updates, supporting materials, and tips for clinicians and coders to ensure adherence to OASIS-E standards and maintain compliance effectively․

CMS Updates and Supporting Materials

CMS Updates and Supporting Materials

CMS regularly releases updates and supporting materials for the OASIS-E Guidance Manual, ensuring home health agencies stay informed about the latest changes and requirements․ These updates often include revised guidelines, clarification on specific items, and new resources to aid in accurate data collection․ Agencies are encouraged to refer to the official CMS website for the most current versions of the manual and related documents․ Additionally, CMS provides training materials, webinars, and FAQs to help clinicians and coders understand and implement updates effectively․ Staying updated is crucial for maintaining compliance and delivering high-quality patient care;

Tips for Clinicians and Coders

Tips for Clinicians and Coders

Clinicians and coders should thoroughly review the OASIS-E Guidance Manual to ensure accurate data collection and reporting․ Conduct patient assessments systematically, using clear communication to gather precise information․ Coders must adhere to CMS guidelines, cross-referencing codes with clinical documentation to avoid discrepancies․ Utilize the manual’s response-specific instructions for clarity and consistency․ Regularly update knowledge on CMS changes and attend training sessions to stay informed․ Double-check data entry for accuracy before submission․ Collaborate with colleagues to resolve complex cases and consult additional resources when needed․ Leveraging these strategies enhances compliance, reduces errors, and improves overall patient care outcomes․

Future Updates and Enhancements to the OASIS-E Manual

Future Updates and Enhancements to the OASIS-E Manual

The OASIS-E Guidance Manual will undergo periodic updates to align with CMS changes, improving clarity and user experience, with future enhancements planned for better data accuracy and compliance․

Anticipated Changes and Improvements

Anticipated Changes and Improvements

The OASIS-E Guidance Manual is expected to evolve with expanded guidance on new assessment items, enhanced clarity for complex data points, and updated instructions to reflect CMS policy changes․ Future updates will prioritize user feedback, incorporating suggestions from clinicians and coders to improve usability․ Additionally, the manual may include new sections dedicated to emerging care practices and technologies․ CMS plans to introduce more detailed examples and scenario-based guidance to aid in accurate data submission․ Regular revisions will ensure the manual remains aligned with regulatory requirements and industry standards, supporting home health agencies in delivering high-quality patient care and maintaining compliance․

Staying Informed About OASIS-E Developments

Staying Informed About OASIS-E Developments

To stay informed about OASIS-E developments, home health agencies should regularly monitor CMS updates and subscribe to notifications from CMS and OASIS-E resources․ The CMS website provides the latest versions of the OASIS-E Guidance Manual, along with change tables and implementation timelines․ Additionally, resources like OASIS Answers offer detailed guidance and clarifications on new and revised items․ Clinicians and coders are encouraged to participate in CMS-hosted webinars and training sessions to stay current on best practices․ By leveraging these resources, agencies can ensure compliance with the latest requirements and maintain high-quality patient care․ Staying proactive with updates is essential for optimal OASIS-E implementation․

house of scorpion pdf

Nancy Farmer’s The House of the Scorpion explores a dystopian future where cloning and power struggles dominate․ The story follows Matt, a clone of the drug lord El Patrón, as he navigates his identity and humanity in a world where clones are despised․ Set in the fictional land of Opium between the US and Mexico, the novel delves into themes of ethics, power, and what it means to be human․ This award-winning book is a gripping tale of survival, loyalty, and self-discovery, resonating with readers of all ages․

Overview of the Book and Its Significance

The House of the Scorpion by Nancy Farmer is a National Book Award-winning novel that explores a dystopian future where cloning and power dynamics shape society․ Set in the fictional land of Opium, the story follows Matt, a clone of the powerful drug lord El Patrón, as he grapples with his identity and humanity․ This gripping tale delves into themes of ethics, control, and self-discovery, making it a thought-provoking read․ Its unique blend of futuristic elements and moral dilemmas has captivated readers worldwide, earning it a place as an international bestseller and a staple in young adult literature․ The book’s significance lies in its ability to spark critical thinking about what it means to be human․

Plot Summary

The House of the Scorpion follows Matt, a clone of the powerful drug lord El Patrón, as he uncovers the truth about his existence in the oppressive land of Opium․ Matt’s journey explores themes of identity, humanity, and survival in a world dominated by corruption and control․ The story unfolds with Matt’s escape from oppression, his quest for acceptance, and the moral dilemmas surrounding his existence as a clone․ Set in a dystopian future, the novel captures the struggles of a boy caught between power and humanity, raising questions about ethics and what it means to be alive․

The Futuristic Setting of Opium

Opium, a vast and isolated land between the United States and Mexico, serves as the backdrop for The House of the Scorpion․ This dystopian society is ruled by powerful drug lords like El Patrón, who maintain control through advanced technology and ruthless tactics․ The setting is marked by stark contrasts: opulent estates for the elite and squalid conditions for the oppressed․ Clones and “eejits” (mindless, brain-chipped laborers) are central to the economy, while the ruling class exploits fear and power to maintain dominance․ The futuristic yet morally decaying world of Opium creates a chilling atmosphere, exploring themes of exploitation, identity, and humanity in a land governed by greed and corruption․

Matt’s Journey as a Clone of El Patrón

Matt, a clone of the formidable drug lord El Patrón, embarks on a journey of self-discovery and survival in the oppressive land of Opium․ Despite his unique status as a clone, Matt faces rejection and prejudice, yet he is afforded privileges due to his connection to El Patrón․ His existence is marked by both luxury and isolation, as he grapples with the moral complexities of his creation․ Through his experiences, Matt evolves from a naive child to a resilient individual determined to forge his own path․ His journey challenges the boundaries of identity, humanity, and acceptance, making him a compelling protagonist in this dystopian tale․

Themes Explored in the Novel

The novel examines cloning ethics, power dynamics, and identity, questioning what defines humanity in a world where clones are marginalized and controlled by the elite․

The Ethics of Cloning and Humanity

The House of the Scorpion delves into the moral complexities of cloning, highlighting the dehumanization of clones in a society where they are treated as property․ Matt’s journey challenges the notion that clones lack humanity, emphasizing their capacity for emotions, growth, and individuality․ The novel critiques the exploitation of clones for power and profit, raising questions about identity and rights․ Farmer’s portrayal of Matt’s struggles humanizes clones, urging readers to reflect on ethical boundaries and the consequences of scientific advancements without moral oversight․ This theme is central to the novel’s exploration of what it means to be human․

Power Dynamics and Control

In The House of the Scorpion, power dynamics are central to the story, with El Patrón ruling Opium through fear, manipulation, and control․ The novel portrays a hierarchical society where authority is maintained by oppression and exploitation․ Matt, as a clone, is initially stripped of agency, highlighting the vulnerability of those at the bottom of the power structure․ Themes of dominance and resistance are explored through characters like El Patrón, who wield absolute power, and those who challenge it; The novel examines how control shapes identities and relationships, emphasizing the struggle for autonomy in a world where power is often abused․ Farmer critiques systems of oppression, urging readers to reflect on justice and equality․

Key Characters

Central figures include Matt, a clone of the powerful drug lord El Patrón, and other influential characters shaping Matt’s journey and identity in Opium․

El Patrón and His Impact on Matt

El Patrón, the powerful drug lord of Opium, is Matt’s genetic original and a central figure in his life․ Despite Matt being a clone, El Patrón treats him with a mix of affection and manipulation, creating a complex dynamic․ Matt struggles with his identity, questioning his humanity and purpose, as he grapples with the reality of being a clone․ El Patrón’s influence shapes Matt’s understanding of himself and his place in the world, leading to internal conflicts and moral dilemmas․ Their relationship is a key driver of the story, exploring themes of power, control, and what it means to be human․

PDF Availability and Download Options

The House of the Scorpion is widely available as a PDF․ Platforms like Open Library and Internet Archive offer free downloads․ Additional resources include comprehension questions for each chapter, enhancing educational value․

Platforms Like Open Library and Internet Archive

Open Library and Internet Archive are reliable platforms for accessing The House of the Scorpion in PDF format․ Open Library offers a vast collection of over 1 million eBooks, including Farmer’s novel․ Internet Archive provides free downloads, making it accessible to a global audience․ Both platforms ensure easy and legal access to the book, supporting educational and personal reading needs․ Additionally, these platforms often include supplementary materials like comprehension questions, enhancing the reading experience for students and educators alike․ Their user-friendly interfaces make it simple to search, download, and enjoy The House of the Scorpion in PDF form․

Educational Resources

The House of the Scorpion PDF includes comprehension questions for each chapter, helping students engage deeply with the plot and themes․ Lesson plans and guides are available for educators to facilitate discussions and analyses, making the novel a valuable tool for classroom learning and literary exploration․

Comprehension Questions for Each Chapter

The House of the Scorpion PDF includes a dedicated section of comprehension questions for each chapter, designed to deepen understanding of the plot, characters, and themes․ These questions encourage critical thinking about Matt’s journey, the ethical dilemmas of cloning, and the power dynamics in Opium․ They also explore the moral complexities faced by key characters like El Patrón and Dr; Celia․ The questions are structured to prompt discussions about identity, humanity, and societal implications, making them an invaluable resource for students and educators․ The PDF file, titled house_of_the_scorpion_comprehension_questions․pdf, is available for download, offering a comprehensive tool for literary analysis and reflection․

Lesson Plans and Teaching Guides

Teaching guides for The House of the Scorpion are widely available, offering educators structured lesson plans to explore the novel’s themes and complex characters․ These resources include activities, discussion prompts, and analysis frameworks that align with curriculum standards․ The PDF guides focus on themes like cloning ethics, power dynamics, and identity, providing educators with tools to engage students in meaningful discussions․ Platforms like Open Library and Internet Archive offer downloadable lesson plans, while Simon Pulse Guides provide additional support for reading groups․ These materials help teachers facilitate a deeper understanding of the novel’s societal implications and literary significance, making it easier to integrate into classroom curricula․

Author Background

Nancy Farmer is an award-winning author known for her thought-provoking novels; Her background in science influences her writing, blending futuristic concepts with ethical dilemmas, as seen in The House of the Scorpion․

Nancy Farmer’s Vision and Writing Style

Nancy Farmer’s vision in The House of the Scorpion blends futuristic dystopia with ethical inquiry, creating a compelling narrative that explores identity and morality․ Her writing style is both accessible and profound, capturing the complexity of Matt’s journey as a clone․ Farmer’s background in science influences her meticulous world-building, crafting a vivid setting in Opium that feels eerily plausible․ Her ability to weave intricate themes, such as humanity and power, into a gripping storyline has earned her critical acclaim․ Farmer’s work resonates with readers, challenging them to reflect on societal norms and the consequences of technological advancements․

Reviews and Reception

The House of the Scorpion has received widespread critical acclaim for its thought-provoking narrative and deep exploration of ethical dilemmas․ Readers praise its engaging storyline and complex characters, while critics highlight its originality and emotional depth․ The novel has won numerous awards, solidifying its place as a modern classic in young adult literature․

Critical Acclaim and Reader Feedback

The House of the Scorpion has garnered significant critical acclaim for its bold narrative and ethical depth․ Critics praise its originality and thought-provoking themes, while readers appreciate its emotional resonance․ The novel, a National Book Award winner, is celebrated for its vivid world-building and complex characters․ Many reviewers highlight its ability to spark important conversations about humanity, power, and identity․ Fans of dystopian fiction particularly commend its unique take on cloning and societal hierarchies․ Overall, the book has left a lasting impact on both critics and readers, solidifying its reputation as a compelling and unforgettable read․

si joint pain exercises pdf

The sacroiliac (SI) joint connects the sacrum and ilium, playing a crucial role in pelvic stability․ Dysfunction or inflammation in this joint can cause significant pain, often radiating to the lower back or legs, and may be triggered by factors like poor posture, repetitive movements, or pregnancy․ Understanding the causes and symptoms is essential for effective management and rehabilitation․

1․1 Understanding the Sacroiliac Joint and Its Function

The sacroiliac (SI) joint is a critical anatomical structure connecting the sacrum (base of the spine) and the ilium (pelvic bone)․ It plays a vital role in pelvic stability, facilitating weight transfer between the spine and legs․ The joint is supported by strong ligaments and contains a synovial lining, allowing for limited movement․ Its primary functions include absorbing shock, distributing forces during activities like walking, and maintaining pelvic alignment․ Understanding its structure and role is essential for addressing pain and dysfunction, as it directly impacts mobility and overall lower back health․

1․2 Common Causes of SI Joint Pain

Sacroiliac joint pain often arises from inflammation, trauma, or structural issues․ Arthritis, pregnancy-related hormonal changes, and repetitive movements can disrupt the joint’s stability․ Activities like jogging or heavy lifting may exacerbate symptoms, while conditions such as spondyloarthritis can directly affect the SI joint․ Poor posture and prior injuries also contribute to dysfunction, leading to pain and limited mobility․ Understanding these causes is crucial for developing targeted therapies and exercises to alleviate discomfort and restore joint function․

1․3 Symptoms of SI Joint Dysfunction

Symptoms of SI joint dysfunction often include lower back or buttock pain, which may radiate to the groin, thighs, or knees․ Pain typically worsens with activities like sitting, coughing, or twisting․ Patients may experience stiffness, limited mobility, or aching after prolonged inactivity․ The Fortin Finger Test is commonly used to identify SI joint pain, where pressure applied to specific areas can reproduce discomfort․ These symptoms can significantly impact daily activities, making diagnosis and appropriate exercises essential for effective pain management and restoring joint function․

Diagnosis of SI Joint Pain

The Fortin Finger Test and physical assessments are commonly used to diagnose SI joint dysfunction, helping identify pain sources and guide appropriate treatment plans effectively․

2․1 Physical Tests for SI Joint Dysfunction

Physical tests for SI joint dysfunction often include the Fortin Finger Test, where patients point to their pain source․ Palpation and movement assessments help identify inflammation or abnormal joint motion․ Gentle exercises may be used to provoke symptoms, aiding diagnosis․ If exercises cause pain, further evaluation is recommended․ These tests are crucial for confirming SI joint dysfunction and guiding treatment plans effectively․

2․2 Imaging and Clinical Assessments

Imaging techniques like X-rays, MRIs, and CT scans are commonly used to confirm SI joint dysfunction․ These tools help identify inflammation, fractures, or degenerative changes․ Clinical assessments, including the Fortin Finger Test, are reliable indicators of SI joint pain․ By combining imaging with physical exams, healthcare providers can accurately diagnose the source of pain and rule out other conditions․ These assessments are crucial for developing targeted treatment plans tailored to the patient’s specific needs․

Exercise Program for SI Joint Pain Relief

A comprehensive exercise program for SI joint pain relief includes gentle stretches, strengthening exercises, and low-impact aerobics․ These exercises improve joint mobility, reduce stiffness, and enhance pelvic stability, promoting long-term pain management and functional recovery․

3․1 Gentle Stretching Exercises for the Sacroiliac Joint

Gentle stretching exercises are essential for alleviating sacroiliac joint pain by improving flexibility and reducing stiffness․ Exercises like the single knee-to-chest stretch and cat-cow stretches target the SI joint, promoting relaxation and mobility․ These stretches should be performed in a pain-free range, avoiding discomfort․ Start with 10-15 repetitions and gradually increase as comfort allows․ It’s important to focus on controlled movements and breathe deeply to enhance the stretching effect․ Always stop if pain exceeds 4/10 on the pain scale․ Consulting a physical therapist can help tailor exercises to individual needs․

3․2 Strengthening Exercises for Pelvic Stability

Strengthening exercises are crucial for improving pelvic stability and reducing SI joint pain․ Exercises like bridging, pelvic tilts, and bird-dog exercises target core muscles, enhancing support for the sacroiliac joint․ Bridging strengthens the glutes and hamstrings, while pelvic tilts improve lumbar-pelvic coordination․ Bird-dog exercises promote balance and stability․ Perform these exercises with controlled movements, starting with 10-15 repetitions and gradually increasing․ Avoid any movement that causes pain․ Strengthening the surrounding muscles helps stabilize the SI joint, reducing dysfunction and discomfort․ Consistency is key for long-term relief and improved pelvic alignment․

3․3 Low-Impact Aerobic Exercises for Pain Management

Low-impact aerobic exercises, such as swimming, cycling, or brisk walking, are excellent for managing SI joint pain․ These activities promote cardiovascular health without putting excessive strain on the sacroiliac joint․ Swimming is particularly beneficial as it minimizes joint stress while improving mobility․ Cycling on a stationary bike or using a recumbent bike is another gentle option․ Walking, especially on flat surfaces, can also help maintain fitness and reduce stiffness․ Start with short sessions and gradually increase duration and intensity․ Always monitor pain levels and avoid movements that exacerbate discomfort․ Consistency in these exercises can improve overall joint stability and pain management․

Treatment Options for SI Joint Pain

Treatment options for SI joint pain include physical therapy, massage, and joint mobilization․ Surgery may be considered for chronic cases․ Pain management plans are personalized․

4․1 Non-Surgical Approaches to Pain Relief

Non-surgical treatments for SI joint pain often include physical therapy, focusing on exercises to improve flexibility and strength․ Massage therapy can reduce muscle tension around the joint․ Chiropractic care, such as spinal manipulation, may alleviate discomfort․ Braces or supports can provide stability, while activity modification helps avoid aggravating movements․ Pain relief options like ice or heat therapy are commonly recommended․ These approaches aim to restore function and reduce pain without invasive procedures, offering a holistic path to recovery and improved quality of life for individuals with SI joint dysfunction․

4․2 Surgical Interventions for Chronic Pain

Surgical options for chronic SI joint pain include minimally invasive procedures like arthrodesis, using systems such as the SImmetry SI Joint Fusion․ These surgeries aim to stabilize the joint by fusing the sacrum and ilium, eliminating painful movement․ They are typically considered when non-surgical treatments fail to provide relief․ The goal is to reduce pain and improve quality of life for patients with severe, persistent dysfunction․ These interventions are carefully evaluated and recommended based on individual needs and the severity of symptoms․

Preventing SI Joint Pain Through Lifestyle Modifications

Maintaining a healthy weight, improving posture, and avoiding repetitive movements can help prevent SI joint pain․ Ergonomic adjustments and regular activity modifications also support long-term joint health․

5․1 Ergonomic Adjustments and Postural Awareness

Ergonomic adjustments and postural awareness are key to preventing SI joint pain․ Maintaining proper posture reduces strain on the sacroiliac joint, while modifying daily activities minimizes repetitive stress․ Using supportive chairs, ensuring proper lifting techniques, and avoiding prolonged sitting can significantly reduce discomfort․ Regular breaks to stretch and move can also alleviate tension․ By incorporating these practices into daily routines, individuals can promote pelvic stability and reduce the risk of SI joint dysfunction․ Consistent attention to posture and ergonomics fosters long-term joint health and overall well-being․

5․2 Weight Management and Activity Modifications

Maintaining a healthy weight reduces pressure on the SI joint, alleviating pain and strain․ Excess weight can exacerbate discomfort, so incorporating a balanced diet and regular exercise is crucial․ Avoiding high-impact activities like running or heavy lifting can prevent further irritation․ Opting for low-impact exercises, such as swimming or cycling, helps maintain mobility without stressing the joint․ Modifying daily activities to avoid repetitive movements or prolonged sitting can also reduce discomfort; Monitoring weight and adjusting activities based on pain levels supports long-term joint health and overall well-being․

Resources for Further Reading

Download the Fortin Finger Test poster and explore PDF guides like “Sacroiliac Pain: Exercises” for detailed stretches and strengthening routines․ Visit reputable sources for comprehensive SI joint resources․

6․1 Recommended PDF Guides and Worksheets

Download the Fortin Finger Test poster for diagnosing SI joint pain․ Explore PDF guides like “Sacroiliac Pain: Exercises” for detailed routines․ These resources offer stretches, strengthening exercises, and bed exercises to maintain muscle strength during recovery․ Worksheets provide step-by-step instructions for exercises like the single knee-to-chest stretch and pelvic tilts․ They emphasize pain-free movements and gradual progression․ These guides are ideal for patients seeking structured rehabilitation plans․ Always consult a healthcare professional before starting any new exercise program to ensure safety and effectiveness․

hoover dual power max pet carpet cleaner manual

Welcome to the Hoover Dual Power Max Pet Carpet Cleaner guide. This powerful, versatile cleaning solution is designed for pet owners, offering advanced stain removal and deep cleaning capabilities.

Key Features of the Hoover Dual Power Max Pet Carpet Cleaner

The Hoover Dual Power Max Pet Carpet Cleaner boasts dual power modes for tailored cleaning, from gentle touch-ups to deep stains. Its advanced pet stain removal technology tackles tough messes effectively. Lightweight and ergonomic, it offers easy maneuverability. The large dirty water tank capacity reduces frequent emptying. Additional tools, like the pet upholstery tool, enhance versatility. Built-in LED lights illuminate hidden dirt, ensuring thorough cleaning. Safe for various carpet types, it maintains fiber integrity while delivering professional-grade results, making it a must-have for pet owners seeking reliable and efficient cleaning solutions.

Importance of Reading the Manual Before Use

Reading the manual is essential for understanding the Hoover Dual Power Max Pet Carpet Cleaner’s operation, safety, and maintenance. It provides detailed guidance on proper use, troubleshooting, and care. The manual ensures safe handling, prevents damage, and helps users achieve optimal cleaning results. It also outlines warranty conditions and maintenance tips to extend the product’s lifespan. By following the manual, users can avoid common mistakes and ensure efficient, effective cleaning while maintaining the cleaner’s performance over time.

Assembly and Initial Setup

Begin by carefully unpacking and identifying all components. Follow the manual’s step-by-step guide to assemble the cleaner securely. Ensure all parts are correctly aligned for safe and effective use.

Unpacking and Identifying Components

Excited to start? Carefully unpack the Hoover Dual Power Max Pet Carpet Cleaner, ensuring all parts are included. Inside, you’ll find the main unit, nozzle, brush roll, clean and dirty water tanks, and additional attachments like the upholstery tool. Take a moment to familiarize yourself with each component and its purpose. Before assembly, inspect for any damage or missing items. Refer to the manual for a detailed diagram and component list. Keep children and pets away during setup to avoid accidental damage or injury. This step ensures a smooth and safe experience.

Step-by-Step Assembly Instructions

Begin by attaching the handle to the main unit using the provided screws. Next, connect the hose securely to the cleaner’s base. Gently insert the brush roll into the nozzle, ensuring it clicks into place. Place the clean water tank on the side and the dirty water tank at the back. Double-check all connections for tightness. Finally, plug in the power cord and ensure the cleaner is placed on a stable, flat surface. Refer to the manual’s diagram for visual guidance, and ensure no parts are damaged during assembly.

Operating the Carpet Cleaner

Start by filling the clean water tank and adding Hoover cleaning solution. Select the desired mode for pet stains or general cleaning. Gently push forward, overlapping strokes for even coverage.

Pre-Cleaning Preparation Tips

Before using the Hoover Dual Power Max Pet Carpet Cleaner, ensure the area is clear of furniture and loose items. Vacuum the carpet thoroughly to remove surface debris. For tough stains, pre-treat with a pet stain remover. Use the crevice tool to clean hard-to-reach areas, such as stairs or upholstery. Always check the cleaning code on upholstered surfaces to avoid damage. Avoid using the cleaner as a dry vacuum. Keep children and pets away until the carpet is completely dry for safety and best results.

Using the Dual Power Mode for Pet Stains

The Hoover Dual Power Max Pet Carpet Cleaner features a Dual Power Mode designed to tackle tough pet stains effectively. For best results, pre-treat stains with a Hoover-approved cleaning solution. Use the Pet Stain Mode for deep cleaning, allowing the machine to apply additional cleaning fluid and suction power. For lighter stains, switch to the Standard Mode. Always follow the manual’s guidelines for solution usage and mode selection to ensure optimal cleaning and carpet protection. This dual functionality ensures thorough stain removal while maintaining carpet integrity.

Maintenance and Cleaning

Regular maintenance ensures optimal performance of your Hoover Dual Power Max Pet Carpet Cleaner. Clean the brush roll and nozzle after each use, and empty the dirty water tank promptly. Follow the manual’s instructions for rinsing and drying components to prevent mold and odors. Proper upkeep extends the life of your cleaner and keeps your carpets fresh and clean. Always refer to the manual for detailed maintenance steps.

Cleaning the Brush Roll and Nozzle

To maintain optimal performance, regularly clean the brush roll and nozzle of your Hoover Dual Power Max Pet Carpet Cleaner. Start by unplugging the device for safety. Remove the nozzle cover and brush roll, typically held in place by screws or clips. Use a soft brush or cloth to wipe away hair and debris. For stubborn dirt, rinse the brush roll with warm water, then allow it to air dry completely before reattaching. Clean the nozzle by removing any blockages and wiping it with a damp cloth. Regular cleaning prevents clogs and ensures efficient cleaning results.

Emptying and Rinsing the Dirty Water Tank

To empty and rinse the dirty water tank on your Hoover Dual Power Max Pet Carpet Cleaner, first ensure the machine is unplugged. Wear gloves for protection. Remove the tank and carefully pour the contents into a sink or drain. Rinse the tank thoroughly with clean water to eliminate any residue. Allow it to air dry before reattaching. Regularly cleaning the tank prevents mold and odors, ensuring fresh cleaning results. Always check for debris and clean the tank after each use for optimal performance.

Safety Precautions

Keep children and pets away from wet carpets. Do not store the cleaner with solution in tanks. Avoid running the cleaner with brushes on unnecessarily.

General Safety Guidelines for Users

Always keep children and pets away from wet carpets until completely dry. Avoid storing the cleaner with solution in the tanks. Unplug the device before servicing. Never use the carpet cleaner as a dry vacuum. Ensure the area is well-ventilated during use. Avoid overexposure to cleaning solutions. Follow recommended usage guidelines for attachments and cleaning fluids. Regularly inspect cords and hoses for damage. Store the cleaner in a dry, cool place. Refer to the manual for additional safety precautions and warranty information.

Storing the Cleaner and Accessories

Store the Hoover Dual Power Max Pet Carpet Cleaner in a dry, cool place, away from direct sunlight. Ensure all components, including hoses and brushes, are completely dry before storage. Keep the dirty water tank empty and clean. Store accessories like upholstery tools and crevice tools in the provided storage bag. Regularly inspect cords and hoses for damage before storing. Maintain the cleaner upright to prevent leakage. Always refer to the manual for specific storage recommendations to prolong the product’s lifespan and maintain its efficiency.

Troubleshooting Common Issues

Common issues include reduced suction power, clogged brushes, or blockages in hoses. Regular maintenance and checking for obstructions can often resolve these problems effectively.

Resolving Suction Power Problems

If your Hoover Dual Power Max Pet Carpet Cleaner experiences low suction, first check for blockages in the hose or nozzle. Ensure the dirty water tank is empty and the filters are clean. A clogged pre-filter or hair wrapped around the brush roll can also reduce suction. Regularly maintaining these parts and ensuring proper assembly can help restore optimal performance. Refer to the manual for detailed steps to address suction issues effectively.

Fixing Clogged Brushes or Tubes

To fix clogged brushes or tubes on your Hoover Dual Power Max Pet Carpet Cleaner, turn off and unplug the device. Remove the brush roll cover and gently pull out any hair or debris. Use a soft brush or tool to clear blockages in the tubes. Regularly cleaning these areas prevents clogs and maintains efficiency. Always refer to the manual for specific instructions to ensure proper maintenance and avoid damage to the cleaner.

Where to Find the Hoover Dual Power Max Pet Carpet Cleaner Manual

Visit the official Hoover website or authorized retailers for the manual. It’s available as a free PDF download under the product support section.

Downloading the Manual from Official Sources

To download the Hoover Dual Power Max Pet Carpet Cleaner manual, visit the official Hoover website or authorized retailer sites. Navigate to the support or product section, enter your model number (e.g., FH51000 or FH51001), and select the manual. Ensure the source is trustworthy to avoid unauthorized downloads. The manual is typically available in PDF format, allowing easy access to instructions, safety guidelines, and troubleshooting tips. Always verify the manual matches your specific model for accurate information.

Additional Resources for Maintenance and Repair

For comprehensive maintenance and repair guidance, explore official Hoover resources, such as their website or customer support. Authorized dealers often provide repair manuals and troubleshooting guides. Additionally, online forums and communities dedicated to Hoover products can offer practical advice from experienced users. These resources cover topics like brush roll cleaning, tank maintenance, and resolving common issues, ensuring your cleaner operates efficiently for years to come.

pro t721 thermostat manual

The Pro T721 Thermostat by Pro1 Technologies is a non-programmable, simple, and affordable solution for temperature control. Designed for reliability, it offers professional-grade performance and ease of use, making it ideal for homeowners and professionals alike. The thermostat comes with a 5-year limited warranty and is compatible with gas, oil, and heat pump systems. Its intuitive design and essential features, such as a low battery indicator, ensure seamless operation and energy efficiency. Perfect for installations requiring straightforward temperature management without advanced programming needs.

1.1 Overview of the Pro T721 Thermostat

The Pro T721 Thermostat is a non-programmable, cost-effective solution designed for simplicity and efficiency. It is compatible with gas, oil, and heat pump systems, offering reliable performance. With a 5-year limited warranty, it provides long-term durability. The thermostat features a user-friendly interface, easy installation, and a low battery indicator for convenience. Its compact design and straightforward operation make it ideal for homeowners seeking basic temperature control without advanced programming features.

1.2 Key Features and Benefits

The Pro T721 Thermostat offers a non-programmable, simple, and affordable solution for temperature control. It features a 5-year limited warranty, compatibility with gas, oil, and heat pump systems, and easy installation. The thermostat includes a low battery indicator and an easy-access battery door. Designed for straightforward operation, it ensures reliable performance and energy efficiency. Its compact design and user-friendly interface make it ideal for basic heating and cooling needs.

Installation of the Pro T721 Thermostat

The Pro T721 Thermostat should be installed 4-5 feet above the floor in an area with average temperature and good air circulation for optimal performance.

2.1 Pre-Installation Requirements

Before installing the Pro T721 Thermostat, ensure the location is 4-5 feet above the floor with average temperature and good air circulation. Power must be turned off at the circuit breaker during installation. Install 2 AA alkaline batteries (included) in the thermostat. Select a wall with proper structural support and ensure compatibility with your HVAC system. Have all necessary tools ready for a smooth installation process.

2.2 Step-by-Step Installation Instructions

Turn off power at the circuit breaker. 2. Insert 2 AA alkaline batteries into the thermostat. 3. Remove the old thermostat and mounting hardware. 4. Mount the new thermostat base, ensuring level placement. 5. Connect wires to the appropriate terminals (refer to manual for wiring guide). 6. Restore power and set the mode (HEAT, COOL, or OFF). 7. Test operation to ensure proper function.

Operating the Pro T721 Thermostat

Use the +/- keys to adjust the temperature. Select HEAT, COOL, or OFF mode. The thermostat displays current settings and low battery alerts. Refer to the manual for advanced features and customization options.

3.1 Basic Operations and Controls

Operating the Pro T721 Thermostat is straightforward. Use the +/- keys to adjust the desired temperature. Select between HEAT, COOL, or OFF modes using the mode button. The thermostat displays the current temperature and mode. A low battery indicator alerts when replacement is needed. Basic controls are intuitive, ensuring easy operation for users of all skill levels. Refer to the manual for detailed guidance.

3.2 Advanced Features and Settings

The Pro T721 Thermostat offers advanced settings for customized comfort. Users can set temperature limits and system preferences to optimize performance. The thermostat supports integration with HVAC systems, ensuring compatibility and efficient operation. Advanced features include energy-saving modes and smart operation capabilities. Refer to the manual for detailed instructions on configuring these settings to maximize comfort and energy efficiency in your home.

Troubleshooting the Pro T721 Thermostat

Common issues include low battery indicators and HVAC system compatibility problems. Resetting the thermostat often resolves these issues. Refer to the manual for detailed troubleshooting steps and solutions.

4.1 Common Issues and Solutions

Common issues with the Pro T721 Thermostat include low battery indicators, display malfunctions, and HVAC system incompatibility. Solutions involve checking battery levels, resetting the thermostat, and ensuring proper installation. If problems persist, refer to the manual or contact customer support for assistance. Regular maintenance and updates can prevent recurring issues.

4.2 Resetting the Thermostat

To reset the Pro T721 Thermostat, remove the batteries, wait 30 seconds, and reinstall them. This process restores default settings and resolves display or operational issues. Resetting is recommended for troubleshooting and ensures proper functionality. Always refer to the manual for detailed instructions to avoid configuration errors and maintain optimal performance. Resetting does not affect saved settings or warranties.

Technical Specifications

The Pro T721 Thermostat is compatible with gas, oil, and heat pump systems, operating on 2 AA alkaline batteries. It should be installed 4-5 feet above the floor in an area with average temperature and good air circulation, ensuring accurate temperature sensing and optimal performance.

5.1 Compatibility and System Requirements

The Pro T721 Thermostat is designed to work seamlessly with various HVAC systems, including gas, oil, and heat pump configurations. It operates on standard 2 AA alkaline batteries, ensuring reliable performance without hardwiring requirements. Compatibility extends to systems with or without emergency heat settings, making it a versatile option for different home configurations. Proper installation at 4-5 feet above the floor in an area with average temperature and good air circulation is recommended for optimal functionality and accuracy.

5.2 Electrical and Performance Specifications

The Pro T721 Thermostat operates on 2 AA alkaline batteries, eliminating the need for hardwiring. It supports systems with or without emergency heat, ensuring compatibility across various HVAC configurations. Designed for efficient performance, the thermostat maintains precise temperature control and features a low battery indicator for timely replacements. Its reliable operation ensures consistent heating and cooling, making it a durable and energy-efficient solution for home comfort systems.

Safety Information and Precautions

Do not operate the cooling system if outdoor temperatures are below freezing to avoid equipment damage. Ensure proper installation and follow all safety guidelines to prevent hazards.

6.1 Important Safety Warnings

Important Safety Warnings: Do not operate the cooling system if outdoor temperatures are below freezing, as this can cause equipment damage. Ensure proper installation and follow all safety guidelines to avoid hazards. Avoid unauthorized modifications to the thermostat, as this may void the warranty or cause malfunctions. Always register the thermostat within 60 days of installation to maintain warranty validity.

6.2 Equipment Damage Prevention

Prevent equipment damage by avoiding operation in extreme temperatures, such as below freezing for cooling systems. Ensure proper installation and use only compatible HVAC systems. Regular maintenance is essential to prevent malfunctions. Avoid unauthorized modifications, as they may void the warranty. Replace batteries correctly to maintain functionality. Keep the thermostat clean and free from obstructions to ensure accurate temperature readings and optimal performance.

Warranty and Support

The Pro T721 Thermostat comes with a 5-year limited warranty, ensuring protection against manufacturing defects. For support, contact Pro1 Technologies at 888-776-1427 or visit www.pro1iaq.com.

7.1 Warranty Details and Registration

The Pro T721 Thermostat is backed by a 5-year limited warranty, covering defects in materials and workmanship. To activate, register the device within 60 days of installation on Pro1 Technologies’ website. This ensures warranty validity and access to exclusive support services. Prompt registration guarantees comprehensive coverage, safeguarding your investment and promoting hassle-free ownership. Visit www.pro1iaq.com for registration details and support options.

7.2 Customer Support and Resources

Pro1 Technologies offers comprehensive customer support for the Pro T721 Thermostat. Their toll-free hotline (888-776-1427) and website (www.pro1iaq.com) provide easy access to assistance. Operating hours are Monday to Friday, 9AM to 6PM Eastern Time. Additional resources, including downloadable manuals and troubleshooting guides, are available online, ensuring users can resolve issues efficiently and stay informed about product updates and maintenance tips.

Maintenance and Care

Regularly replace the 2 AA Alkaline batteries to ensure optimal performance. Install the thermostat 4-5 feet above the floor in an area with average temperature and good air circulation for accurate readings. Register your device within 60 days of installation to activate the 5-year limited warranty and receive support.

8.1 Routine Maintenance Tips

For optimal performance, replace the 2 AA Alkaline batteries annually or when the low battery indicator appears. Ensure the thermostat is installed 4-5 feet above the floor in an area with average temperature and good air circulation. Clean the device with a soft cloth to prevent dust buildup. Regularly check and update settings to maintain efficiency and comfort. Register your thermostat within 60 days of installation to activate the 5-year warranty and access support resources. Proper maintenance ensures accurate temperature control and extends the product’s lifespan.

8.2 Battery Replacement and Management

Replace the 2 AA Alkaline batteries annually or when the low battery indicator appears. To access the battery compartment, use the finger bevel on the thermostat’s lower side to open the easy access door. Insert the new batteries, ensuring correct polarity for proper function. Properly dispose of the old batteries. Using high-quality batteries ensures reliable performance and maintains accurate temperature control throughout the year.

Advanced Configuration and Customization

The Pro T721 allows customization of temperature settings and integration with HVAC systems for enhanced control; Use the or ⎼ keys to adjust settings for optimal performance and efficiency.

9.1 Customizing Temperature Settings

The Pro T721 allows users to customize temperature settings for optimal comfort. Use the + or ⎼ keys to adjust the desired temperature. Select modes like HEAT, COOL, or OFF to tailor your HVAC system’s operation. The thermostat also supports energy-efficient adjustments, ensuring consistent comfort while managing energy use effectively. Customizable settings enable personalized temperature control, enhancing overall performance and user satisfaction.

9.2 Integrating with HVAC Systems

The Pro T721 Thermostat seamlessly integrates with various HVAC systems, including gas, oil, and heat pump configurations. Its universal design ensures compatibility, allowing smooth operation and efficient temperature control. Proper installation, ideally 4-5 feet above the floor in an area with good air circulation, ensures accurate temperature sensing and optimal system performance. This integration enhances overall HVAC efficiency and user comfort.

The Pro T721 Thermostat offers simplicity, reliability, and efficiency for temperature control. For detailed guidance, download the full manual or visit www.pro1iaq.com for support and resources.

10.1 Summary of Key Points

The Pro T721 Thermostat is a non-programmable, affordable, and professional solution for temperature control. It supports gas, oil, and heat pump systems, with a 5-year warranty. Installation requires placement 4-5 feet above the floor for optimal performance. The thermostat uses 2 AA alkaline batteries and features a low battery indicator. For detailed instructions, refer to the Pro T721 Installation Manual or visit www.pro1iaq.com for additional resources and support, ensuring efficient and easy operation.

10.2 Accessing Full Manual and Support

For comprehensive guidance, the full Pro T721 Thermostat Manual can be downloaded from Pro1 Technologies’ official website at www.pro1iaq.com. Additional support is available through their toll-free number: 888-776-1427, with customer service operating Monday to Friday, 9AM to 6PM Eastern Time. The manual is also available in multiple languages, ensuring accessibility for all users.

el salvador guide

El Salvador, Central America’s smallest country, captivates travelers with stunning landscapes, from volcanic peaks to pristine beaches, blending rich history, vibrant culture, and breathtaking natural beauty.

Overview of El Salvador’s Geography and Culture

El Salvador, the smallest country in Central America, is home to a diverse geography that includes towering volcanoes, lush cloud forests, and a stunning Pacific coastline with golden beaches. Its vibrant culture blends indigenous heritage with colonial influences, creating a unique identity. The capital, San Salvador, reflects this mix of modernity and history, while charming colonial towns and lively festivals showcase the country’s deep traditions. The local cuisine, filled with flavors like pupusas and fresh seafood, adds to the allure. This blend of breathtaking landscapes and vibrant culture makes El Salvador a captivating destination for any traveler.

Why Visit El Salvador? Key Attractions and Highlights

El Salvador offers a mix of adventure, culture, and natural beauty that captivates every traveler. Its stunning beaches and world-class surfing spots, like El Tunco, attract water lovers, while the Ruta de las Flores enchants with charming colonial towns and vibrant markets. The country’s volcanic landscapes, such as Santa Ana Volcano, provide thrilling hiking opportunities, and ancient Mayan ruins like Tazumal reveal its rich history. Add the delicious local cuisine, lively festivals, and warm hospitality, and El Salvador emerges as a hidden gem waiting to be explored, offering unforgettable experiences for every kind of traveler.

Best Places to Visit in El Salvador

El Salvador’s diverse attractions include the vibrant capital, San Salvador, the picturesque Ruta de las Flores, the surf paradise of El Tunco, and the historic city of Santa Ana, each offering unique experiences;

San Salvador: The Vibrant Capital City

San Salvador, the bustling capital of El Salvador, blends modernity with rich history, offering a dynamic cultural experience. Visit iconic landmarks like the Catedral Metropolitana and the National Palace, or explore the lively Mercado Central for local flavors and crafts. The city’s mix of colonial architecture and contemporary vibes creates a unique atmosphere. Stay in a four-star hotel near major attractions, and enjoy activities like swimming, basketball, and baseball. While safety is a concern, tourist areas are generally secure. Immerse yourself in the city’s energy and discover its hidden gems, making San Salvador a memorable start to your El Salvador adventure.

Ruta de las Flores: Charming Colonial Towns

Ruta de las Flores is a picturesque journey through El Salvador’s colonial towns, showcasing vibrant markets, traditional crafts, and stunning natural beauty. Towns like Ataco, Salcoatitán, and Nahuizalco captivate visitors with their colorful architecture and rich cultural heritage. Explore cobblestone streets, visit local artisans, and immerse yourself in the region’s unique charm. The route is a must-visit for those who appreciate history, art, and nature, offering a glimpse into El Salvador’s authentic rural life and the warmth of its people.

El Tunco and the Pacific Coast: Surfing and Beaches

El Tunco, a vibrant coastal town, is a hotspot for surfers and beach lovers alike. Its world-class waves cater to both experienced surfers and beginners. The Pacific Coast of El Salvador boasts stunning beaches with crystal-clear waters, perfect for relaxation and sunbathing. Beyond surfing, visitors can explore nearby waterfalls, hike through lush forests, or simply enjoy the breathtaking sunsets. The laid-back atmosphere and warm locals make El Tunco a must-visit destination for those seeking adventure, tranquility, and a taste of coastal Salvadoran life.

Santa Ana: A City Rich in History and Natural Beauty

Santa Ana, a city steeped in history and natural allure, offers visitors a captivating blend of culture and scenic beauty. Its historic center features the stunning Santa Ana Cathedral and the impressive Teatro de Santa Ana, showcasing its rich colonial heritage. Nearby, the picturesque Lake Coatepeque provides breathtaking views and opportunities for boating. The city is also a gateway to the surrounding volcanic landscapes, including the iconic Santa Ana Volcano. With its vibrant markets, traditional cuisine, and welcoming atmosphere, Santa Ana is a must-visit destination for those seeking both cultural immersion and natural splendor.

Top Activities and Experiences

Discover El Salvador’s vibrant culture and landscapes through hiking volcanoes, surfing world-class waves, and exploring ancient Mayan ruins, offering unforgettable adventures for every kind of traveler.

Hiking and Exploring Volcanoes

El Salvador’s rugged landscape offers thrilling opportunities for hiking and volcano exploration. Active volcanoes like Santa Ana and Izalco provide breathtaking views and unique adventures. Trek through lush cloud forests, discover hidden waterfalls, and marvel at the stunning natural beauty surrounding these volcanic peaks. With guided tours available, visitors can safely explore these geological wonders, learning about their history and ecological significance. The challenging trails reward hikers with panoramic vistas, making it a must-do experience for nature enthusiasts and adventure seekers in this Central American gem.

Surfing: World-Class Waves for All Levels

El Salvador’s Pacific Coast is a surfer’s paradise, offering world-class waves for all skill levels. From the consistent swells at El Tunco to the powerful breaks at Punta Roca, the coastline provides endless opportunities to catch epic waves. Beginners can enjoy gentle waves at beaches like El Zonte, while experienced surfers can tackle the challenging waves at spots like Sunzal. Surf schools and rentals are readily available, making it easy for visitors to dive into the sport. With its laid-back beach towns, stunning sunsets, and affordable accommodations, El Salvador has become a must-visit destination for surf enthusiasts worldwide.

Discovering Ancient Mayan Ruins

El Salvador is home to fascinating ancient Mayan ruins, offering a glimpse into the region’s rich history. Sites like Joya de Cerén, often called the “Pompeii of the Americas,” provide a unique opportunity to explore remarkably preserved structures. Tazumal, another significant site, showcases impressive pyramids and plazas, revealing the advanced engineering and cultural sophistication of the Maya. Visitors can immerse themselves in history by trekking through lush jungles to uncover hidden ruins, many of which are surrounded by stunning natural landscapes, including waterfalls and dense forests. These archaeological treasures are a must-visit for anyone intrigued by ancient civilizations.

Travel Tips and Safety

Plan ahead, stay informed, and use reliable transportation. Exercise caution in crowded areas and avoid traveling at night. Respect local customs and enjoy a safe journey.

Getting Around: Transportation Options

El Salvador offers various transportation options for travelers. Private transfers and shuttles are convenient for airport arrivals and inter-city trips. Public buses are affordable but often crowded. Renting a car provides flexibility, though driving conditions may vary. Shared colectivos are budget-friendly for shorter distances. Taxis are widely available, but using reputable companies is recommended. For ease, consider booking transportation in advance. Always opt for licensed services and avoid hitchhiking. Sticking to major highways ensures smoother journeys. Plan your transportation in advance to make the most of your El Salvador adventure.

Staying Safe: Essential Precautions for Travelers

Exercise caution when traveling in El Salvador. Stick to major highways and avoid driving at night. Use licensed taxis or ride-sharing apps for safety. Avoid displaying valuables and keep belongings secure in crowded areas. Stay informed about local conditions and follow government advisories. While El Salvador has made strides in improving security, petty theft and scams can occur. Travelers should remain vigilant, especially in bustling cities like San Salvador. By taking these precautions, you can enjoy a safe and memorable trip to El Salvador.

Cultural Experiences

El Salvador’s vibrant culture blends colonial heritage, indigenous traditions, and modern influences. Experience lively festivals, savor local cuisine, and engage with welcoming locals to truly immerse yourself.

Local Cuisine: Must-Try Dishes and Drinks

El Salvador’s cuisine is a flavorful blend of indigenous, Spanish, and African influences. Must-try dishes include pupusas (stuffed cornmeal flatbreads), tamales, and empanadas. Fresh seafood, grilled meats, and vibrant salads are also popular; Don’t miss horchata (a sweet milky drink) and fresh coconut water. Local markets and family gatherings showcase the country’s culinary heart. Indulge in these authentic flavors to experience Salvadoran culture firsthand.

Festivals and Traditions: Immersing in Salvadoran Culture

El Salvador’s vibrant culture comes alive through its festivals and traditions. The Fiestas Agostinas in San Salvador and the Semana Santa (Holy Week) celebrations are iconic, showcasing colorful parades and religious processions. Traditional dances, such as the Danza de los Voladores, highlight indigenous heritage. Festivals often feature live music, local crafts, and delicious food. Family gatherings and markets buzz with energy, offering a glimpse into Salvadoran hospitality. Immersing yourself in these traditions provides a deeper connection to the country’s rich cultural identity and warm, welcoming people.

El Salvador, a Central American gem, captivates with stunning landscapes, rich history, and vibrant culture, making it a must-visit destination for travelers seeking unique experiences and natural beauty.

Final Thoughts: Why El Salvador Should Be on Your Bucket List

El Salvador is a hidden gem offering a mix of stunning beaches, vibrant culture, and breathtaking landscapes. From surfing world-class waves to hiking volcanoes, it provides unforgettable experiences. The country’s warm hospitality, rich history, and diverse ecosystems make it a must-visit destination. Whether you’re exploring colonial towns or relaxing on Pacific coast beaches, El Salvador’s unique charm captivates every traveler. Its affordability, accessibility, and untapped beauty make it an ideal choice for adventurers seeking an off-the-beaten-path experience in Central America.

waffle maker instructions

Preheating the Waffle Maker

Plug in the waffle maker and set the desired temperature. Allow it to preheat for 3-5 minutes until the indicator light shows it’s ready for use.

Step 1: Plug in the Waffle Maker

Locate the power cord of your waffle maker and plug it into a nearby electrical outlet. Ensure the outlet is safe and not overloaded with other appliances. Once plugged in, switch on the waffle maker using the power button or switch, typically found on the front or side of the device. Some models may have an indicator light that illuminates when the waffle maker is powered on. Allow the unit to begin heating up—this is the first step in preparing it for cooking. Always keep children away from the waffle maker while it is plugged in and in use. If unsure about any part of this process, consult the user manual for specific instructions. Once plugged in, the waffle maker is ready to start preheating for the next step.

Step 2: Set the Temperature

Once the waffle maker is plugged in, adjust the temperature setting according to your preference. Most waffle makers have a dial or button that allows you to choose the desired heat level. For standard waffles, a medium-high heat setting is usually recommended. If your waffle maker has specific temperature guidelines, refer to the user manual for the ideal setting. Ensure the temperature is set before allowing the waffle maker to preheat. Some models may have an indicator light that signals when the desired temperature is reached. Proper temperature setting is crucial for achieving the perfect texture and browning of your waffles. Always use the temperature control as instructed to avoid overheating or underheating the plates.

Step 3: Allow the Waffle Maker to Preheat

After setting the temperature, let the waffle maker preheat for 3-5 minutes. Most models have an indicator light that turns off or changes color when ready. During preheating, the plates will heat evenly, ensuring a consistent cooking surface. Do not rush this step, as proper preheating is essential for achieving crispy waffles. If your waffle maker doesn’t have an indicator, you can test readiness by flicking a few drops of water onto the plates; they should sizzle and evaporate quickly. Once preheated, the waffle maker is ready for batter. Always ensure the plates are hot before pouring in the batter to prevent sticking and promote even cooking.

Preparing the Batter

Mix dry ingredients like flour, sugar, and baking powder in a bowl. In a separate bowl, combine wet ingredients such as milk, eggs, and oil. Stir until smooth.

Step 1: Mix Dry Ingredients

In a large bowl, combine 1 3/4 cups of flour, 2 tablespoons of sugar, 1 tablespoon of baking powder, and a pinch of salt. Sift the ingredients to ensure they are well incorporated and free of lumps. This step is crucial for achieving a smooth batter and even cooking. Use a whisk to mix thoroughly, ensuring the dry ingredients are evenly distributed. Avoid overmixing, as this can create a dense texture. Once combined, set the bowl aside for the next step. Properly mixing the dry ingredients lays the foundation for light and fluffy waffles.

Step 2: Combine Wet Ingredients

In a separate bowl, whisk together 1 3/4 cups of milk, 2 eggs, and 1/2 cup of oil or melted butter. Add a teaspoon of vanilla extract for flavor. Beat the eggs lightly before mixing to ensure a smooth consistency. Gradually pour in the milk while whisking to prevent lumps. Continue until all wet ingredients are fully incorporated. This mixture adds moisture and richness to the batter. Once smooth, set aside to prepare for combining with dry ingredients. Properly blending the wet ingredients ensures the batter will be even and the waffles will cook uniformly. Avoid over-whisking to maintain a light texture.

Step 3: Stir Wet and Dry Ingredients Together

Gently pour the wet ingredients into the dry ingredients bowl. Use a spatula to stir until just combined, being careful not to overmix. A few lumps are okay; overmixing can make the waffles tough. Ensure all flour is incorporated without creating a dense batter. Stop stirring once the ingredients are evenly mixed. This step is crucial for maintaining the waffles’ light and fluffy texture. Avoid using electric mixers to prevent overworking the batter. Let the batter rest for a minute to allow the flour to absorb the liquid fully before cooking. Proper mixing ensures even cooking and a delicious result.

Cooking the Waffles

Pour batter onto the preheated waffle maker, spreading evenly. Close the lid and cook until golden brown. Adjust cooking time as needed for desired crispiness.

Step 1: Grease the Waffle Plates

Lightly grease the waffle plates with cooking spray or a small amount of oil to prevent batter from sticking. For non-stick surfaces, this step may be optional but recommended for the first use or if using a new waffle maker. Ensure the grease is evenly applied across both plates to promote even cooking and easy removal of waffles. Avoid excessive oil to prevent a greasy texture on the waffles. If using a seasoned waffle iron, apply a thin, even layer of oil to maintain the seasoning. Greasing the plates properly ensures your waffles will cook evenly and have a crispy exterior without sticking to the maker.

Step 2: Pour the Batter

Pour the prepared batter onto the center of the greased waffle plates, spreading it evenly to cover the surface without overfilling. Use a ladle or pouring spout for control, ensuring the batter reaches all corners but doesn’t overflow. The amount of batter needed depends on the size of your waffle maker, typically about 1/4 to 1/2 cup. Avoid overfilling to prevent batter from spilling during cooking. Pour in a circular or spiral motion for even distribution. Make sure to leave a small border around the edges to allow for expansion during cooking. This ensures the waffles will cook evenly and release easily once done. Proper batter distribution is key for a perfect waffle texture and appearance.

Step 3: Close the Lid and Cook

Once the batter is evenly spread, gently close the waffle maker’s lid, ensuring it is securely shut. Set the timer according to the manufacturer’s instructions, typically 3-5 minutes, depending on the desired crispiness. The waffle maker will indicate when the waffles are ready, often with a light or sound. Do not open the lid too early, as this can cause the waffles to break. When the timer goes off or the indicator shows completion, carefully lift the lid to check if the waffles are golden brown. If they need more cooking time, close the lid for an additional 30 seconds to 1 minute. Repeat until perfectly cooked, then remove and serve hot.

Cooling and Serving

Allow the waffles to cool slightly on a wire rack to maintain crispiness. Serve warm with your favorite toppings, such as syrup, butter, fruit, or whipped cream.

Step 1: Remove the Waffles

Once the waffles are cooked to your desired crispiness, carefully remove them from the waffle maker using a spatula or tongs. Be cautious, as the waffles and plates will be hot. Gently lift the waffles and place them on a wire rack or plate to cool slightly before serving. If using a non-stick waffle maker, the waffles should release easily. For stuck waffles, lightly pry them loose with a spatula. Repeat the process for additional batches, ensuring the waffle maker is properly heated between each use. Always handle hot waffles with care to avoid burns or accidents.

Step 2: Let the Waffles Cool

After removing the waffles from the maker, place them on a clean wire rack or paper towels to cool. Allowing them to cool slightly prevents sogginess and helps retain crispiness. Avoid stacking waffles immediately, as this can trap steam and make them soft. Letting them cool for a few minutes also makes them easier to handle and top without falling apart. If you’re preparing multiple batches, keep the cooled waffles warm in a low-temperature oven until serving. Cooling ensures the waffles stay light and fluffy, enhancing their texture and flavor for the best serving experience.

Step 3: Serve with Toppings

Once the waffles have cooled slightly, it’s time to add your favorite toppings. Classic options include fresh fruits like strawberries or blueberries, whipped cream, maple syrup, or powdered sugar. For a savory twist, try adding cheese, bacon, or a fried egg. Experiment with combinations to find your perfect match. Ensure toppings are evenly distributed to enhance flavor in every bite. Serve immediately to enjoy the waffles at their crispest and freshest. Let everyone customize their own for a personalized breakfast or brunch experience that’s both delicious and memorable.

jello no bake crust mix instructions

Jell-O No-Bake Crust Mix offers a convenient solution for creating dessert bases without baking․ Ideal for cheesecakes and pies‚ it simplifies preparation with pre-measured ingredients․

1․1 Overview of the Product

The Jell-O No-Bake Crust Mix is a convenient‚ pre-measured blend designed for effortless dessert preparation․ Perfect for cheesecakes‚ pies‚ and other treats‚ it eliminates the need for baking․ Simply mix with melted butter‚ press into a pan‚ and let it set in the refrigerator․ This product offers a quick and hassle-free way to create a sturdy‚ flavorful crust‚ ideal for both novice and experienced bakers․ Its no-bake feature makes it a great option for hot days or when oven space is limited․

1․2 Importance of No-Bake Crusts in Desserts

No-bake crusts have become a staple in modern dessert preparation due to their convenience and versatility․ They eliminate the need for baking‚ saving time and effort while ensuring a sturdy base for creamy fillings․ Perfect for cheesecakes‚ pies‚ and trifles‚ no-bake crusts are ideal for hot weather or when oven space is limited․ Their ease of preparation makes them accessible to both novice and experienced bakers‚ while their texture and flavor enhance the overall dessert experience․ This simplicity has made no-bake crusts a favorite in many kitchens․

Ingredients and Tools Needed

Jell-O No-Bake Crust Mix requires just a few ingredients and basic tools; Essential items include the crust mix‚ melted butter‚ a mixing bowl‚ and a spatula․

2․1 List of Required Ingredients

The primary ingredients needed for the Jell-O No-Bake Crust Mix include the crust mix itself‚ melted butter‚ and water․ For enhanced flavor‚ you can add crushed nuts‚ cocoa powder‚ or spices․ Ensure the butter is melted but not overly hot to maintain texture․ Optional additions like vanilla extract or a pinch of salt can elevate the crust’s taste․ Using real butter is recommended for the best flavor and texture․ Avoid using margarine or oil substitutes for optimal results․

2․2 Essential Tools for Preparation

To prepare the Jell-O No-Bake Crust Mix‚ you’ll need a mixing bowl‚ a mixing spoon or spatula‚ and a 9-inch pie pan or springform pan․ A measuring cup is necessary for accurately measuring the melted butter and water․ Additionally‚ a flat-bottomed tool or the back of a spoon is helpful for pressing the crust mixture evenly into the pan․ Ensure you have a refrigerator available for chilling the crust to set properly before adding the filling․ These tools are essential for a smooth and successful preparation process․

Step-by-Step Instructions

Preparing the Jell-O No-Bake Crust Mix is straightforward․ Follow the simple steps to mix‚ shape‚ and set the crust for a perfect dessert base․

3․1 Preparing the Crust Mix

To prepare the Jell-O No-Bake Crust Mix‚ start by emptying the envelope into a mixing bowl․ Add the recommended amount of melted butter‚ typically 1/4 cup‚ and mix until the crust mixture reaches a uniform consistency․ Ensure all crumbs are evenly coated with the butter for a smooth texture․ Avoid overmixing‚ as this can make the crust dense․ Once mixed‚ the crust will resemble wet sand and is ready to be pressed into the pan․ This step is crucial for achieving a firm and even base for your dessert․

3․2 Mixing with Melted Butter

Pour the melted butter into the bowl with the crust mix and stir until the mixture is evenly coated․ Use a fork or spatula to blend thoroughly․ Ensure no dry spots remain․ The butter binds the crust together‚ so precise measurement is key․ Avoid overmixing to prevent a dense texture․ The mixture should resemble damp sand‚ holding its shape when pressed․ This consistency ensures the crust sets properly and provides a sturdy base for fillings․ Proper mixing is essential for a smooth‚ even crust formation․

3․3 Pressing the Crust into the Pan

Transfer the crust mixture to a lightly greased pan․ Using the bottom of a glass or your fingertips‚ press firmly and evenly across the base and up the sides․ Ensure the crust is uniformly thick to prevent cracking․ Start from the center and work outward to eliminate air pockets․ Pressing too hard can create a dense crust‚ so apply steady‚ moderate pressure․ A smooth‚ compact layer is crucial for a professional finish and stability when filled․ Proper pressing ensures the crust holds its shape and sets evenly․

3․4 Refrigeration and Setting Time

Once pressed into the pan‚ refrigerate the crust at 40°F (4°C) for at least 30 minutes to set․ Avoid freezing‚ as it can make the crust too hard․ After setting‚ it’s ready to fill with your dessert mixture․ Chilling allows the butter to firm up‚ ensuring the crust holds its shape․ Letting it set longer‚ up to 2 hours‚ enhances stability․ A properly set crust ensures a clean release when serving‚ making your dessert look professional․ Always refrigerate before adding fillings․

Tips for Achieving the Perfect Crust

To ensure a perfect no-bake crust‚ press firmly into the pan and chill thoroughly․ Avoid overmixing to maintain texture and prevent sogginess for a crisp base․

4․1 Ensuring the Crust Sets Properly

To ensure your Jell-O No-Bake Crust sets properly‚ press the mixture firmly into the pan using the back of a spatula or your fingers․ Avoid applying uneven pressure‚ as this can lead to a crust that’s too thick in some areas and too thin in others․ Refrigerate for at least 30 minutes to allow the crust to set completely․ If using a springform pan‚ make sure the crust reaches the edges and is evenly distributed․ This step is crucial for a stable and even base for your dessert․ Proper setting ensures the crust holds its shape and doesn’t crumble when serving․

4․2 Avoiding Common Mistakes

One common mistake when using Jell-O No-Bake Crust Mix is overmixing the ingredients‚ which can make the crust dense and tough; Another error is using melted butter that’s too hot‚ causing the crust to become greasy․ Ensure the butter is evenly incorporated without overmixing․ Additionally‚ avoid pressing the crust into the pan too aggressively‚ as this can create air pockets․ Lastly‚ don’t skip the refrigeration step‚ as the crust needs time to set properly․ These precautions help achieve a smooth‚ even‚ and sturdy base for your dessert․ Proper technique ensures a professional finish․

Enhancing the Crust Flavor

Elevate your crust’s flavor by incorporating spices‚ citrus zest‚ or crushed nuts․ These additions create a unique and delicious base for various desserts․

5․1 Adding Spices or Zest

Incorporate warmth with cinnamon‚ nutmeg‚ or cardamom for a spicy twist‚ or add citrus zest like lemon or orange for a bright‚ refreshing flavor․ These additions complement the crust’s texture and enhance the overall dessert experience without overpowering it․ Experiment with subtle amounts to find your perfect balance‚ ensuring the crust remains a delightful base for your creations․ This simple step allows for customization‚ making each dessert uniquely tailored to your taste preferences․

5․2 Incorporating Crushed Nuts or Cookies

Add a crunchy texture and extra flavor by mixing crushed nuts like almonds‚ walnuts‚ or pecans into the crust mixture․ Alternatively‚ use crushed cookies such as chocolate sandwich cookies or wafers for a sweeter base․ Simply fold the crushed elements into the crust mix before adding the melted butter for a uniform texture․ This customization enhances the crust’s appeal and provides a delicious contrast to the smooth dessert filling․ Toasting the nuts lightly before crushing can deepen their flavor‚ while cookies add a sweet‚ indulgent twist․ Avoid overmixing to preserve the crunch and texture․ Ensure the crust presses evenly into the pan for a stable base․ Experimenting with different combinations allows you to tailor the crust to your dessert’s theme‚ whether it’s a classic nutty flavor or a playful cookie-inspired crust․ This step offers endless possibilities for creative and personalized desserts․ Always use fresh nuts and cookies for the best flavor and texture․ Properly toasting nuts can enhance their aroma without burning․ This technique ensures your crust stands out and complements the filling perfectly․ It’s a simple yet impactful way to elevate your no-bake desserts․ Always press the mixture firmly into the pan to ensure it holds its shape․ The addition of nuts or cookies makes the crust more robust and visually appealing․ It’s an excellent way to add depth and variety to your desserts․

Using the Crust for Different Desserts

The Jell-O No-Bake Crust Mix is versatile‚ perfect for cheesecakes‚ pies‚ tarts‚ trifles‚ and layered desserts․ Its neutral flavor complements creamy fillings and fruity toppings effortlessly․
It provides a sturdy base for both classic and modern dessert creations‚ making it a go-to choice for any no-bake treat․ The crust’s simplicity allows it to adapt to various flavor profiles‚ ensuring a delicious foundation for your favorite desserts․

6․1 Cheesecakes

The Jell-O No-Bake Crust Mix is a perfect base for cheesecakes‚ offering a quick and easy alternative to traditional graham cracker crusts․ Simply mix the crust with melted butter‚ press it into a pan‚ and chill․ This crust pairs beautifully with creamy cheesecake fillings‚ whether you’re making a classic vanilla‚ strawberry‚ or chocolate variation․ For added texture‚ you can fold crushed cookies or nuts into the filling before pouring it over the crust; This method simplifies dessert preparation while maintaining exceptional flavor and texture․
It’s ideal for both novice bakers and experienced dessert enthusiasts looking to save time without compromising quality․

6․2 Pies and Tarts

Jell-O No-Bake Crust Mix is a versatile base for pies and tarts‚ offering a quick and effortless preparation method․ Perfect for sweet or savory fillings‚ it pairs well with creamy desserts like chocolate or fruit pies․ The crust’s no-bake requirement ensures a sturdy base without oven time‚ making it ideal for layered or chilled desserts․ Its simplicity allows for creative freedom‚ whether you’re crafting a classic tart or an innovative dessert combination․ This mix is a time-saving solution for both simple and elaborate pie creations․
It’s a must-have for any dessert enthusiast․

6․3 Trifles and Layered Desserts

Jell-O No-Bake Crust Mix is an excellent base for trifles and layered desserts‚ offering a crunchy‚ no-fuss foundation․ Its ease of preparation allows you to focus on layering creamy fillings‚ fruits‚ and custards․ The crust adds a delightful texture contrast‚ ensuring a balanced dessert experience․ Perfect for multi-layered creations‚ it provides stability without sogginess․ Customize by adding spices or nuts to the crust for extra flavor‚ making it a versatile choice for both traditional and modern layered desserts․ It’s a perfect fit for any occasion․
Effortless and delicious‚ it enhances any trifle recipe․

Storing the Crust

Store the Jell-O No-Bake Crust in an airtight container․ For short-term storage‚ refrigerate up to 3 days․ For longer storage‚ freeze up to 3 months․ Thaw overnight in the fridge before use․

7․1 Short-Term Storage

For short-term storage‚ place the Jell-O No-Bake Crust in an airtight container and refrigerate at 40°F or below․ It will remain fresh for up to 3 days․ Ensure the container is sealed tightly to prevent moisture or odors from affecting the crust․ If using a pan‚ wrap it securely with plastic wrap or aluminum foil before refrigerating․ This method maintains the crust’s texture and freshness perfectly for immediate use in desserts․

7․2 Freezing for Later Use

To freeze the Jell-O No-Bake Crust‚ press it into a pan lined with parchment paper․ Wrap the pan tightly with plastic wrap or aluminum foil‚ ensuring no air exposure․ Place in a freezer-safe bag for extra protection․ Store in the freezer for up to 3 months․ When ready to use‚ thaw overnight in the refrigerator․ Freezing preserves the crust’s texture‚ making it convenient for future desserts without compromising quality․ This method is ideal for advance meal prep or special occasions․

The Jell-O No-Bake Crust Mix is a versatile and convenient solution for dessert preparation․ Its ease of use and quick setup make it ideal for both novice bakers and experienced chefs․ Whether you’re crafting cheesecakes‚ pies‚ or layered desserts‚ this mix ensures a sturdy and flavorful base․ By following the instructions and tips provided‚ you can achieve professional-quality results without the hassle of baking․ This mix is a must-have for anyone looking to elevate their dessert game effortlessly․