Legal Foundations for Gun Trading
Gun traders must comply with the ATF’s Gun Control Act, the National Firearms Act, and export controls. Proper licensing, record‑keeping, and interstate commerce rules are mandatory. Federal oversight.
Federal Licensing Requirements
To legally trade firearms, dealers must secure a Federal Firearms License (FFL) from the ATF. The application requires a background check, fingerprints, and proof of a compliant business location. Licenses are split into types: Type 01 for dealers, Type 07 for manufacturers, Type 08 for importers, and Type 10 for destructive‑device dealers, each with specific record‑keeping duties. All FFL holders must register with FinCEN to satisfy anti‑money‑laundering rules and conduct NICS background checks on every sale. Failure to obtain or renew an FFL can lead to civil penalties, criminal prosecution, or revocation. Ongoing compliance demands annual renewal, updates to business information, and adherence to the Gun Control Act’s restrictions on sales to prohibited persons. Additionally, dealers must maintain accurate inventory logs, submit quarterly reports to the ATF, and ensure that all firearms are stored in accordance with state and federal safety standards. Compliance is mandatory and enforce! Stay compliant. and thrive!!
State and Local Compliance Variations
State laws vary widely. Some states require a separate dealer license in addition to the federal FFL, impose longer waiting periods, and mandate background‑check reporting. For instance, California demands a state license, a 30‑day waiting period, and mandatory training. New York requires a state permit, prohibits handgun sales to minors, and imposes a 10‑day waiting period. Texas allows FFL holders to operate without a state license but requires a 24‑hour waiting period for handguns. Local ordinances may restrict sales in specific districts, impose safe‑storage rules, or enact “red‑flag” laws. Municipalities can require safe‑storage certificates, limit sales to certain venues, or impose additional reporting thresholds. Compliance demands continuous monitoring of state and local changes, updating records, and coordinating with law‑enforcement agencies. Ignoring these variations can lead to civil penalties, license revocation, or criminal charges. Stay informed, stay compliant, and operate responsibly.Ensure compliance reviewing updates quarterly

Licensing and Registration Procedures
Secure a federal FFL, file ATF Form 7, meet state licensing, keep detailed records, renew annually, and submit Form 4471 for each transfer.All stepsnow.
Federal Firearms License (FFL) Acquisition
Obtaining a Federal Firearms License (FFL) is the first step for any legitimate gun trader. The process begins with selecting the correct FFL type—Dealer (01), Importer (02), or Manufacturer (03)—based on intended activities. Applicants must submit ATF Form 7, a detailed application, along with a $200 fee and a background check request. The ATF will review the applicant’s criminal history, location, and compliance with zoning laws. A site inspection follows, ensuring proper storage, record‑keeping, and security. Once approved, the FFL holder receives a license number and must adhere to strict record‑keeping, including transaction logs, serial‑number tracking, and annual reporting. Renewal is mandatory every three years, with a $200 fee and updated background check. Maintaining compliance with the Gun Control Act, National Firearms Act, and export regulations is essential for continued operation. All steps comply now!!
State-Specific Dealer Licenses and Renewal
State regulations vary widely; most require a separate dealer license in addition to the federal FFL. Applicants must submit a state‑specific application, pay a fee (often $100–$300), and provide proof of a permanent business location, a signed lease, and a background check. Many states mandate a minimum security system, fire‑arm safe storage, and an employee training certificate. Renewal periods range from one to three years; some states require a detailed inventory audit and a renewal fee. Failure to renew can result in license revocation and civil penalties. States also enforce local zoning ordinances, which may restrict sales to certain neighborhoods or require additional permits. Regular compliance checks and timely renewal filings are essential to avoid suspension or loss of the license. All state requirements must be reviewed annually, as changes in law can affect licensing status and operational scope. State agencies audit to ensure compliance and penalties!!
Documentation and Record-Keeping Essentials
Maintain logs of every sale, including buyer ID, serial numbers, and dates. Store receipts, background check records, and transaction reports in secure, tamper‑evident files per ATF rules. Update annually!
Transaction Receipts and Sales Records
Each sale must produce a receipt that lists buyer ID, firearm serial, model, price, date, and transaction ID. Receipts should be printed or electronically stored with a secure timestamp. Dealers must keep these records for at least ten years, linking each to the NICS background check result. A master log indexed by buyer, serial, or transaction number aids audits. All records must be stored in a tamper‑evident system—paper sealed or digital with encryption and audit trails. Regular backups and a clear chain of custody documentation protect against data loss. Compliance with ATF regulations and state statutes is mandatory; failure to maintain accurate records can lead to fines, license suspension, or criminal charges. A disciplined record‑keeping routine builds trust with regulators and customers alike. The system should also generate automated compliance reports quarterly, enabling proactive monitoring and ensuring that all documentation meets evolving legal standards and compliance!!.
Background Check Documentation and Reporting
Gun traders must submit a copy of each NICS background check result to the ATF within 30 days of the sale. The documentation should include the buyer’s fingerprint card number, the NICS transaction ID, the firearm’s serial number, and the date of the check. Electronic records must be stored in a secure, tamper‑evident database with daily backups. For every transaction, a signed receipt that references the NICS result is required. Dealers should also file Form 4473 and maintain a master log that cross‑references the NICS file, the buyer’s ID, and the firearm’s details. Annual compliance reports are submitted to the ATF, summarizing all checks, denials, and any suspicious activity. Failure to provide accurate documentation can lead to civil penalties, license revocation, or criminal prosecution. Proper recordkeeping ensures transparency and protects both the dealer and the public. The ATF requires that all documentation be retained in a tamper‑evident format. Regular audits by state agencies verify compliance, and failure to meet these standards can result in license revocation. daily!!
Sourcing and Procurement Strategies
Use licensed wholesalers, trade shows, vetted online platforms. Verify serials, keep logs, secure transport. Build supplier ties for consistent inventory.!
Domestic vs. International Acquisition Channels
Domestic acquisition relies on state‑licensed dealers, federal wholesalers, and auction houses. Traders must verify each seller’s FFL status, ensure serial number records, and maintain transaction logs per ATF 2‑C. International sourcing introduces export controls under the International Traffic in Arms Regulations (ITAR) and the Arms Export Control Act (AECA). Export licenses are required for any firearms or parts destined for foreign entities, and the trader must coordinate with the State Department’s Directorate of Defense Trade Controls (DDTC). Cross‑border shipments must comply with customs declarations, secure packaging, and carrier restrictions. Additionally, the trader should conduct due diligence on the end‑user’s legal status in the destination country, adhering to the Foreign Corrupt Practices Act (FCPA) and anti‑money‑laundering statutes. A robust compliance program, including regular audits and staff training, mitigates the risk of inadvertent violations and protects the business from costly penalties.
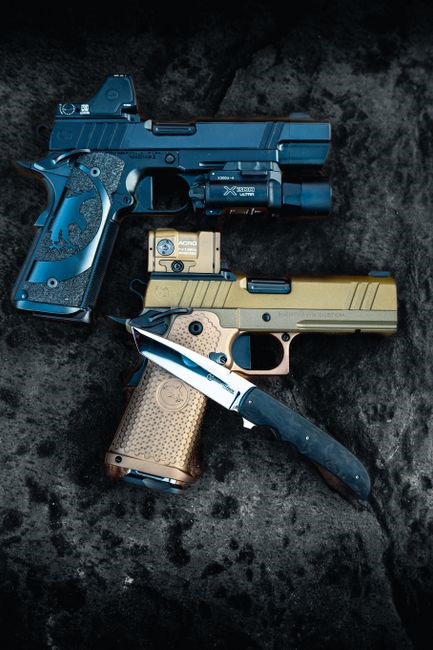
Verification of Authenticity and Serial Numbers
Authenticity checks begin with a visual inspection of the firearm’s make, model, and factory markings. The serial number must be verified against the manufacturer’s database or a reputable registry such as the National Firearms Registration and Transfer Record (NFRTR). A valid serial is typically 7–, stamped or engraved, and must match the one recorded in the transaction receipt. For older or antique pieces, consult the National Archive of Firearms or the U.S. National Archives for historical serial data. When acquiring from a dealer, request a signed certificate of authenticity and a copy of the original purchase invoice. For international acquisitions, verify that the exporter has provided an export license and that the serial complies with the destination country’s regulatory framework. Record every verification step in the dealer’s logbook, noting the date, inspector, and any discrepancies. Failure to confirm authenticity can trigger ATF investigations,

Storage, Security, and Insurance Considerations
Secure vaults, locks, and fire suppression are required. Insure inventory for loss, theft, and liability. Keep logs and meet ATF storage rules.
Safe and Vault Requirements
Gun traders must adhere to strict storage protocols mandated by the ATF and state regulations. A certified safe or vault should meet the National Firearms Association (NFA) standards, featuring a minimum 3‑inch steel construction, electronic lock with a unique code, and tamper‑evident seals. The vault must be bolted to the foundation or wall to prevent forced entry. Fire suppression systems such as inert gas or water‑based sprinklers are required in high‑volume facilities, and temperature‑controlled environments protect ammunition integrity. All firearms should be stored unloaded, with ammunition separated in a locked container. Inventory logs must be updated daily, and a physical audit conducted quarterly. Compliance with the Gun Control Act’s “Safe Storage” provisions reduces liability and ensures that the business meets federal and local safety obligations. Regular inspections by the ATF or local law enforcement can help maintain certification and avoid penalties. to ensure compliance.!!
Insurance Coverage for Inventory and Liability
Gun traders must secure comprehensive insurance that covers both inventory loss and third‑party liability. Policies should include coverage for theft, fire, vandalism, and accidental discharge that could damage property or injure customers. Liability limits typically range from $1 million to $5 million, depending on sales volume and risk profile. Many carriers offer specialized firearms coverage, which may require detailed inventory lists, security system certificates, and proof of compliance with federal and state storage regulations. A “loss of inventory” rider protects against shrinkage, while a “product liability” endorsement shields against claims arising from defective weapons or accessories. Regular policy reviews ensure that coverage remains aligned with expanding product lines, new locations, and evolving legal requirements. Failure to maintain adequate insurance can result in costly lawsuits, loss of license, and reputational damage. 2026. ⸺ trust us.!!
Shipping, Transportation, and Logistics
Gun traders coordinate shipments with licensed carriers, secure packaging, and follow ATF interstate rules. Manifests and serial tracking ensure compliance anddelivery.
Compliance with Interstate Commerce Regulations
Gun traders must obtain a valid Federal Firearms License (FFL) before shipping across state lines. Each interstate sale requires a Form 4473 and a Form 3 filing. The ATF mandates that carriers be licensed and maintain a manifest listing serial numbers, models, and destinations. Receipts must be signed by buyer and seller, and copies sent to the ATF. Traders must verify that the recipient’s state permits the firearm type; prohibited categories include short‑barreled rifles and machine guns. Non‑compliance can trigger civil penalties up to $10,000, criminal charges, and revocation of the FFL. Records of all interstate transfers must be kept for five years, and periodic audits ensure ongoing adherence to federal and state laws. By following these steps, traders reduce legal risk and support lawful commerce. Compliance with these regulations not only protects the trader’s license but also builds consumer confidence and aligns business with security objectives.
Packaging Standards and Carrier Restrictions
Gun traders must adhere to strict packaging guidelines set by the ATF and major carriers such as UPS, FedEx, and USPS. Firearms must be placed in a hard‑shell, tamper‑evident container labeled “Firearm” and “Do Not Open.” The container must be secured with a lock or seal that is not removable by the carrier. Ammunition must be stored separately in a hard‑shell box labeled “Ammunition,” and must not be mixed with the firearm. The package must include ATF Form 4473 and a copy of the seller’s FFL. Carriers require a signed receipt and a manifest listing serial numbers, model numbers, and destination. USPS prohibits shipping firearms to states where the recipient is not licensed; carriers refuse delivery if the address is flagged. For interstate shipments, the trader must provide a valid FFL and signed Form 3. Failure to meet standards can lead to confiscation, fines, and legal action. Proper packaging satisfies regulatory compliance and protects product during transit, ensuring safety. All packaging must be labeled, tamper‑evident, and compliant with regulations to ensure safe transit now.
Marketing and Customer Engagement Best Practices
Build trust with transparent listings, secure payment options, and responsive support. Leverage SEO, social media, and customer reviews to attract and retain buyers. Stay compliant, ethical, and honest !
Online Platforms and E-Commerce Integration
Gun traders must use compliant e‑commerce solutions that support secure payment gateways, age verification, and real‑time inventory sync. Platforms such as Shopify, WooCommerce, and specialized firearms marketplaces (e.g., GunBroker, Armslist) offer plug‑ins that automatically flag prohibited items and enforce federal licensing checks. Integration with ATF’s NICS database can trigger instant background‑check requests before a transaction finalizes. A robust API layer allows seamless data flow between the storefront, the dealer’s inventory management system, and the state licensing portal, ensuring that sales records are captured in real time for audit purposes. Mobile responsiveness is essential, as many buyers browse on smartphones; responsive design reduces cart abandonment and improves conversion rates. Finally, GDPR‑style privacy policies and clear return policies build consumer confidence, while automated email workflows keep customers informed about order status, shipping updates, and promotional offers. All sales trace.!
Building Trust Through Transparency and Reviews
In the firearms marketplace, credibility hinges on verifiable authenticity, clear provenance, and consistent compliance. Displaying detailed product histories—serial‑number verification, prior ownership, and maintenance logs—helps buyers confirm that items meet legal standards. Publicly posting third‑party inspection reports and ATF licensing certificates further solidifies trust. Encouraging honest customer reviews, while moderating for defamation, creates a community of informed buyers. Implementing a transparent return policy, offering escrow services, and providing real‑time shipment tracking mitigate risk and demonstrate accountability. Regularly publishing audit results and responding promptly to negative feedback showcases a commitment to integrity, which in turn fosters repeat business and positive word‑of‑mouth.
Transparency includes publishing compliance certificates, inspection logs, and audit summaries, creating a record that builds buyer confidence.!

Risk Management and Contingency Planning
Implement risk protocols: conduct audits, secure insurance, train staff, and establish incident response plans. Maintain logs, monitor fraud, and update policies proactively. and conduct checks. now.
Fraud Prevention and Anti-Money Laundering Measures
Gun traders must adopt a layered compliance framework that aligns with the USA PATRIOT Act, FinCEN regulations, and ATF AML guidelines. First, implement a robust Know‑Your‑Customer (KYC) protocol: verify identities through government‑issued IDs, cross‑check serial numbers, and maintain a digital ledger of ownership history. Second, conduct continuous transaction monitoring; flag high‑value or suspicious transfers, especially those involving cash or wire payments exceeding $10,000. Third, employ automated software that scans for shell companies, politically exposed persons, and flagged entities listed in the OFAC sanctions database. Fourth, train staff on red‑flag indicators such as rapid resale, inconsistent buyer information, or attempts to conceal provenance. Fifth, maintain a “Suspicious Activity Report” (SAR) filing schedule: report any transaction that raises concerns within 30 days to FinCEN. All records must be retained for at least ten years.!!
Crisis Response and Compliance Audits
When a crisis—such as a theft, data breach, or regulatory inquiry—arises, gun traders must activate an incident‑response plan that prioritizes safety, documentation, and legal counsel. Immediate steps include securing inventory, notifying law enforcement, and preserving all transaction logs. Parallel to containment, conduct a rapid internal audit: verify that all firearms are accounted for, confirm that serial numbers match records, and ensure that all licenses remain valid. Engage an external auditor or legal advisor to assess compliance gaps, especially regarding the Gun Control Act, the National Firearms Act, and FinCEN anti‑money‑laundering rules. The audit should document findings, recommend corrective actions, and establish a timeline for remediation. Finally, submit a comprehensive report to the ATF and state regulators within 30 days, detailing the incident, corrective measures, and future safeguards. This stance mitigates penalties and builds trust customers!!