si joint pain exercises pdf

The sacroiliac (SI) joint connects the sacrum and ilium, playing a crucial role in pelvic stability․ Dysfunction or inflammation in this joint can cause significant pain, often radiating to the lower back or legs, and may be triggered by factors like poor posture, repetitive movements, or pregnancy․ Understanding the causes and symptoms is essential for effective management and rehabilitation․

1․1 Understanding the Sacroiliac Joint and Its Function

The sacroiliac (SI) joint is a critical anatomical structure connecting the sacrum (base of the spine) and the ilium (pelvic bone)․ It plays a vital role in pelvic stability, facilitating weight transfer between the spine and legs․ The joint is supported by strong ligaments and contains a synovial lining, allowing for limited movement․ Its primary functions include absorbing shock, distributing forces during activities like walking, and maintaining pelvic alignment․ Understanding its structure and role is essential for addressing pain and dysfunction, as it directly impacts mobility and overall lower back health․

1․2 Common Causes of SI Joint Pain

Sacroiliac joint pain often arises from inflammation, trauma, or structural issues․ Arthritis, pregnancy-related hormonal changes, and repetitive movements can disrupt the joint’s stability․ Activities like jogging or heavy lifting may exacerbate symptoms, while conditions such as spondyloarthritis can directly affect the SI joint․ Poor posture and prior injuries also contribute to dysfunction, leading to pain and limited mobility․ Understanding these causes is crucial for developing targeted therapies and exercises to alleviate discomfort and restore joint function․

1․3 Symptoms of SI Joint Dysfunction

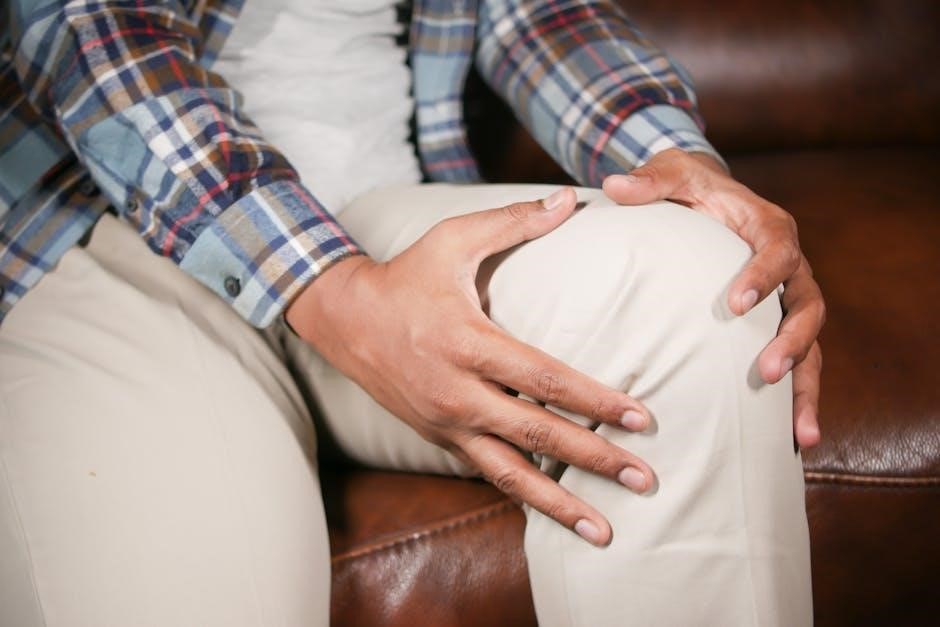
Symptoms of SI joint dysfunction often include lower back or buttock pain, which may radiate to the groin, thighs, or knees․ Pain typically worsens with activities like sitting, coughing, or twisting․ Patients may experience stiffness, limited mobility, or aching after prolonged inactivity․ The Fortin Finger Test is commonly used to identify SI joint pain, where pressure applied to specific areas can reproduce discomfort․ These symptoms can significantly impact daily activities, making diagnosis and appropriate exercises essential for effective pain management and restoring joint function․

Diagnosis of SI Joint Pain

The Fortin Finger Test and physical assessments are commonly used to diagnose SI joint dysfunction, helping identify pain sources and guide appropriate treatment plans effectively․

2․1 Physical Tests for SI Joint Dysfunction

Physical tests for SI joint dysfunction often include the Fortin Finger Test, where patients point to their pain source․ Palpation and movement assessments help identify inflammation or abnormal joint motion․ Gentle exercises may be used to provoke symptoms, aiding diagnosis․ If exercises cause pain, further evaluation is recommended․ These tests are crucial for confirming SI joint dysfunction and guiding treatment plans effectively․

2․2 Imaging and Clinical Assessments

Imaging techniques like X-rays, MRIs, and CT scans are commonly used to confirm SI joint dysfunction․ These tools help identify inflammation, fractures, or degenerative changes․ Clinical assessments, including the Fortin Finger Test, are reliable indicators of SI joint pain․ By combining imaging with physical exams, healthcare providers can accurately diagnose the source of pain and rule out other conditions․ These assessments are crucial for developing targeted treatment plans tailored to the patient’s specific needs․

Exercise Program for SI Joint Pain Relief

A comprehensive exercise program for SI joint pain relief includes gentle stretches, strengthening exercises, and low-impact aerobics․ These exercises improve joint mobility, reduce stiffness, and enhance pelvic stability, promoting long-term pain management and functional recovery․

3․1 Gentle Stretching Exercises for the Sacroiliac Joint

Gentle stretching exercises are essential for alleviating sacroiliac joint pain by improving flexibility and reducing stiffness․ Exercises like the single knee-to-chest stretch and cat-cow stretches target the SI joint, promoting relaxation and mobility․ These stretches should be performed in a pain-free range, avoiding discomfort․ Start with 10-15 repetitions and gradually increase as comfort allows․ It’s important to focus on controlled movements and breathe deeply to enhance the stretching effect․ Always stop if pain exceeds 4/10 on the pain scale․ Consulting a physical therapist can help tailor exercises to individual needs․

3․2 Strengthening Exercises for Pelvic Stability

Strengthening exercises are crucial for improving pelvic stability and reducing SI joint pain․ Exercises like bridging, pelvic tilts, and bird-dog exercises target core muscles, enhancing support for the sacroiliac joint․ Bridging strengthens the glutes and hamstrings, while pelvic tilts improve lumbar-pelvic coordination․ Bird-dog exercises promote balance and stability․ Perform these exercises with controlled movements, starting with 10-15 repetitions and gradually increasing․ Avoid any movement that causes pain․ Strengthening the surrounding muscles helps stabilize the SI joint, reducing dysfunction and discomfort․ Consistency is key for long-term relief and improved pelvic alignment․

3․3 Low-Impact Aerobic Exercises for Pain Management

Low-impact aerobic exercises, such as swimming, cycling, or brisk walking, are excellent for managing SI joint pain․ These activities promote cardiovascular health without putting excessive strain on the sacroiliac joint․ Swimming is particularly beneficial as it minimizes joint stress while improving mobility․ Cycling on a stationary bike or using a recumbent bike is another gentle option․ Walking, especially on flat surfaces, can also help maintain fitness and reduce stiffness․ Start with short sessions and gradually increase duration and intensity․ Always monitor pain levels and avoid movements that exacerbate discomfort․ Consistency in these exercises can improve overall joint stability and pain management․

Treatment Options for SI Joint Pain

Treatment options for SI joint pain include physical therapy, massage, and joint mobilization․ Surgery may be considered for chronic cases․ Pain management plans are personalized․

4․1 Non-Surgical Approaches to Pain Relief

Non-surgical treatments for SI joint pain often include physical therapy, focusing on exercises to improve flexibility and strength․ Massage therapy can reduce muscle tension around the joint․ Chiropractic care, such as spinal manipulation, may alleviate discomfort․ Braces or supports can provide stability, while activity modification helps avoid aggravating movements․ Pain relief options like ice or heat therapy are commonly recommended․ These approaches aim to restore function and reduce pain without invasive procedures, offering a holistic path to recovery and improved quality of life for individuals with SI joint dysfunction․

4․2 Surgical Interventions for Chronic Pain

Surgical options for chronic SI joint pain include minimally invasive procedures like arthrodesis, using systems such as the SImmetry SI Joint Fusion․ These surgeries aim to stabilize the joint by fusing the sacrum and ilium, eliminating painful movement․ They are typically considered when non-surgical treatments fail to provide relief․ The goal is to reduce pain and improve quality of life for patients with severe, persistent dysfunction․ These interventions are carefully evaluated and recommended based on individual needs and the severity of symptoms․

Preventing SI Joint Pain Through Lifestyle Modifications

Maintaining a healthy weight, improving posture, and avoiding repetitive movements can help prevent SI joint pain․ Ergonomic adjustments and regular activity modifications also support long-term joint health․

5․1 Ergonomic Adjustments and Postural Awareness

Ergonomic adjustments and postural awareness are key to preventing SI joint pain․ Maintaining proper posture reduces strain on the sacroiliac joint, while modifying daily activities minimizes repetitive stress․ Using supportive chairs, ensuring proper lifting techniques, and avoiding prolonged sitting can significantly reduce discomfort․ Regular breaks to stretch and move can also alleviate tension․ By incorporating these practices into daily routines, individuals can promote pelvic stability and reduce the risk of SI joint dysfunction․ Consistent attention to posture and ergonomics fosters long-term joint health and overall well-being․

5․2 Weight Management and Activity Modifications

Maintaining a healthy weight reduces pressure on the SI joint, alleviating pain and strain․ Excess weight can exacerbate discomfort, so incorporating a balanced diet and regular exercise is crucial․ Avoiding high-impact activities like running or heavy lifting can prevent further irritation․ Opting for low-impact exercises, such as swimming or cycling, helps maintain mobility without stressing the joint․ Modifying daily activities to avoid repetitive movements or prolonged sitting can also reduce discomfort; Monitoring weight and adjusting activities based on pain levels supports long-term joint health and overall well-being․

Resources for Further Reading

Download the Fortin Finger Test poster and explore PDF guides like “Sacroiliac Pain: Exercises” for detailed stretches and strengthening routines․ Visit reputable sources for comprehensive SI joint resources․

6․1 Recommended PDF Guides and Worksheets

Download the Fortin Finger Test poster for diagnosing SI joint pain․ Explore PDF guides like “Sacroiliac Pain: Exercises” for detailed routines․ These resources offer stretches, strengthening exercises, and bed exercises to maintain muscle strength during recovery․ Worksheets provide step-by-step instructions for exercises like the single knee-to-chest stretch and pelvic tilts․ They emphasize pain-free movements and gradual progression․ These guides are ideal for patients seeking structured rehabilitation plans․ Always consult a healthcare professional before starting any new exercise program to ensure safety and effectiveness․

hoover dual power max pet carpet cleaner manual

Welcome to the Hoover Dual Power Max Pet Carpet Cleaner guide. This powerful, versatile cleaning solution is designed for pet owners, offering advanced stain removal and deep cleaning capabilities.

Key Features of the Hoover Dual Power Max Pet Carpet Cleaner

The Hoover Dual Power Max Pet Carpet Cleaner boasts dual power modes for tailored cleaning, from gentle touch-ups to deep stains. Its advanced pet stain removal technology tackles tough messes effectively. Lightweight and ergonomic, it offers easy maneuverability. The large dirty water tank capacity reduces frequent emptying. Additional tools, like the pet upholstery tool, enhance versatility. Built-in LED lights illuminate hidden dirt, ensuring thorough cleaning. Safe for various carpet types, it maintains fiber integrity while delivering professional-grade results, making it a must-have for pet owners seeking reliable and efficient cleaning solutions.

Importance of Reading the Manual Before Use

Reading the manual is essential for understanding the Hoover Dual Power Max Pet Carpet Cleaner’s operation, safety, and maintenance. It provides detailed guidance on proper use, troubleshooting, and care. The manual ensures safe handling, prevents damage, and helps users achieve optimal cleaning results. It also outlines warranty conditions and maintenance tips to extend the product’s lifespan. By following the manual, users can avoid common mistakes and ensure efficient, effective cleaning while maintaining the cleaner’s performance over time.

Assembly and Initial Setup

Begin by carefully unpacking and identifying all components. Follow the manual’s step-by-step guide to assemble the cleaner securely. Ensure all parts are correctly aligned for safe and effective use.

Unpacking and Identifying Components

Excited to start? Carefully unpack the Hoover Dual Power Max Pet Carpet Cleaner, ensuring all parts are included. Inside, you’ll find the main unit, nozzle, brush roll, clean and dirty water tanks, and additional attachments like the upholstery tool. Take a moment to familiarize yourself with each component and its purpose. Before assembly, inspect for any damage or missing items. Refer to the manual for a detailed diagram and component list. Keep children and pets away during setup to avoid accidental damage or injury. This step ensures a smooth and safe experience.

Step-by-Step Assembly Instructions

Begin by attaching the handle to the main unit using the provided screws. Next, connect the hose securely to the cleaner’s base. Gently insert the brush roll into the nozzle, ensuring it clicks into place. Place the clean water tank on the side and the dirty water tank at the back. Double-check all connections for tightness. Finally, plug in the power cord and ensure the cleaner is placed on a stable, flat surface. Refer to the manual’s diagram for visual guidance, and ensure no parts are damaged during assembly.

Operating the Carpet Cleaner

Start by filling the clean water tank and adding Hoover cleaning solution. Select the desired mode for pet stains or general cleaning. Gently push forward, overlapping strokes for even coverage.

Pre-Cleaning Preparation Tips

Before using the Hoover Dual Power Max Pet Carpet Cleaner, ensure the area is clear of furniture and loose items. Vacuum the carpet thoroughly to remove surface debris. For tough stains, pre-treat with a pet stain remover. Use the crevice tool to clean hard-to-reach areas, such as stairs or upholstery. Always check the cleaning code on upholstered surfaces to avoid damage. Avoid using the cleaner as a dry vacuum. Keep children and pets away until the carpet is completely dry for safety and best results.

Using the Dual Power Mode for Pet Stains

The Hoover Dual Power Max Pet Carpet Cleaner features a Dual Power Mode designed to tackle tough pet stains effectively. For best results, pre-treat stains with a Hoover-approved cleaning solution. Use the Pet Stain Mode for deep cleaning, allowing the machine to apply additional cleaning fluid and suction power. For lighter stains, switch to the Standard Mode. Always follow the manual’s guidelines for solution usage and mode selection to ensure optimal cleaning and carpet protection. This dual functionality ensures thorough stain removal while maintaining carpet integrity.

Maintenance and Cleaning

Regular maintenance ensures optimal performance of your Hoover Dual Power Max Pet Carpet Cleaner. Clean the brush roll and nozzle after each use, and empty the dirty water tank promptly. Follow the manual’s instructions for rinsing and drying components to prevent mold and odors. Proper upkeep extends the life of your cleaner and keeps your carpets fresh and clean. Always refer to the manual for detailed maintenance steps.

Cleaning the Brush Roll and Nozzle

To maintain optimal performance, regularly clean the brush roll and nozzle of your Hoover Dual Power Max Pet Carpet Cleaner. Start by unplugging the device for safety. Remove the nozzle cover and brush roll, typically held in place by screws or clips. Use a soft brush or cloth to wipe away hair and debris. For stubborn dirt, rinse the brush roll with warm water, then allow it to air dry completely before reattaching. Clean the nozzle by removing any blockages and wiping it with a damp cloth. Regular cleaning prevents clogs and ensures efficient cleaning results.

Emptying and Rinsing the Dirty Water Tank

To empty and rinse the dirty water tank on your Hoover Dual Power Max Pet Carpet Cleaner, first ensure the machine is unplugged. Wear gloves for protection. Remove the tank and carefully pour the contents into a sink or drain. Rinse the tank thoroughly with clean water to eliminate any residue. Allow it to air dry before reattaching. Regularly cleaning the tank prevents mold and odors, ensuring fresh cleaning results. Always check for debris and clean the tank after each use for optimal performance.

Safety Precautions

Keep children and pets away from wet carpets. Do not store the cleaner with solution in tanks. Avoid running the cleaner with brushes on unnecessarily.

General Safety Guidelines for Users

Always keep children and pets away from wet carpets until completely dry. Avoid storing the cleaner with solution in the tanks. Unplug the device before servicing. Never use the carpet cleaner as a dry vacuum. Ensure the area is well-ventilated during use. Avoid overexposure to cleaning solutions. Follow recommended usage guidelines for attachments and cleaning fluids. Regularly inspect cords and hoses for damage. Store the cleaner in a dry, cool place. Refer to the manual for additional safety precautions and warranty information.

Storing the Cleaner and Accessories

Store the Hoover Dual Power Max Pet Carpet Cleaner in a dry, cool place, away from direct sunlight. Ensure all components, including hoses and brushes, are completely dry before storage. Keep the dirty water tank empty and clean. Store accessories like upholstery tools and crevice tools in the provided storage bag. Regularly inspect cords and hoses for damage before storing. Maintain the cleaner upright to prevent leakage. Always refer to the manual for specific storage recommendations to prolong the product’s lifespan and maintain its efficiency.

Troubleshooting Common Issues

Common issues include reduced suction power, clogged brushes, or blockages in hoses. Regular maintenance and checking for obstructions can often resolve these problems effectively.

Resolving Suction Power Problems

If your Hoover Dual Power Max Pet Carpet Cleaner experiences low suction, first check for blockages in the hose or nozzle. Ensure the dirty water tank is empty and the filters are clean. A clogged pre-filter or hair wrapped around the brush roll can also reduce suction. Regularly maintaining these parts and ensuring proper assembly can help restore optimal performance. Refer to the manual for detailed steps to address suction issues effectively.

Fixing Clogged Brushes or Tubes

To fix clogged brushes or tubes on your Hoover Dual Power Max Pet Carpet Cleaner, turn off and unplug the device. Remove the brush roll cover and gently pull out any hair or debris. Use a soft brush or tool to clear blockages in the tubes. Regularly cleaning these areas prevents clogs and maintains efficiency. Always refer to the manual for specific instructions to ensure proper maintenance and avoid damage to the cleaner.

Where to Find the Hoover Dual Power Max Pet Carpet Cleaner Manual

Visit the official Hoover website or authorized retailers for the manual. It’s available as a free PDF download under the product support section.

Downloading the Manual from Official Sources

To download the Hoover Dual Power Max Pet Carpet Cleaner manual, visit the official Hoover website or authorized retailer sites. Navigate to the support or product section, enter your model number (e.g., FH51000 or FH51001), and select the manual. Ensure the source is trustworthy to avoid unauthorized downloads. The manual is typically available in PDF format, allowing easy access to instructions, safety guidelines, and troubleshooting tips. Always verify the manual matches your specific model for accurate information.

Additional Resources for Maintenance and Repair

For comprehensive maintenance and repair guidance, explore official Hoover resources, such as their website or customer support. Authorized dealers often provide repair manuals and troubleshooting guides. Additionally, online forums and communities dedicated to Hoover products can offer practical advice from experienced users. These resources cover topics like brush roll cleaning, tank maintenance, and resolving common issues, ensuring your cleaner operates efficiently for years to come.

pro t721 thermostat manual

The Pro T721 Thermostat by Pro1 Technologies is a non-programmable, simple, and affordable solution for temperature control. Designed for reliability, it offers professional-grade performance and ease of use, making it ideal for homeowners and professionals alike. The thermostat comes with a 5-year limited warranty and is compatible with gas, oil, and heat pump systems. Its intuitive design and essential features, such as a low battery indicator, ensure seamless operation and energy efficiency. Perfect for installations requiring straightforward temperature management without advanced programming needs.

1.1 Overview of the Pro T721 Thermostat

The Pro T721 Thermostat is a non-programmable, cost-effective solution designed for simplicity and efficiency. It is compatible with gas, oil, and heat pump systems, offering reliable performance. With a 5-year limited warranty, it provides long-term durability. The thermostat features a user-friendly interface, easy installation, and a low battery indicator for convenience. Its compact design and straightforward operation make it ideal for homeowners seeking basic temperature control without advanced programming features.

1.2 Key Features and Benefits

The Pro T721 Thermostat offers a non-programmable, simple, and affordable solution for temperature control. It features a 5-year limited warranty, compatibility with gas, oil, and heat pump systems, and easy installation. The thermostat includes a low battery indicator and an easy-access battery door. Designed for straightforward operation, it ensures reliable performance and energy efficiency. Its compact design and user-friendly interface make it ideal for basic heating and cooling needs.

Installation of the Pro T721 Thermostat

The Pro T721 Thermostat should be installed 4-5 feet above the floor in an area with average temperature and good air circulation for optimal performance.

2.1 Pre-Installation Requirements

Before installing the Pro T721 Thermostat, ensure the location is 4-5 feet above the floor with average temperature and good air circulation. Power must be turned off at the circuit breaker during installation. Install 2 AA alkaline batteries (included) in the thermostat. Select a wall with proper structural support and ensure compatibility with your HVAC system. Have all necessary tools ready for a smooth installation process.

2.2 Step-by-Step Installation Instructions

Turn off power at the circuit breaker. 2. Insert 2 AA alkaline batteries into the thermostat. 3. Remove the old thermostat and mounting hardware. 4. Mount the new thermostat base, ensuring level placement. 5. Connect wires to the appropriate terminals (refer to manual for wiring guide). 6. Restore power and set the mode (HEAT, COOL, or OFF). 7. Test operation to ensure proper function.

Operating the Pro T721 Thermostat

Use the +/- keys to adjust the temperature. Select HEAT, COOL, or OFF mode. The thermostat displays current settings and low battery alerts. Refer to the manual for advanced features and customization options.

3.1 Basic Operations and Controls

Operating the Pro T721 Thermostat is straightforward. Use the +/- keys to adjust the desired temperature. Select between HEAT, COOL, or OFF modes using the mode button. The thermostat displays the current temperature and mode. A low battery indicator alerts when replacement is needed. Basic controls are intuitive, ensuring easy operation for users of all skill levels. Refer to the manual for detailed guidance.

3.2 Advanced Features and Settings

The Pro T721 Thermostat offers advanced settings for customized comfort. Users can set temperature limits and system preferences to optimize performance. The thermostat supports integration with HVAC systems, ensuring compatibility and efficient operation. Advanced features include energy-saving modes and smart operation capabilities. Refer to the manual for detailed instructions on configuring these settings to maximize comfort and energy efficiency in your home.

Troubleshooting the Pro T721 Thermostat

Common issues include low battery indicators and HVAC system compatibility problems. Resetting the thermostat often resolves these issues. Refer to the manual for detailed troubleshooting steps and solutions.

4.1 Common Issues and Solutions

Common issues with the Pro T721 Thermostat include low battery indicators, display malfunctions, and HVAC system incompatibility. Solutions involve checking battery levels, resetting the thermostat, and ensuring proper installation. If problems persist, refer to the manual or contact customer support for assistance. Regular maintenance and updates can prevent recurring issues.

4.2 Resetting the Thermostat

To reset the Pro T721 Thermostat, remove the batteries, wait 30 seconds, and reinstall them. This process restores default settings and resolves display or operational issues. Resetting is recommended for troubleshooting and ensures proper functionality. Always refer to the manual for detailed instructions to avoid configuration errors and maintain optimal performance. Resetting does not affect saved settings or warranties.

Technical Specifications

The Pro T721 Thermostat is compatible with gas, oil, and heat pump systems, operating on 2 AA alkaline batteries. It should be installed 4-5 feet above the floor in an area with average temperature and good air circulation, ensuring accurate temperature sensing and optimal performance.

5.1 Compatibility and System Requirements

The Pro T721 Thermostat is designed to work seamlessly with various HVAC systems, including gas, oil, and heat pump configurations. It operates on standard 2 AA alkaline batteries, ensuring reliable performance without hardwiring requirements. Compatibility extends to systems with or without emergency heat settings, making it a versatile option for different home configurations. Proper installation at 4-5 feet above the floor in an area with average temperature and good air circulation is recommended for optimal functionality and accuracy.

5.2 Electrical and Performance Specifications

The Pro T721 Thermostat operates on 2 AA alkaline batteries, eliminating the need for hardwiring. It supports systems with or without emergency heat, ensuring compatibility across various HVAC configurations. Designed for efficient performance, the thermostat maintains precise temperature control and features a low battery indicator for timely replacements. Its reliable operation ensures consistent heating and cooling, making it a durable and energy-efficient solution for home comfort systems.

Safety Information and Precautions

Do not operate the cooling system if outdoor temperatures are below freezing to avoid equipment damage. Ensure proper installation and follow all safety guidelines to prevent hazards.

6.1 Important Safety Warnings

Important Safety Warnings: Do not operate the cooling system if outdoor temperatures are below freezing, as this can cause equipment damage. Ensure proper installation and follow all safety guidelines to avoid hazards. Avoid unauthorized modifications to the thermostat, as this may void the warranty or cause malfunctions. Always register the thermostat within 60 days of installation to maintain warranty validity.

6.2 Equipment Damage Prevention

Prevent equipment damage by avoiding operation in extreme temperatures, such as below freezing for cooling systems. Ensure proper installation and use only compatible HVAC systems. Regular maintenance is essential to prevent malfunctions. Avoid unauthorized modifications, as they may void the warranty. Replace batteries correctly to maintain functionality. Keep the thermostat clean and free from obstructions to ensure accurate temperature readings and optimal performance.

Warranty and Support

The Pro T721 Thermostat comes with a 5-year limited warranty, ensuring protection against manufacturing defects. For support, contact Pro1 Technologies at 888-776-1427 or visit www.pro1iaq.com.

7.1 Warranty Details and Registration

The Pro T721 Thermostat is backed by a 5-year limited warranty, covering defects in materials and workmanship. To activate, register the device within 60 days of installation on Pro1 Technologies’ website. This ensures warranty validity and access to exclusive support services. Prompt registration guarantees comprehensive coverage, safeguarding your investment and promoting hassle-free ownership. Visit www.pro1iaq.com for registration details and support options.

7.2 Customer Support and Resources

Pro1 Technologies offers comprehensive customer support for the Pro T721 Thermostat. Their toll-free hotline (888-776-1427) and website (www.pro1iaq.com) provide easy access to assistance. Operating hours are Monday to Friday, 9AM to 6PM Eastern Time. Additional resources, including downloadable manuals and troubleshooting guides, are available online, ensuring users can resolve issues efficiently and stay informed about product updates and maintenance tips.

Maintenance and Care

Regularly replace the 2 AA Alkaline batteries to ensure optimal performance. Install the thermostat 4-5 feet above the floor in an area with average temperature and good air circulation for accurate readings. Register your device within 60 days of installation to activate the 5-year limited warranty and receive support.

8.1 Routine Maintenance Tips

For optimal performance, replace the 2 AA Alkaline batteries annually or when the low battery indicator appears. Ensure the thermostat is installed 4-5 feet above the floor in an area with average temperature and good air circulation. Clean the device with a soft cloth to prevent dust buildup. Regularly check and update settings to maintain efficiency and comfort. Register your thermostat within 60 days of installation to activate the 5-year warranty and access support resources. Proper maintenance ensures accurate temperature control and extends the product’s lifespan.

8.2 Battery Replacement and Management

Replace the 2 AA Alkaline batteries annually or when the low battery indicator appears. To access the battery compartment, use the finger bevel on the thermostat’s lower side to open the easy access door. Insert the new batteries, ensuring correct polarity for proper function. Properly dispose of the old batteries. Using high-quality batteries ensures reliable performance and maintains accurate temperature control throughout the year.

Advanced Configuration and Customization

The Pro T721 allows customization of temperature settings and integration with HVAC systems for enhanced control; Use the or ⎼ keys to adjust settings for optimal performance and efficiency.

9.1 Customizing Temperature Settings

The Pro T721 allows users to customize temperature settings for optimal comfort. Use the + or ⎼ keys to adjust the desired temperature. Select modes like HEAT, COOL, or OFF to tailor your HVAC system’s operation. The thermostat also supports energy-efficient adjustments, ensuring consistent comfort while managing energy use effectively. Customizable settings enable personalized temperature control, enhancing overall performance and user satisfaction.

9.2 Integrating with HVAC Systems

The Pro T721 Thermostat seamlessly integrates with various HVAC systems, including gas, oil, and heat pump configurations. Its universal design ensures compatibility, allowing smooth operation and efficient temperature control. Proper installation, ideally 4-5 feet above the floor in an area with good air circulation, ensures accurate temperature sensing and optimal system performance. This integration enhances overall HVAC efficiency and user comfort.

The Pro T721 Thermostat offers simplicity, reliability, and efficiency for temperature control. For detailed guidance, download the full manual or visit www.pro1iaq.com for support and resources.

10.1 Summary of Key Points

The Pro T721 Thermostat is a non-programmable, affordable, and professional solution for temperature control. It supports gas, oil, and heat pump systems, with a 5-year warranty. Installation requires placement 4-5 feet above the floor for optimal performance. The thermostat uses 2 AA alkaline batteries and features a low battery indicator. For detailed instructions, refer to the Pro T721 Installation Manual or visit www.pro1iaq.com for additional resources and support, ensuring efficient and easy operation.

10.2 Accessing Full Manual and Support

For comprehensive guidance, the full Pro T721 Thermostat Manual can be downloaded from Pro1 Technologies’ official website at www.pro1iaq.com. Additional support is available through their toll-free number: 888-776-1427, with customer service operating Monday to Friday, 9AM to 6PM Eastern Time. The manual is also available in multiple languages, ensuring accessibility for all users.

el salvador guide

El Salvador, Central America’s smallest country, captivates travelers with stunning landscapes, from volcanic peaks to pristine beaches, blending rich history, vibrant culture, and breathtaking natural beauty.

Overview of El Salvador’s Geography and Culture

El Salvador, the smallest country in Central America, is home to a diverse geography that includes towering volcanoes, lush cloud forests, and a stunning Pacific coastline with golden beaches. Its vibrant culture blends indigenous heritage with colonial influences, creating a unique identity. The capital, San Salvador, reflects this mix of modernity and history, while charming colonial towns and lively festivals showcase the country’s deep traditions. The local cuisine, filled with flavors like pupusas and fresh seafood, adds to the allure. This blend of breathtaking landscapes and vibrant culture makes El Salvador a captivating destination for any traveler.

Why Visit El Salvador? Key Attractions and Highlights

El Salvador offers a mix of adventure, culture, and natural beauty that captivates every traveler. Its stunning beaches and world-class surfing spots, like El Tunco, attract water lovers, while the Ruta de las Flores enchants with charming colonial towns and vibrant markets. The country’s volcanic landscapes, such as Santa Ana Volcano, provide thrilling hiking opportunities, and ancient Mayan ruins like Tazumal reveal its rich history. Add the delicious local cuisine, lively festivals, and warm hospitality, and El Salvador emerges as a hidden gem waiting to be explored, offering unforgettable experiences for every kind of traveler.

Best Places to Visit in El Salvador

El Salvador’s diverse attractions include the vibrant capital, San Salvador, the picturesque Ruta de las Flores, the surf paradise of El Tunco, and the historic city of Santa Ana, each offering unique experiences;

San Salvador: The Vibrant Capital City

San Salvador, the bustling capital of El Salvador, blends modernity with rich history, offering a dynamic cultural experience. Visit iconic landmarks like the Catedral Metropolitana and the National Palace, or explore the lively Mercado Central for local flavors and crafts. The city’s mix of colonial architecture and contemporary vibes creates a unique atmosphere. Stay in a four-star hotel near major attractions, and enjoy activities like swimming, basketball, and baseball. While safety is a concern, tourist areas are generally secure. Immerse yourself in the city’s energy and discover its hidden gems, making San Salvador a memorable start to your El Salvador adventure.

Ruta de las Flores: Charming Colonial Towns

Ruta de las Flores is a picturesque journey through El Salvador’s colonial towns, showcasing vibrant markets, traditional crafts, and stunning natural beauty. Towns like Ataco, Salcoatitán, and Nahuizalco captivate visitors with their colorful architecture and rich cultural heritage. Explore cobblestone streets, visit local artisans, and immerse yourself in the region’s unique charm. The route is a must-visit for those who appreciate history, art, and nature, offering a glimpse into El Salvador’s authentic rural life and the warmth of its people.

El Tunco and the Pacific Coast: Surfing and Beaches

El Tunco, a vibrant coastal town, is a hotspot for surfers and beach lovers alike. Its world-class waves cater to both experienced surfers and beginners. The Pacific Coast of El Salvador boasts stunning beaches with crystal-clear waters, perfect for relaxation and sunbathing. Beyond surfing, visitors can explore nearby waterfalls, hike through lush forests, or simply enjoy the breathtaking sunsets. The laid-back atmosphere and warm locals make El Tunco a must-visit destination for those seeking adventure, tranquility, and a taste of coastal Salvadoran life.

Santa Ana: A City Rich in History and Natural Beauty

Santa Ana, a city steeped in history and natural allure, offers visitors a captivating blend of culture and scenic beauty. Its historic center features the stunning Santa Ana Cathedral and the impressive Teatro de Santa Ana, showcasing its rich colonial heritage. Nearby, the picturesque Lake Coatepeque provides breathtaking views and opportunities for boating. The city is also a gateway to the surrounding volcanic landscapes, including the iconic Santa Ana Volcano. With its vibrant markets, traditional cuisine, and welcoming atmosphere, Santa Ana is a must-visit destination for those seeking both cultural immersion and natural splendor.

Top Activities and Experiences

Discover El Salvador’s vibrant culture and landscapes through hiking volcanoes, surfing world-class waves, and exploring ancient Mayan ruins, offering unforgettable adventures for every kind of traveler.

Hiking and Exploring Volcanoes

El Salvador’s rugged landscape offers thrilling opportunities for hiking and volcano exploration. Active volcanoes like Santa Ana and Izalco provide breathtaking views and unique adventures. Trek through lush cloud forests, discover hidden waterfalls, and marvel at the stunning natural beauty surrounding these volcanic peaks. With guided tours available, visitors can safely explore these geological wonders, learning about their history and ecological significance. The challenging trails reward hikers with panoramic vistas, making it a must-do experience for nature enthusiasts and adventure seekers in this Central American gem.

Surfing: World-Class Waves for All Levels

El Salvador’s Pacific Coast is a surfer’s paradise, offering world-class waves for all skill levels. From the consistent swells at El Tunco to the powerful breaks at Punta Roca, the coastline provides endless opportunities to catch epic waves. Beginners can enjoy gentle waves at beaches like El Zonte, while experienced surfers can tackle the challenging waves at spots like Sunzal. Surf schools and rentals are readily available, making it easy for visitors to dive into the sport. With its laid-back beach towns, stunning sunsets, and affordable accommodations, El Salvador has become a must-visit destination for surf enthusiasts worldwide.

Discovering Ancient Mayan Ruins

El Salvador is home to fascinating ancient Mayan ruins, offering a glimpse into the region’s rich history. Sites like Joya de Cerén, often called the “Pompeii of the Americas,” provide a unique opportunity to explore remarkably preserved structures. Tazumal, another significant site, showcases impressive pyramids and plazas, revealing the advanced engineering and cultural sophistication of the Maya. Visitors can immerse themselves in history by trekking through lush jungles to uncover hidden ruins, many of which are surrounded by stunning natural landscapes, including waterfalls and dense forests. These archaeological treasures are a must-visit for anyone intrigued by ancient civilizations.

Travel Tips and Safety

Plan ahead, stay informed, and use reliable transportation. Exercise caution in crowded areas and avoid traveling at night. Respect local customs and enjoy a safe journey.

Getting Around: Transportation Options

El Salvador offers various transportation options for travelers. Private transfers and shuttles are convenient for airport arrivals and inter-city trips. Public buses are affordable but often crowded. Renting a car provides flexibility, though driving conditions may vary. Shared colectivos are budget-friendly for shorter distances. Taxis are widely available, but using reputable companies is recommended. For ease, consider booking transportation in advance. Always opt for licensed services and avoid hitchhiking. Sticking to major highways ensures smoother journeys. Plan your transportation in advance to make the most of your El Salvador adventure.

Staying Safe: Essential Precautions for Travelers

Exercise caution when traveling in El Salvador. Stick to major highways and avoid driving at night. Use licensed taxis or ride-sharing apps for safety. Avoid displaying valuables and keep belongings secure in crowded areas. Stay informed about local conditions and follow government advisories. While El Salvador has made strides in improving security, petty theft and scams can occur. Travelers should remain vigilant, especially in bustling cities like San Salvador. By taking these precautions, you can enjoy a safe and memorable trip to El Salvador.

Cultural Experiences

El Salvador’s vibrant culture blends colonial heritage, indigenous traditions, and modern influences. Experience lively festivals, savor local cuisine, and engage with welcoming locals to truly immerse yourself.

Local Cuisine: Must-Try Dishes and Drinks

El Salvador’s cuisine is a flavorful blend of indigenous, Spanish, and African influences. Must-try dishes include pupusas (stuffed cornmeal flatbreads), tamales, and empanadas. Fresh seafood, grilled meats, and vibrant salads are also popular; Don’t miss horchata (a sweet milky drink) and fresh coconut water. Local markets and family gatherings showcase the country’s culinary heart. Indulge in these authentic flavors to experience Salvadoran culture firsthand.

Festivals and Traditions: Immersing in Salvadoran Culture

El Salvador’s vibrant culture comes alive through its festivals and traditions. The Fiestas Agostinas in San Salvador and the Semana Santa (Holy Week) celebrations are iconic, showcasing colorful parades and religious processions. Traditional dances, such as the Danza de los Voladores, highlight indigenous heritage. Festivals often feature live music, local crafts, and delicious food. Family gatherings and markets buzz with energy, offering a glimpse into Salvadoran hospitality. Immersing yourself in these traditions provides a deeper connection to the country’s rich cultural identity and warm, welcoming people.

El Salvador, a Central American gem, captivates with stunning landscapes, rich history, and vibrant culture, making it a must-visit destination for travelers seeking unique experiences and natural beauty.

Final Thoughts: Why El Salvador Should Be on Your Bucket List

El Salvador is a hidden gem offering a mix of stunning beaches, vibrant culture, and breathtaking landscapes. From surfing world-class waves to hiking volcanoes, it provides unforgettable experiences. The country’s warm hospitality, rich history, and diverse ecosystems make it a must-visit destination. Whether you’re exploring colonial towns or relaxing on Pacific coast beaches, El Salvador’s unique charm captivates every traveler. Its affordability, accessibility, and untapped beauty make it an ideal choice for adventurers seeking an off-the-beaten-path experience in Central America.

waffle maker instructions

Preheating the Waffle Maker

Plug in the waffle maker and set the desired temperature. Allow it to preheat for 3-5 minutes until the indicator light shows it’s ready for use.

Step 1: Plug in the Waffle Maker

Locate the power cord of your waffle maker and plug it into a nearby electrical outlet. Ensure the outlet is safe and not overloaded with other appliances. Once plugged in, switch on the waffle maker using the power button or switch, typically found on the front or side of the device. Some models may have an indicator light that illuminates when the waffle maker is powered on. Allow the unit to begin heating up—this is the first step in preparing it for cooking. Always keep children away from the waffle maker while it is plugged in and in use. If unsure about any part of this process, consult the user manual for specific instructions. Once plugged in, the waffle maker is ready to start preheating for the next step.

Step 2: Set the Temperature

Once the waffle maker is plugged in, adjust the temperature setting according to your preference. Most waffle makers have a dial or button that allows you to choose the desired heat level. For standard waffles, a medium-high heat setting is usually recommended. If your waffle maker has specific temperature guidelines, refer to the user manual for the ideal setting. Ensure the temperature is set before allowing the waffle maker to preheat. Some models may have an indicator light that signals when the desired temperature is reached. Proper temperature setting is crucial for achieving the perfect texture and browning of your waffles. Always use the temperature control as instructed to avoid overheating or underheating the plates.

Step 3: Allow the Waffle Maker to Preheat

After setting the temperature, let the waffle maker preheat for 3-5 minutes. Most models have an indicator light that turns off or changes color when ready. During preheating, the plates will heat evenly, ensuring a consistent cooking surface. Do not rush this step, as proper preheating is essential for achieving crispy waffles. If your waffle maker doesn’t have an indicator, you can test readiness by flicking a few drops of water onto the plates; they should sizzle and evaporate quickly. Once preheated, the waffle maker is ready for batter. Always ensure the plates are hot before pouring in the batter to prevent sticking and promote even cooking.

Preparing the Batter

Mix dry ingredients like flour, sugar, and baking powder in a bowl. In a separate bowl, combine wet ingredients such as milk, eggs, and oil. Stir until smooth.

Step 1: Mix Dry Ingredients

In a large bowl, combine 1 3/4 cups of flour, 2 tablespoons of sugar, 1 tablespoon of baking powder, and a pinch of salt. Sift the ingredients to ensure they are well incorporated and free of lumps. This step is crucial for achieving a smooth batter and even cooking. Use a whisk to mix thoroughly, ensuring the dry ingredients are evenly distributed. Avoid overmixing, as this can create a dense texture. Once combined, set the bowl aside for the next step. Properly mixing the dry ingredients lays the foundation for light and fluffy waffles.

Step 2: Combine Wet Ingredients

In a separate bowl, whisk together 1 3/4 cups of milk, 2 eggs, and 1/2 cup of oil or melted butter. Add a teaspoon of vanilla extract for flavor. Beat the eggs lightly before mixing to ensure a smooth consistency. Gradually pour in the milk while whisking to prevent lumps. Continue until all wet ingredients are fully incorporated. This mixture adds moisture and richness to the batter. Once smooth, set aside to prepare for combining with dry ingredients. Properly blending the wet ingredients ensures the batter will be even and the waffles will cook uniformly. Avoid over-whisking to maintain a light texture.

Step 3: Stir Wet and Dry Ingredients Together

Gently pour the wet ingredients into the dry ingredients bowl. Use a spatula to stir until just combined, being careful not to overmix. A few lumps are okay; overmixing can make the waffles tough. Ensure all flour is incorporated without creating a dense batter. Stop stirring once the ingredients are evenly mixed. This step is crucial for maintaining the waffles’ light and fluffy texture. Avoid using electric mixers to prevent overworking the batter. Let the batter rest for a minute to allow the flour to absorb the liquid fully before cooking. Proper mixing ensures even cooking and a delicious result.

Cooking the Waffles

Pour batter onto the preheated waffle maker, spreading evenly. Close the lid and cook until golden brown. Adjust cooking time as needed for desired crispiness.

Step 1: Grease the Waffle Plates

Lightly grease the waffle plates with cooking spray or a small amount of oil to prevent batter from sticking. For non-stick surfaces, this step may be optional but recommended for the first use or if using a new waffle maker. Ensure the grease is evenly applied across both plates to promote even cooking and easy removal of waffles. Avoid excessive oil to prevent a greasy texture on the waffles. If using a seasoned waffle iron, apply a thin, even layer of oil to maintain the seasoning. Greasing the plates properly ensures your waffles will cook evenly and have a crispy exterior without sticking to the maker.

Step 2: Pour the Batter

Pour the prepared batter onto the center of the greased waffle plates, spreading it evenly to cover the surface without overfilling. Use a ladle or pouring spout for control, ensuring the batter reaches all corners but doesn’t overflow. The amount of batter needed depends on the size of your waffle maker, typically about 1/4 to 1/2 cup. Avoid overfilling to prevent batter from spilling during cooking. Pour in a circular or spiral motion for even distribution. Make sure to leave a small border around the edges to allow for expansion during cooking. This ensures the waffles will cook evenly and release easily once done. Proper batter distribution is key for a perfect waffle texture and appearance.

Step 3: Close the Lid and Cook

Once the batter is evenly spread, gently close the waffle maker’s lid, ensuring it is securely shut. Set the timer according to the manufacturer’s instructions, typically 3-5 minutes, depending on the desired crispiness. The waffle maker will indicate when the waffles are ready, often with a light or sound. Do not open the lid too early, as this can cause the waffles to break. When the timer goes off or the indicator shows completion, carefully lift the lid to check if the waffles are golden brown. If they need more cooking time, close the lid for an additional 30 seconds to 1 minute. Repeat until perfectly cooked, then remove and serve hot.

Cooling and Serving

Allow the waffles to cool slightly on a wire rack to maintain crispiness. Serve warm with your favorite toppings, such as syrup, butter, fruit, or whipped cream.

Step 1: Remove the Waffles

Once the waffles are cooked to your desired crispiness, carefully remove them from the waffle maker using a spatula or tongs. Be cautious, as the waffles and plates will be hot. Gently lift the waffles and place them on a wire rack or plate to cool slightly before serving. If using a non-stick waffle maker, the waffles should release easily. For stuck waffles, lightly pry them loose with a spatula. Repeat the process for additional batches, ensuring the waffle maker is properly heated between each use. Always handle hot waffles with care to avoid burns or accidents.

Step 2: Let the Waffles Cool

After removing the waffles from the maker, place them on a clean wire rack or paper towels to cool. Allowing them to cool slightly prevents sogginess and helps retain crispiness. Avoid stacking waffles immediately, as this can trap steam and make them soft. Letting them cool for a few minutes also makes them easier to handle and top without falling apart. If you’re preparing multiple batches, keep the cooled waffles warm in a low-temperature oven until serving. Cooling ensures the waffles stay light and fluffy, enhancing their texture and flavor for the best serving experience.

Step 3: Serve with Toppings

Once the waffles have cooled slightly, it’s time to add your favorite toppings. Classic options include fresh fruits like strawberries or blueberries, whipped cream, maple syrup, or powdered sugar. For a savory twist, try adding cheese, bacon, or a fried egg. Experiment with combinations to find your perfect match. Ensure toppings are evenly distributed to enhance flavor in every bite. Serve immediately to enjoy the waffles at their crispest and freshest. Let everyone customize their own for a personalized breakfast or brunch experience that’s both delicious and memorable.

jello no bake crust mix instructions

Jell-O No-Bake Crust Mix offers a convenient solution for creating dessert bases without baking․ Ideal for cheesecakes and pies‚ it simplifies preparation with pre-measured ingredients․

1․1 Overview of the Product

The Jell-O No-Bake Crust Mix is a convenient‚ pre-measured blend designed for effortless dessert preparation․ Perfect for cheesecakes‚ pies‚ and other treats‚ it eliminates the need for baking․ Simply mix with melted butter‚ press into a pan‚ and let it set in the refrigerator․ This product offers a quick and hassle-free way to create a sturdy‚ flavorful crust‚ ideal for both novice and experienced bakers․ Its no-bake feature makes it a great option for hot days or when oven space is limited․

1․2 Importance of No-Bake Crusts in Desserts

No-bake crusts have become a staple in modern dessert preparation due to their convenience and versatility․ They eliminate the need for baking‚ saving time and effort while ensuring a sturdy base for creamy fillings․ Perfect for cheesecakes‚ pies‚ and trifles‚ no-bake crusts are ideal for hot weather or when oven space is limited․ Their ease of preparation makes them accessible to both novice and experienced bakers‚ while their texture and flavor enhance the overall dessert experience․ This simplicity has made no-bake crusts a favorite in many kitchens․

Ingredients and Tools Needed

Jell-O No-Bake Crust Mix requires just a few ingredients and basic tools; Essential items include the crust mix‚ melted butter‚ a mixing bowl‚ and a spatula․

2․1 List of Required Ingredients

The primary ingredients needed for the Jell-O No-Bake Crust Mix include the crust mix itself‚ melted butter‚ and water․ For enhanced flavor‚ you can add crushed nuts‚ cocoa powder‚ or spices․ Ensure the butter is melted but not overly hot to maintain texture․ Optional additions like vanilla extract or a pinch of salt can elevate the crust’s taste․ Using real butter is recommended for the best flavor and texture․ Avoid using margarine or oil substitutes for optimal results․

2․2 Essential Tools for Preparation

To prepare the Jell-O No-Bake Crust Mix‚ you’ll need a mixing bowl‚ a mixing spoon or spatula‚ and a 9-inch pie pan or springform pan․ A measuring cup is necessary for accurately measuring the melted butter and water․ Additionally‚ a flat-bottomed tool or the back of a spoon is helpful for pressing the crust mixture evenly into the pan․ Ensure you have a refrigerator available for chilling the crust to set properly before adding the filling․ These tools are essential for a smooth and successful preparation process․

Step-by-Step Instructions

Preparing the Jell-O No-Bake Crust Mix is straightforward․ Follow the simple steps to mix‚ shape‚ and set the crust for a perfect dessert base․

3․1 Preparing the Crust Mix

To prepare the Jell-O No-Bake Crust Mix‚ start by emptying the envelope into a mixing bowl․ Add the recommended amount of melted butter‚ typically 1/4 cup‚ and mix until the crust mixture reaches a uniform consistency․ Ensure all crumbs are evenly coated with the butter for a smooth texture․ Avoid overmixing‚ as this can make the crust dense․ Once mixed‚ the crust will resemble wet sand and is ready to be pressed into the pan․ This step is crucial for achieving a firm and even base for your dessert․

3․2 Mixing with Melted Butter

Pour the melted butter into the bowl with the crust mix and stir until the mixture is evenly coated․ Use a fork or spatula to blend thoroughly․ Ensure no dry spots remain․ The butter binds the crust together‚ so precise measurement is key․ Avoid overmixing to prevent a dense texture․ The mixture should resemble damp sand‚ holding its shape when pressed․ This consistency ensures the crust sets properly and provides a sturdy base for fillings․ Proper mixing is essential for a smooth‚ even crust formation․

3․3 Pressing the Crust into the Pan

Transfer the crust mixture to a lightly greased pan․ Using the bottom of a glass or your fingertips‚ press firmly and evenly across the base and up the sides․ Ensure the crust is uniformly thick to prevent cracking․ Start from the center and work outward to eliminate air pockets․ Pressing too hard can create a dense crust‚ so apply steady‚ moderate pressure․ A smooth‚ compact layer is crucial for a professional finish and stability when filled․ Proper pressing ensures the crust holds its shape and sets evenly․

3․4 Refrigeration and Setting Time

Once pressed into the pan‚ refrigerate the crust at 40°F (4°C) for at least 30 minutes to set․ Avoid freezing‚ as it can make the crust too hard․ After setting‚ it’s ready to fill with your dessert mixture․ Chilling allows the butter to firm up‚ ensuring the crust holds its shape․ Letting it set longer‚ up to 2 hours‚ enhances stability․ A properly set crust ensures a clean release when serving‚ making your dessert look professional․ Always refrigerate before adding fillings․

Tips for Achieving the Perfect Crust

To ensure a perfect no-bake crust‚ press firmly into the pan and chill thoroughly․ Avoid overmixing to maintain texture and prevent sogginess for a crisp base․

4․1 Ensuring the Crust Sets Properly

To ensure your Jell-O No-Bake Crust sets properly‚ press the mixture firmly into the pan using the back of a spatula or your fingers․ Avoid applying uneven pressure‚ as this can lead to a crust that’s too thick in some areas and too thin in others․ Refrigerate for at least 30 minutes to allow the crust to set completely․ If using a springform pan‚ make sure the crust reaches the edges and is evenly distributed․ This step is crucial for a stable and even base for your dessert․ Proper setting ensures the crust holds its shape and doesn’t crumble when serving․

4․2 Avoiding Common Mistakes

One common mistake when using Jell-O No-Bake Crust Mix is overmixing the ingredients‚ which can make the crust dense and tough; Another error is using melted butter that’s too hot‚ causing the crust to become greasy․ Ensure the butter is evenly incorporated without overmixing․ Additionally‚ avoid pressing the crust into the pan too aggressively‚ as this can create air pockets․ Lastly‚ don’t skip the refrigeration step‚ as the crust needs time to set properly․ These precautions help achieve a smooth‚ even‚ and sturdy base for your dessert․ Proper technique ensures a professional finish․

Enhancing the Crust Flavor

Elevate your crust’s flavor by incorporating spices‚ citrus zest‚ or crushed nuts․ These additions create a unique and delicious base for various desserts․

5․1 Adding Spices or Zest

Incorporate warmth with cinnamon‚ nutmeg‚ or cardamom for a spicy twist‚ or add citrus zest like lemon or orange for a bright‚ refreshing flavor․ These additions complement the crust’s texture and enhance the overall dessert experience without overpowering it․ Experiment with subtle amounts to find your perfect balance‚ ensuring the crust remains a delightful base for your creations․ This simple step allows for customization‚ making each dessert uniquely tailored to your taste preferences․

5․2 Incorporating Crushed Nuts or Cookies

Add a crunchy texture and extra flavor by mixing crushed nuts like almonds‚ walnuts‚ or pecans into the crust mixture․ Alternatively‚ use crushed cookies such as chocolate sandwich cookies or wafers for a sweeter base․ Simply fold the crushed elements into the crust mix before adding the melted butter for a uniform texture․ This customization enhances the crust’s appeal and provides a delicious contrast to the smooth dessert filling․ Toasting the nuts lightly before crushing can deepen their flavor‚ while cookies add a sweet‚ indulgent twist․ Avoid overmixing to preserve the crunch and texture․ Ensure the crust presses evenly into the pan for a stable base․ Experimenting with different combinations allows you to tailor the crust to your dessert’s theme‚ whether it’s a classic nutty flavor or a playful cookie-inspired crust․ This step offers endless possibilities for creative and personalized desserts․ Always use fresh nuts and cookies for the best flavor and texture․ Properly toasting nuts can enhance their aroma without burning․ This technique ensures your crust stands out and complements the filling perfectly․ It’s a simple yet impactful way to elevate your no-bake desserts․ Always press the mixture firmly into the pan to ensure it holds its shape․ The addition of nuts or cookies makes the crust more robust and visually appealing․ It’s an excellent way to add depth and variety to your desserts․

Using the Crust for Different Desserts

The Jell-O No-Bake Crust Mix is versatile‚ perfect for cheesecakes‚ pies‚ tarts‚ trifles‚ and layered desserts․ Its neutral flavor complements creamy fillings and fruity toppings effortlessly․
It provides a sturdy base for both classic and modern dessert creations‚ making it a go-to choice for any no-bake treat․ The crust’s simplicity allows it to adapt to various flavor profiles‚ ensuring a delicious foundation for your favorite desserts․

6․1 Cheesecakes

The Jell-O No-Bake Crust Mix is a perfect base for cheesecakes‚ offering a quick and easy alternative to traditional graham cracker crusts․ Simply mix the crust with melted butter‚ press it into a pan‚ and chill․ This crust pairs beautifully with creamy cheesecake fillings‚ whether you’re making a classic vanilla‚ strawberry‚ or chocolate variation․ For added texture‚ you can fold crushed cookies or nuts into the filling before pouring it over the crust; This method simplifies dessert preparation while maintaining exceptional flavor and texture․
It’s ideal for both novice bakers and experienced dessert enthusiasts looking to save time without compromising quality․

6․2 Pies and Tarts

Jell-O No-Bake Crust Mix is a versatile base for pies and tarts‚ offering a quick and effortless preparation method․ Perfect for sweet or savory fillings‚ it pairs well with creamy desserts like chocolate or fruit pies․ The crust’s no-bake requirement ensures a sturdy base without oven time‚ making it ideal for layered or chilled desserts․ Its simplicity allows for creative freedom‚ whether you’re crafting a classic tart or an innovative dessert combination․ This mix is a time-saving solution for both simple and elaborate pie creations․
It’s a must-have for any dessert enthusiast․

6․3 Trifles and Layered Desserts

Jell-O No-Bake Crust Mix is an excellent base for trifles and layered desserts‚ offering a crunchy‚ no-fuss foundation․ Its ease of preparation allows you to focus on layering creamy fillings‚ fruits‚ and custards․ The crust adds a delightful texture contrast‚ ensuring a balanced dessert experience․ Perfect for multi-layered creations‚ it provides stability without sogginess․ Customize by adding spices or nuts to the crust for extra flavor‚ making it a versatile choice for both traditional and modern layered desserts․ It’s a perfect fit for any occasion․
Effortless and delicious‚ it enhances any trifle recipe․

Storing the Crust

Store the Jell-O No-Bake Crust in an airtight container․ For short-term storage‚ refrigerate up to 3 days․ For longer storage‚ freeze up to 3 months․ Thaw overnight in the fridge before use․

7․1 Short-Term Storage

For short-term storage‚ place the Jell-O No-Bake Crust in an airtight container and refrigerate at 40°F or below․ It will remain fresh for up to 3 days․ Ensure the container is sealed tightly to prevent moisture or odors from affecting the crust․ If using a pan‚ wrap it securely with plastic wrap or aluminum foil before refrigerating․ This method maintains the crust’s texture and freshness perfectly for immediate use in desserts․

7․2 Freezing for Later Use

To freeze the Jell-O No-Bake Crust‚ press it into a pan lined with parchment paper․ Wrap the pan tightly with plastic wrap or aluminum foil‚ ensuring no air exposure․ Place in a freezer-safe bag for extra protection․ Store in the freezer for up to 3 months․ When ready to use‚ thaw overnight in the refrigerator․ Freezing preserves the crust’s texture‚ making it convenient for future desserts without compromising quality․ This method is ideal for advance meal prep or special occasions․

The Jell-O No-Bake Crust Mix is a versatile and convenient solution for dessert preparation․ Its ease of use and quick setup make it ideal for both novice bakers and experienced chefs․ Whether you’re crafting cheesecakes‚ pies‚ or layered desserts‚ this mix ensures a sturdy and flavorful base․ By following the instructions and tips provided‚ you can achieve professional-quality results without the hassle of baking․ This mix is a must-have for anyone looking to elevate their dessert game effortlessly․

upc study guide

The Uniform Plumbing Code (UPC) Study Guide is a comprehensive resource for plumbing professionals, providing in-depth insights into the UPC’s standards and requirements․ It ensures adherence to safety, efficiency, and legal compliance, making it essential for licensing exams and everyday plumbing practices․

1․1 Overview of the UPC and Its Importance

The Uniform Plumbing Code (UPC) is a model code that provides uniform standards for plumbing systems, ensuring public health, safety, and water efficiency․ Ratified by many U․S․ municipalities, the UPC addresses design, installation, and maintenance of plumbing infrastructure․ Its importance lies in enforcing consistent practices nationwide, reducing risks of unsafe installations, and promoting water conservation․ The UPC study guide serves as a critical tool for professionals, helping them understand and comply with these standards․ By mastering the UPC, plumbing professionals can ensure their work meets legal and ethical requirements, protecting both the environment and public well-being while staying updated on the latest industry practices and advancements․

1;2 Key Features of the UPC Study Guide

The UPC Study Guide is designed to simplify the complexities of the Uniform Plumbing Code, offering a structured approach to learning․ It includes detailed explanations of code sections, practical examples, and real-world applications to enhance understanding․ The guide features chapter breakdowns, highlighting key areas such as water heaters, drainage systems, and permits․ Interactive tools like flashcards and sample questions are also provided, allowing users to test their knowledge․ Additionally, it covers recent updates and changes in plumbing standards, ensuring users stay current with the latest regulations․ This comprehensive resource is tailored for both newcomers and experienced professionals, making it an indispensable tool for exam preparation and daily plumbing tasks․

Understanding the Structure of the UPC

The UPC is logically organized into chapters and sections, covering plumbing systems, materials, and installation requirements․ Its clear structure ensures easy navigation and comprehensive understanding of regulations․

2․1 Chapters and Sections of the UPC

The UPC is divided into multiple chapters, each addressing specific aspects of plumbing systems․ Chapters cover topics like water heaters, drainage systems, and gas piping․ Sections within these chapters provide detailed requirements for materials, installation, and safety standards․ For example, Chapter 6 focuses on water sizing, while sections like 103․4 and 104․0 detail permits and inspections․ This structured approach ensures clarity and ease of reference for professionals․ The study guide aligns with this framework, offering insights into navigating these chapters and sections effectively․ Understanding the hierarchy of chapters and sections is key to mastering the UPC and applying its principles in real-world scenarios․

2․2 Navigation Tips for the UPC Codebook

Mastering the UPC codebook requires effective navigation strategies․ Start by thoroughly reviewing the table of contents to understand the structure of chapters and sections․ Use the index to quickly locate specific topics, such as water heaters or drainage systems․ Pay attention to cross-references, as they guide you to related sections․ Tabbing or bookmarking frequently used pages can save time․ Familiarize yourself with the formatting, as key terms are often bolded or italicized for emphasis․ Additionally, utilize the appendices for supplementary information and tables․ Regularly consulting the codebook and practicing with sample questions will enhance your understanding․ These tips ensure efficient navigation, helping you quickly find and apply the necessary guidelines in your plumbing projects and studies․

Key Chapters in the UPC Study Guide

The UPC Study Guide focuses on critical chapters like water heaters, drainage systems, and water efficiency․ These sections provide detailed insights into installation, safety, and compliance standards, essential for plumbing professionals․

3․1 Water Heaters and Water Heating Systems

The UPC Study Guide dedicates a detailed section to water heaters and water heating systems, emphasizing safe and efficient installations․ It covers requirements for temperature and pressure relief valves, sizing, and venting․ The guide also addresses energy efficiency standards and proper installation practices to ensure compliance with local codes․ Key topics include safety devices, system design, and maintenance protocols․ Additionally, it highlights the importance of permits and inspections for water heater installations․ This chapter is crucial for plumbing professionals to understand the technical and legal aspects of water heating systems, ensuring they meet UPC standards for safety, performance, and environmental impact․

3․2 Drainage and Waste Disposal Systems

The UPC Study Guide thoroughly covers drainage and waste disposal systems, focusing on proper installation and maintenance․ Key components include traps to prevent sewer gas entry, vents for pressure regulation, and interceptors to separate contaminants․ The guide emphasizes using approved materials, correct pipe sizing, and proper slope to ensure efficient drainage․ It also addresses common violations, such as improper connections and lack of maintenance, which can lead to system failures․ By adhering to UPC standards, professionals ensure safe and sanitary plumbing systems, complying with local regulations and preventing health hazards․ Additionally, the guide highlights the importance of regular inspections to identify and address potential issues before they escalate, ensuring long-term system reliability and public health safety․

Essential Topics for Plumbing Professionals

The UPC Study Guide covers critical areas, including permits, inspections, water efficiency, and sanitation standards, ensuring professionals understand compliance requirements and best practices for safe, reliable systems․

4․1 Permits, Inspections, and Code Enforcement

Permits, inspections, and code enforcement are critical components of the UPC, ensuring compliance with safety and regulatory standards․ The study guide details the process for obtaining permits, including application requirements and exemptions․ It emphasizes the role of inspections in verifying installations and addressing potential violations․ Code enforcement officers are responsible for upholding these standards, with powers granted under sections like 103․4 (Right of Entry) and 104․0 (Permits)․ The guide also covers penalties for non-compliance, highlighting the importance of adherence․ Understanding these procedures is vital for professionals to navigate legal and practical aspects of plumbing work, ensuring systems are safe, efficient, and meet all regulatory demands․ Proper documentation and communication with authorities are stressed throughout the guide․

4․2 Water Efficiency and Sanitation Standards

Water efficiency and sanitation standards are central to the UPC, focusing on conserving resources while maintaining public health․ The study guide emphasizes strategies like low-flow fixtures and greywater systems to reduce consumption․ It also addresses sanitation through proper system designs that prevent contamination․ These standards ensure safe water supply and waste disposal, aligning with the Water Efficiency and Sanitation Standard (WE•Stand)․ Professionals learn to balance efficiency with hygiene, crucial for sustainable plumbing practices․ The guide provides detailed requirements and best practices, supported by case studies and interactive tools, helping users master these critical aspects of modern plumbing systems․

Effective Study Strategies for Mastering the UPC

Effective study strategies for the UPC include creating structured study schedules, using flashcards for key terms, and practicing with sample questions to reinforce understanding and prepare for exams․

5․1 Creating a Study Schedule and Flashcards

Creating a structured study schedule is crucial for mastering the UPC․ Dedicate specific time slots to each chapter, ensuring consistent progress․ Flashcards are an effective tool for memorizing key terms, code sections, and complex concepts․ Write the term or question on one side and the explanation or answer on the other․ Regularly review and update your flashcards to reinforce learning․ Pairing your schedule with active recall techniques, like quizzing yourself, enhances retention․ Organize your study materials, including the UPC codebook and study guide, for easy access․ Consistency and organization are key to absorbing the vast information efficiently and performing well on licensing exams․

5․2 Practicing with Sample Questions and Case Studies

Practicing with sample questions and case studies is essential for applying UPC knowledge effectively․ Utilize the study guide’s practice exams to familiarize yourself with the test format and identify weak areas․ Case studies provide real-world scenarios, helping you understand how codes are applied in practical situations․ Analyze each problem, referencing the UPC codebook to verify solutions․ Time yourself during practice to simulate exam conditions and improve time management․ Review incorrect answers thoroughly to avoid repeating mistakes․ Engage with online forums or study groups to discuss challenging questions and gain insights from others․ Regular practice strengthens problem-solving skills, ensuring readiness for the licensing exam and real-world plumbing challenges․

Additional Resources for UPC Preparation

Additional resources include official UPC codebooks, study guides, and online platforms offering interactive learning tools and practice exams to enhance preparation and understanding of plumbing codes․

6․1 Recommended Codebooks and Study Materials

For effective UPC preparation, the official Uniform Plumbing Code (UPC) codebook is essential, offering detailed standards and regulations․ Supplement this with study guides tailored to the 2021 or 2024 UPC editions, which include interactive programs and practice exams; The ASPE Plumbing Engineering Design Handbook provides additional insights for advanced applications․ Flashcards and summaries of key chapters, such as water heaters and drainage systems, are valuable for quick reviews․ Utilize the IAPMO Codes app for mobile access to purchased materials․ Combining these resources ensures a comprehensive understanding of the UPC, aiding both exam preparation and real-world plumbing projects․

6․2 Online Tools and Interactive Learning Platforms

Online tools and interactive platforms enhance UPC study efficiency, offering dynamic resources for plumbing professionals․ The IAPMO Codes app provides mobile access to purchased UPC materials, enabling anytime, anywhere study․ Interactive learning platforms feature practice exams, video tutorials, and real-world case studies to simulate exam conditions and practical scenarios․ These tools allow learners to track progress, identify weaknesses, and reinforce understanding of critical topics like water efficiency and drainage systems․ Additionally, forums and discussion groups connect professionals for shared learning and problem-solving․ Leveraging these digital resources complements traditional study materials, ensuring a well-rounded and effective approach to mastering the Uniform Plumbing Code․

The Uniform Plumbing Code (UPC) Study Guide is an indispensable tool for plumbing professionals, offering a structured approach to understanding and adhering to the UPC․ By covering essential topics such as permits, water efficiency, and key chapters on water heaters and drainage systems, the guide ensures comprehensive preparation for licensing exams and real-world applications․ Utilizing study strategies like flashcards and practice questions, along with recommended resources and online tools, enhances learning efficiency; Mastery of the UPC is crucial for ensuring safe, sanitary, and efficient plumbing systems․ This guide provides the foundation needed to navigate the complexities of plumbing codes, making it a vital resource for both newcomers and experienced professionals in the field․

2015 nissan altima maintenance guide

The 2015 Nissan Altima is a reliable and fuel-efficient vehicle, known for its comfort and performance. Regular maintenance is essential to ensure longevity, safety, and optimal functionality. This guide provides a comprehensive overview of necessary upkeep tasks, helping owners preserve their vehicle’s health and value over time.

1.1 Overview of the 2015 Nissan Altima Features and Reliability

The 2015 Nissan Altima is renowned for its fuel efficiency, comfortable ride, and robust features. It offers a choice of a 2.5L 4-cylinder or 3.5L V6 engine, delivering impressive performance. Known for reliability, it provides lower maintenance costs compared to competitors. While some CVT transmission issues have been reported, overall owner satisfaction remains high, making it a dependable choice for daily driving.

1.2 Importance of Regular Maintenance for Longevity

Regular maintenance is crucial for extending the lifespan of your 2015 Nissan Altima. Adhering to scheduled services ensures optimal performance, prevents costly repairs, and maintains fuel efficiency. Proper care, including oil changes and inspections, helps identify potential issues early, safeguarding both safety and reliability. Consistent upkeep also preserves the vehicle’s value and provides peace of mind for years of trouble-free driving.

Oil Change and Lubrication

Regular oil changes are vital for the 2015 Nissan Altima’s engine health. Proper lubrication ensures smooth operation, reduces friction, and prevents premature wear, enhancing overall performance and longevity.

2.1 Recommended Oil Types and Viscosity for the 2015 Nissan Altima

The 2015 Nissan Altima requires 5W-20 or 5W-30 synthetic oil for optimal performance. These viscosity grades ensure proper engine lubrication in extreme temperatures, reducing wear and improving fuel efficiency. Always use Nissan-approved or equivalent oils to maintain warranty and ensure compatibility with the engine’s design.

2.2 Oil Change Intervals and Procedures

Nissan recommends oil changes every 5,000 to 7,500 miles for the 2015 Altima. Use synthetic oil for better engine protection. Proper procedure involves draining the old oil, replacing the filter, and refilling with the recommended viscosity. Always use Nissan-approved materials to ensure compatibility and maintain warranty coverage. Dispose of used oil responsibly to protect the environment.

Tire Maintenance

Proper tire maintenance ensures safety, fuel efficiency, and handling. Regularly check pressure, balance, and alignment; Inspect tread depth and look for signs of uneven wear or damage.

3.1 Proper Tire Pressure Levels and Monitoring

Check tire pressure monthly and before long trips using a reliable gauge. Refer to the tire information placard or owner’s manual for recommended levels. Under-inflation can lead to uneven wear and reduced fuel efficiency, while over-inflation may cause a harsh ride. Ensure tires are cold for accurate readings. Proper pressure maintains tire health, safety, and vehicle performance;

3.2 Tire Rotation Patterns and Frequency

Rotate tires every 5,000 to 8,000 miles to ensure even tread wear and maintain handling. Use the rearward cross pattern: move front tires to the rear on the opposite side, and rear tires straight to the front. This method optimizes tread distribution and prevents uneven wear. Always follow the owner’s manual recommendations for specific rotation guidelines tailored to the 2015 Nissan Altima;

Regularly inspect tires for uneven wear, cracks, or punctures. Check tread depth using the penny test: insert a penny with Lincoln’s head down; if his hair is visible, replace tires. Look for bulges or blisters on sidewalls. Addressing issues early prevents costly repairs and ensures safety on the road for your 2015 Nissan Altima.

Brake System Care

3.3 Inspecting Tires for Wear and Damage

Inspect tires monthly for uneven wear, cracks, or punctures. Use the penny test to check tread depth: insert a penny with Lincoln’s head down; if his hair is visible, replace tires. Look for sidewall damage, like bulges or blisters. Proper alignment and regular rotations prevent uneven wear. Addressing issues promptly ensures safety and extends tire life for your 2015 Nissan Altima.

4.1 Signs of Worn Brake Pads and Rotors

Common signs of worn brake pads include squealing or grinding noises when braking. Spongy brake pedals or vibrations during braking may indicate worn pads or warped rotors. Visual inspections reveal thin pads or uneven rotor wear. Ignoring these signs can lead to brake failure. Regular checks and prompt replacements are crucial for safety and preventing costly repairs in your 2015 Nissan Altima.

4.2 Brake Fluid Replacement and Inspection

Brake fluid replacement is essential for maintaining the hydraulic system’s integrity. Moisture absorption can degrade fluid performance, leading to brake failure. Inspect the reservoir for low levels or contamination. Replace brake fluid every 30,000 to 50,000 miles, using the recommended DOT rating. Always check for leaks and test the pedal feel after service to ensure proper braking functionality in your 2015 Nissan Altima.

Timing Chain and Water Pump Maintenance

Regular inspection and maintenance of the timing chain and water pump are crucial for preventing costly repairs and ensuring engine reliability in your 2015 Nissan Altima.

5.1 Common Issues with the Timing Chain in 2015 Models

The 2015 Nissan Altima may experience timing chain issues such as excessive noise, stretching, or improper tension, which can lead to engine misfires or failure. Regular inspections and ensuring proper lubrication are key to preventing these problems. Addressing symptoms early helps avoid costly repairs and maintains engine performance. Monitoring for unusual sounds or decreased power is essential for timely intervention.

5.2 Water Pump Replacement and Maintenance Tips

The water pump in the 2015 Nissan Altima may need replacement due to wear or leaks. Symptoms include coolant leaks, overheating, or unusual noises. Regular inspections and coolant checks are crucial. Replace the water pump promptly if issues arise, using high-quality parts. Ensure proper installation and bleeding of the cooling system. Routine maintenance every 50,000–100,000 miles helps prevent premature failure and engine damage.

Battery and Electrical System

Regular battery checks are vital for reliable starting and electrical performance. Inspect terminals for corrosion and ensure proper connections. Test battery voltage and charge levels annually to prevent unexpected failures and maintain optimal electrical system function.

6.1 Battery Life Expectancy and Testing

The 2015 Nissan Altima’s battery typically lasts 4-6 years, depending on usage and environmental factors. Signs of aging include slow engine crank and dimming lights. Testing involves checking voltage with a multimeter (12.4-12.7V fully charged) and performing a load test to ensure proper function. Regular inspections and clean connections help maintain reliability and prevent sudden failures, ensuring consistent electrical system performance.

6.2 Maintaining the Electrical System and Avoiding Drain

Regularly inspect electrical components like battery terminals and the alternator belt to prevent sudden failures. Avoid excessive accessory use when the engine is off and ensure all lights are turned off to prevent battery drain. Using high-quality replacements and avoiding overload ensures system efficiency. These practices help maintain reliability and extend component lifespan, ensuring consistent electrical system performance over time.

Air Filter and HVAC Maintenance

Regular air filter replacements improve engine performance and fuel efficiency. A clean cabin air filter ensures a comfortable and healthy in-car environment. Schedule inspections for HVAC systems.

7.1 Replacing the Engine Air Filter

Replacing the engine air filter every 15,000 to 30,000 miles enhances fuel efficiency and performance. Locate the filter under the hood, release the clips, and remove the housing. Inspect for dirt, then install a new filter, ensuring it’s properly sealed. This simple process improves airflow and protects your engine from dust and debris.

7.2 Maintaining the Cabin Air Filter and HVAC System

Regularly replacing the cabin air filter every 12,000 to 18,000 miles ensures clean air circulation inside the vehicle. Locate the filter behind the glovebox, remove the screws, and replace it with a new one. Additionally, inspect the HVAC system for leaks and dust buildup to maintain optimal heating, cooling, and air quality, enhancing passenger comfort and reducing odors.

CVT Transmission Maintenance

Regular CVT fluid checks and changes are crucial to prevent wear and slippage. Monitor for unusual noises or hesitation, and avoid extreme temperatures to ensure smooth operation;

8.1 Understanding the CVT Transmission

The CVT (Continuously Variable Transmission) in the 2015 Nissan Altima provides smooth acceleration by adjusting gear ratios seamlessly. Unlike traditional automatic transmissions, it uses belts and pulleys to optimize fuel efficiency. Regular fluid changes and monitoring are essential to maintain its performance and prevent common issues like slipping or hesitation.

8.2 Fluid Changes and Monitoring for CVT Health

Regular CVT fluid changes are crucial for the 2015 Nissan Altima to ensure smooth performance. Use only recommended Nissan CVT fluid for optimal functionality. Change the fluid every 30,000 to 60,000 miles to prevent degradation. Monitor levels monthly and check for contamination or low levels. Neglecting this can lead to costly repairs; follow the owner’s manual for specifications.

Exterior and Interior Care

Regular washing and waxing protect the paint and exterior surfaces. Clean the interior regularly, vacuum seats, and use protective products on upholstery to maintain condition and longevity.

9.1 Regular Washing and Waxing Techniques

Wash your Altima every two weeks using mild soap and soft sponges to avoid scratches. Wax every three months to protect the paint and maintain shine. Avoid harsh chemicals and direct sunlight during cleaning. Use microfiber towels to dry the vehicle thoroughly, preventing water spots. Regular waxing also helps repel dirt and UV damage, preserving the exterior finish.

9.2 Interior Cleaning and Upholstery Protection

Vacuum seats and carpets regularly to remove dirt and debris. Use fabric cleaners for stains on upholstery. Avoid harsh chemicals that may damage materials. Condition leather seats every six months to maintain suppleness. Protect surfaces from spills and UV rays with seat covers and window shades. Regular cleaning prevents odors and extends the life of interior components, ensuring a comfortable and pristine cabin environment;

Regular maintenance is key to extending the life of your 2015 Nissan Altima. Follow this guide to ensure reliability, performance, and safety while driving.

10.1 Summary of Key Maintenance Practices

Regular oil changes, tire rotations, and brake inspections are essential for the 2015 Nissan Altima. Ensure proper CVT transmission fluid levels and inspect the timing chain for wear. Replace the air filters and maintain the battery to avoid electrical issues. Follow the recommended maintenance schedule to preserve performance, reliability, and longevity of your vehicle.

10.2 Scheduling and Tracking Maintenance

Use a digital calendar or app to schedule oil changes, tire rotations, and other tasks. Track mileage and follow the owner’s manual for recommended intervals. Regularly review and update your maintenance log to ensure no service is overlooked. This organized approach helps prevent overlooked inspections and keeps your Altima in peak condition. Consistency is key to long-term reliability and performance. Stay proactive with your vehicle’s care.

canon pixma ts3322 manual

This manual provides a comprehensive guide to understanding and operating the Canon PIXMA TS3322 printer․ It covers setup, features, troubleshooting, and maintenance tips for optimal performance․

1․1 Overview of the Canon PIXMA TS3322 Printer

The Canon PIXMA TS3322 is a versatile all-in-one wireless printer designed for home and small office use․ It offers high-quality printing, scanning, and copying capabilities․ With its compact design and wireless connectivity, it supports mobile printing via the Canon PRINT app․ The printer uses FINE cartridge technology for vibrant and detailed outputs․ It features an intuitive interface with an LCD screen for easy navigation․ The TS3322 is ideal for everyday printing needs, providing reliable performance and versatility for various tasks․ Its user-friendly design makes it accessible for both beginners and experienced users․

1․2 Importance of the Manual for Users

The Canon PIXMA TS3322 manual is essential for users to fully utilize the printer’s features and troubleshoot common issues․ It provides detailed instructions for setting up the printer, understanding its functions, and resolving errors․ The manual ensures users can navigate the device confidently, whether they are tech-savvy or new to printing․ By following the guide, users can optimize printing quality, maintain the printer, and extend its lifespan․ It also offers solutions for connectivity problems and driver installations, making it a vital resource for seamless operation and enhancing overall printing efficiency․

Setting Up the Canon PIXMA TS3322

This chapter guides you through the initial setup of the Canon PIXMA TS3322, including unboxing, physical setup, and connecting via USB or wireless for smooth operation․

2․1 Unboxing and Physical Setup

Start by carefully unboxing the Canon PIXMA TS3322 printer and removing all protective materials․ Ensure all orange tape and packaging are discarded․ Next, locate the power cord and connect it to a nearby outlet․ Turn on the printer and allow it to initialize․ Remove the protective film from the control panel and ink cartridge area․ Open the cartridge holder and gently insert the provided ink cartridges, ensuring they click into place․ Finally, load the paper tray with the recommended paper type and size․ This completes the physical setup, readying the printer for further configuration․

2․2 Wired and Wireless Connection Options

The Canon PIXMA TS3322 offers flexible connectivity options․ For a wired connection, use a USB cable to connect the printer to your computer, ensuring direct communication․ For wireless setup, download the Canon PRINT app or use the Easy Wireless Connect method․ Ensure your printer and device are on the same network․ Follow on-screen instructions to complete the connection․ Wireless printing allows convenience, while the USB option provides reliability․ Choose the method that best suits your setup needs for seamless printing, scanning, and copying experiences․

2․3 Downloading and Installing Printer Drivers

To ensure optimal performance, download and install the latest Canon PIXMA TS3322 drivers from the official Canon website․ Visit ij․start․canon or cannon․com/ijsetup and follow the on-screen instructions․ Select your printer model and operating system to download the appropriate drivers․ Run the installer and complete the setup process․ Ensure your printer is connected to the same network or via USB during installation․ Restart your device and printer after installation for proper functionality․ Regularly update drivers to access new features and resolve compatibility issues․ Proper installation ensures seamless printing, scanning, and copying operations․

Using the Canon PIXMA TS3322 Manual Effectively

The manual is designed to guide users through setup, operation, and troubleshooting․ It is divided into clear sections, making it easy to find information quickly and efficiently․

3․1 Navigating the Manual Sections

The Canon PIXMA TS3322 manual is organized into clear, numbered sections for easy navigation․ Each chapter is divided into subsections, making it simple to locate specific information․ The manual begins with an introduction, followed by setup instructions, operational guides, and advanced features․ Users can quickly find troubleshooting solutions or maintenance tips by referencing the table of contents․ Key features and functions are highlighted, with step-by-step instructions provided for complex tasks․ The manual also includes a glossary and index for rapid access to specific terms or topics․ By understanding the structure, users can efficiently navigate and utilize the manual to its full potential․

3․2 Key Features and Functions Explained

The Canon PIXMA TS3322 manual details the printer’s key features, including wireless printing, mobile connectivity, and all-in-one functionality․ It explains how to use the Canon PRINT app for seamless mobile printing and scanning․ The manual also covers the printer’s compact design and its suitability for home and small office use․ Additionally, it provides guidance on setting up and using the scanner and copier functions․ The manual emphasizes the importance of proper installation of ink cartridges and drivers for optimal performance․ By understanding these features, users can maximize the printer’s capabilities and enjoy high-quality printing, scanning, and copying experiences․

3․3 Troubleshooting Common Issues

The Canon PIXMA TS3322 manual offers solutions for common issues, such as USB connection problems and driver installation errors․ It guides users through resolving error codes like E13 or E16, often related to ink cartridge installation․ Additionally, the manual addresses wireless connectivity issues, providing steps to reconnect the printer to a network․ Troubleshooting sections also cover paper jams, print quality problems, and scanner malfunctions․ By following the manual’s instructions, users can identify and fix issues quickly, ensuring uninterrupted printing, scanning, and copying․ Regular maintenance tips are also included to prevent future problems and optimize performance․

Advanced Features of the Canon PIXMA TS3322

The Canon PIXMA TS3322 offers wireless printing, mobile solutions via the Canon PRINT app, and efficient scan and copy functions, enhancing productivity and convenience for users․

4․1 Wireless Printing Capabilities

The Canon PIXMA TS3322 supports wireless printing, enabling seamless connectivity to smartphones, tablets, and computers․ Using the Canon PRINT app, users can print photos and documents directly from their devices․ The printer also supports Apple AirPrint and Google Cloud Print, making wireless printing convenient across various platforms․ With Wi-Fi Direct, devices can connect directly to the printer without needing a network․ This feature enhances productivity and flexibility, allowing users to print wirelessly from anywhere in their home or office․

4․2 Mobile Printing Solutions

The Canon PIXMA TS3322 offers versatile mobile printing solutions, allowing users to print directly from their smartphones and tablets․ The Canon PRINT app enables seamless printing of photos and documents from iOS and Android devices․ Additionally, the printer supports PIXMA Cloud Link, which allows printing from cloud services like Facebook, Instagram, and Google Drive․ Users can also print photos and documents stored on their mobile devices wirelessly․ This feature enhances convenience for mobile users, ensuring high-quality prints without the need for a computer․ The app also supports scanning and transferring files between the printer and mobile devices, making it a comprehensive solution for modern printing needs․

4․3 Scan and Copy Functions

The Canon PIXMA TS3322 features an integrated flatbed scanner, allowing users to scan documents and photos with ease․ The scanner supports a resolution of up to 600×1200 dpi, ensuring crisp and clear scans․ Users can scan directly to a computer, email, or a network folder for convenience․ The copy function provides options for resizing, adjusting brightness, and copying multiple pages in a single operation․ Wireless connectivity enables scanning and copying from mobile devices via the Canon PRINT app․ This feature-rich all-in-one printer is designed to streamline scanning and copying tasks, making it a versatile solution for home and small office needs․

Maintenance and Care of the Printer

Regular cleaning and replacing ink cartridges ensure optimal performance․ Follow manual guidelines for proper care to maintain print quality and extend the printer’s lifespan effectively․

5․1 Cleaning the Printer

Cleaning the Canon PIXMA TS3322 regularly ensures optimal performance and prevents dust buildup․ Power off the printer, then gently remove any debris from the exterior using a soft cloth․ For internal cleaning, use the printer’s automatic cleaning function via the control panel or printer software․ Avoid harsh chemicals, as they may damage the device․ Regularly check and clean the print head to maintain print quality․ Refer to the manual for detailed cleaning instructions and guidelines to ensure proper maintenance without causing damage to internal components․

5․2 Replacing Ink Cartridges

To replace ink cartridges in the Canon PIXMA TS3322, first, ensure the printer is turned on․ Open the top cover and wait for the print head to move to the replacement position․ Remove the empty cartridge by lifting it gently․ Unpack the new cartridge, ensuring not to touch the electrical contacts․ Align the new cartridge with the correct slot, matching the color marks, and push it in until it clicks․ Close the cover and allow the printer to perform the automatic cleaning cycle․ Always use genuine Canon ink cartridges for optimal performance․ Refer to the manual for detailed steps and compatibility information․

5․3 Routine Maintenance Tips

Regular maintenance ensures the Canon PIXMA TS3322 operates efficiently․ Clean the printer exterior with a soft cloth and gently wipe the print head to prevent dust buildup․ Align the print head periodically to maintain print quality․ Check for firmware updates via the Canon website to keep the printer up-to-date․ Store unused paper in a dry place to avoid moisture damage․ Use genuine Canon ink cartridges to prevent compatibility issues․ Perform routine nozzle checks and clean the paper feed roller if needed․ Turn off the printer when not in use to conserve energy․ Follow these tips to extend the printer’s lifespan and ensure consistent performance․

Troubleshooting Common Problems

This section helps resolve common issues like USB connection errors, driver installation problems, and error codes․ Refer to the manual for detailed solutions and troubleshooting steps․

6․1 USB Connection Issues

USB connection problems can prevent communication between your Canon PIXMA TS3322 and computer․ Common issues include the printer not being recognized or error messages during printing․ Check if the USB cable is securely connected to both devices․ Ensure the cable is not damaged or faulty․ Try using a different USB port or replacing the cable if necessary․ If issues persist, restart both the printer and computer․ Reinstalling the printer drivers may also resolve the problem․ Additionally, verify that the printer is properly configured in your operating system’s settings․ For further assistance, refer to the troubleshooting section in the manual or contact Canon support․

6․2 Installation and Driver Problems

Installation and driver issues are common challenges when setting up the Canon PIXMA TS3322․ Problems may include failed driver installations or drivers not being recognized․ Ensure you download the correct drivers from Canon’s official website to avoid corrupted files․ Restart your printer and computer after installation․ If issues persist, check for driver updates or reinstall the drivers․ Verify that the printer is properly connected via USB or wirelessly before installing․ For troubleshooting, refer to the manual or visit Canon’s support page for detailed guidance․ Properly installed drivers are essential for smooth printer operation and functionality․

6․3 Error Codes and Solutions

Error codes on the Canon PIXMA TS3322 indicate specific issues that need immediate attention․ Common errors include paper jams, ink tank problems, or connectivity issues․ For example, an “E” series error often relates to ink cartridges, while “B” series errors may indicate paper jams․ Refer to the manual or Canon’s support website to identify the exact cause․ Solutions may involve resetting the printer, replacing ink tanks, or clearing paper jams․ Ensure all connections are secure and restart the printer after addressing the issue․ Regular maintenance and updates can help prevent recurring error codes and ensure smooth operation․

The Canon PIXMA TS3322 manual offers comprehensive guidance for setup, features, and troubleshooting, ensuring optimal printer performance․ Refer to it for resolving issues and maximizing functionality․

7․1 Summary of Key Points

The Canon PIXMA TS3322 manual provides essential guidance for printer setup, operation, and troubleshooting․ It covers wireless connectivity, ink cartridge replacement, and resolving common issues like USB and driver problems․ The manual emphasizes routine maintenance to ensure longevity and optimal performance․ With detailed instructions for scanning, copying, and printing, it serves as a comprehensive resource for users․ By following the manual, users can unlock advanced features and maintain their printer efficiently, ensuring high-quality output and hassle-free functionality․

7․2 Final Tips for Optimal Printer Use

For optimal use of your Canon PIXMA TS3322, regularly maintain the printer by cleaning it and updating its software․ Always check ink levels and replace cartridges as needed․ Ensure proper ventilation and avoid overheating․ Use genuine Canon ink and compatible paper types for best results․ Download the Canon PRINT app for seamless mobile printing and utilize the Canon IJ Scan Utility for scanning needs․ By following these tips, you can ensure high-quality prints, extend the printer’s lifespan, and enjoy hassle-free functionality for years to come․

guide to navigating an internet resource crossword

Discovering the answer to the crossword clue “Guide to navigating an internet resource” leads us to the term sitemap, a tool designed to help users explore and understand website structures efficiently․

1․1 Understanding the Clue: “Guide to Navigating an Internet Resource”

The crossword clue “Guide to navigating an internet resource” is a popular puzzle question that challenges solvers to identify a tool or method used for exploring online content․ The clue points to a well-known solution in web navigation, which is sitemap․ This term refers to a visual or textual representation of a website’s structure, aiding users in finding specific resources or pages․ The clue’s phrasing emphasizes the role of the tool in guiding users through internet resources effectively, making it a fitting description for the answer․

1․2 Importance of Crossword Puzzles in Cognitive Development

Crossword puzzles are highly beneficial for cognitive development, enhancing memory, vocabulary, and problem-solving skills․ They stimulate the brain by challenging individuals to think critically and connect clues to solutions․ Regularly solving crosswords can improve mental agility, concentration, and linguistic abilities․ For instance, deciphering clues like “Guide to navigating an internet resource” requires logical thinking and knowledge retrieval, making it an excellent exercise for sharpening cognitive functions․ This mental stimulation is particularly valuable for learners and those seeking to maintain or improve their intellectual acuity․

What is a Sitemap?

A sitemap is a guide that outlines the structure of a website, helping users and search engines navigate and understand its layout and content organization effectively․

2․1 Definition and Purpose of a Sitemap

A sitemap is a visual or textual representation of a website’s structure, detailing its pages, links, and content organization; Its primary purpose is to provide a clear guide for users and search engines to navigate and understand the site’s layout efficiently․ By outlining the hierarchy and relationships between different sections, a sitemap enhances accessibility and ensures that all content is easily discoverable․ It is an essential tool for improving user experience and search engine optimization․

2․2 How a Sitemap Helps in Navigating an Internet Resource

A sitemap acts as a roadmap for users, simplifying navigation by providing a clear overview of a website’s structure․ It allows visitors to quickly locate specific pages or content without getting lost in complex menus․ Additionally, sitemaps help search engines crawl and index pages more effectively, improving visibility․ This tool is particularly useful for large websites, ensuring users can efficiently find information and explore the site’s full offerings with minimal effort and confusion․

The Role of Sitemaps in Web Navigation

Sitemaps enhance user experience by providing a clear structure of a website, making it easier for visitors to navigate and find content efficiently․

3․1 Historical Development of Sitemaps

3․2 Modern Applications of Sitemaps in Website Design

Solving the Crossword Clue

Solving the clue involves analyzing the hint and considering word lengths․ The answer “sitemap” fits perfectly, guiding users through internet resources efficiently and accurately․

4․1 Step-by-Step Guide to Finding the Answer

To solve the crossword clue “Guide to navigating an internet resource,” start by understanding the hint․ Break down the phrase to identify key terms like “guide” and “navigate․” Consider the context of internet resources and think about tools used for navigation․ Brainstorm related terms, such as “sitemap,” which is commonly associated with website navigation․ Check the letter count to ensure it fits the crossword grid․ Verify the answer by cross-referencing with known solutions or crossword solvers․ Confirm that “sitemap” aligns with the clue’s description․ This methodical approach ensures accuracy and efficiency in finding the correct answer․

4․2 Tips for Understanding Crossword Clues

Understanding crossword clues requires a mix of vocabulary, logic, and pattern recognition․ Start by carefully reading the clue and identifying key words․ Look for prefixes, suffixes, or anagrams that might hint at the answer․ Consider the context of the clue, such as “navigating an internet resource,” which suggests a tool like a sitemap․ Use crossword solvers or dictionaries to verify potential answers․ Additionally, cross-reference the clue with known solutions to ensure accuracy․ Pay attention to wordplay, puns, or double meanings, as these are common in crosswords․ Practice regularly to improve your skill in deciphering clues efficiently․

The Answer: Sitemap

The crossword clue “Guide to navigating an internet resource” is solved by “sitemap,” a tool organizing web content for easy navigation and accessibility․

5․1 Explanation of the Term “Sitemap”

5․2 Why “Sitemap” is the Correct Answer

The term sitemap perfectly fits the crossword clue “Guide to navigating an internet resource” because it directly refers to a tool designed to help users and search engines navigate a website’s structure․ A sitemap outlines all pages and sections, making it an essential guide for exploring online resources․ Its relevance to web navigation and its 7-letter length make it the ideal solution for the clue․ This alignment confirms sitemap as the most accurate and logical answer․

Benefits of Solving Crossword Puzzles

Solving crosswords enhances cognitive skills like memory, vocabulary, and logical thinking․ It also reduces stress and boosts confidence, making it a rewarding mental exercise for all ages․

6․1 Cognitive Benefits of Crossword Puzzles

Solving crosswords offers significant cognitive benefits, including enhanced memory, improved problem-solving skills, and better logical thinking․ These puzzles stimulate the brain, promoting mental agility and sharpness․ They also strengthen vocabulary and linguistic abilities, while fostering patience and focus․ Regularly engaging in crosswords can delay cognitive decline and improve overall mental health․ The challenging nature of crosswords ensures continuous brain exercise, making them an excellent activity for lifelong learning and intellectual growth․

6․2 Enhancing Vocabulary and Knowledge

Crossword puzzles are an excellent way to expand your vocabulary and broaden your knowledge base․ By encountering new words in clues, players are encouraged to explore their meanings, leading to a natural enhancement of linguistic skills․ Crosswords often cover a wide array of topics, from history to science and literature, which helps in acquiring a more comprehensive understanding of various subjects․ This exposure not only improves vocabulary but also equips individuals with diverse knowledge that can be applied in real-life conversations and intellectual pursuits, making crosswords a valuable tool for lifelong learning and personal growth․

Resources for Crossword Enthusiasts

Explore essential tools like Crossword Solver, NYT Crossword, and crossword apps such as Crossword Genius to enhance your solving experience and expand your skills effectively online․

7․1 Recommended Tools for Solving Crosswords

For solving crosswords effectively, consider using tools like the Crossword Solver, which helps find answers by inputting known letters or patterns․ Crossword Genius offers hints, explanations, and a database of clues․ The NYT Crossword app provides daily puzzles and archives for practice․ Additionally, browser extensions and mobile apps like Crossword Puzzle Free or Lexulous can enhance your solving experience․ These tools are ideal for both beginners and experienced enthusiasts, offering features like auto-fill, word lists, and progress tracking to make solving crosswords more enjoyable and efficient․

7․2 Popular Crossword Platforms and Apps

Several platforms and apps are available for crossword enthusiasts, offering a variety of puzzles and interactive features․ The New York Times Crossword app is a favorite, providing daily puzzles and an archive of past crosswords․ Crossword Puzzle Free and Lexulous are also popular, offering both crosswords and word games․ Additionally, Crosswords With Friends combines social interaction with puzzle-solving, while Crossword Champ offers real-time competitions․ These tools cater to different skill levels and preferences, making crossword solving accessible and enjoyable for everyone․

The Future of Crossword Puzzles

Technology is revolutionizing crosswords, with interactive platforms, AI-generated puzzles, and virtual reality experiences emerging, ensuring crosswords remain engaging and accessible for future generations online․

8․1 How Technology is Changing Crosswords

Technology is transforming crosswords by introducing interactive platforms, AI-generated puzzles, and virtual reality experiences․ Online tools now offer real-time hints, solving aids, and community features, enhancing accessibility and engagement․ Mobile apps enable puzzle-solving on-the-go, while automated scoring and leaderboards add a competitive edge․ AI algorithms can create customized crosswords based on skill levels or themes, making them more personalized․ Additionally, virtual reality immersive experiences are being explored, allowing players to interact with crosswords in entirely new dimensions․ These innovations ensure crosswords remain dynamic and appealing to both traditional and modern audiences, blending nostalgia with cutting-edge technology to foster a vibrant crossword culture in the digital age․

8․2 The Rise of Online Crossword Communities

Online crossword communities are flourishing, offering enthusiasts a space to solve puzzles, share strategies, and connect with fellow solvers․ Platforms like Reddit’s r/crossword or specialized apps provide forums for discussing clues and trends․ These communities foster collaboration, with members often pooling knowledge to tackle challenging clues․ Events such as virtual puzzle tournaments and live-solving sessions further enhance engagement․ The rise of these communities highlights the social aspect of crosswords, turning a traditionally solitary activity into a shared, global experience that promotes camaraderie and intellectual growth among participants of all skill levels․

9․1 Summary of Key Points

The crossword clue “Guide to navigating an internet resource” has been explored in depth, revealing that the answer is sitemap, a tool that helps users navigate website structures․ A sitemap provides a clear map of a website’s pages, aiding in efficient navigation and organization․ Historically, sitemaps were simpler but have evolved to include detailed hierarchies and links․ They are crucial for both users and search engines, improving accessibility and SEO․ Solving such crossword clues enhances cognitive skills and vocabulary, making crosswords a valuable mental exercise․ Resources like crossword solvers and platforms further aid enthusiasts in solving puzzles effectively․

9․2 Encouragement to Explore More Crosswords

Crossword puzzles are not only entertaining but also intellectually stimulating, sharpening your mind and expanding your vocabulary․ Exploring more crosswords can be a rewarding hobby, offering a sense of achievement with each solved clue․ Whether you’re a casual solver or an avid enthusiast, crosswords provide endless opportunities to learn and grow․ With resources like solvers, apps, and online communities, navigating the world of crosswords has never been easier․ Embrace the challenge and enjoy the journey of discovery that each puzzle brings!