aeg favorit dishwasher user manual

The AEG Favorit dishwasher series offers advanced features, energy efficiency, and silent operation, designed for optimal cleaning performance․ Reading the user manual ensures proper usage and maintenance, guaranteeing longevity and safety․

1․1 Overview of the AEG Favorit Dishwasher Series

The AEG Favorit series offers a range of dishwashers with varying capacities and features, catering to different household needs․ Models like the 60820 and 40860 provide efficient cleaning and user-friendly interfaces․ The series emphasizes innovative design, with options for fully integrated units that blend seamlessly into modern kitchens․ This variety ensures there’s a Favorit dishwasher for every home, combining advanced functions with energy efficiency․

1․2 Importance of Reading the User Manual

Reading the user manual is crucial for understanding the AEG Favorit dishwasher’s features, operation, and maintenance․ It provides essential guidance on safety precautions, troubleshooting, and optimal usage․ The manual includes detailed instructions for specific models, ensuring users can maximize efficiency and longevity; Regularly referring to it helps prevent errors and ensures the appliance performs at its best․

Key Features of the AEG Favorit Dishwasher

The AEG Favorit dishwasher boasts silent operation, energy efficiency, and adjustable racks for flexible loading․ It features multiple wash programs, child safety locks, and advanced drying systems for optimal performance․

2․1 Control Panel and Button Functions

The control panel features intuitive buttons for selecting wash programs, starting/stopping cycles, and adjusting settings․ The program selector allows choosing between eco, intensive, or quick wash modes․ The start/stop button controls cycle operation, while indicators notify when rinse aid or salt levels are low․ Additional buttons enable options like child lock or delayed start for convenient use․

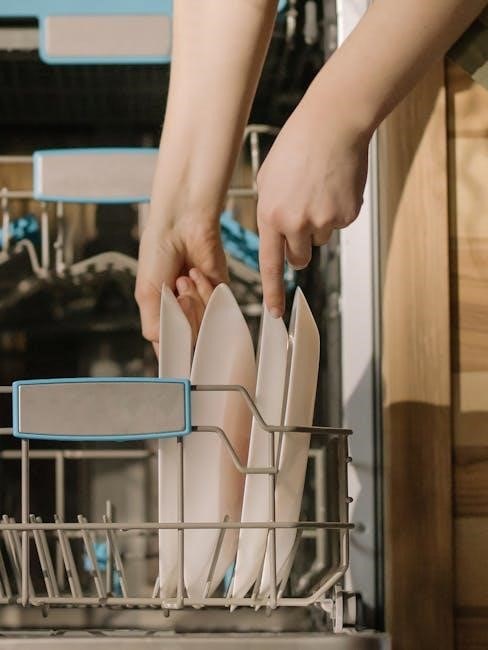
2․2 Rack Adjustability and Loading Capacity

The AEG Favorit dishwasher features adjustable racks with folding cup racks that can be folded up, saving space․ The upper rack’s adjustable tines accommodate various dish sizes, enhancing loading flexibility․ This design optimizes space and ensures efficient loading for optimal performance․

2․3 Silent Operation and Energy Efficiency

The AEG Favorit dishwasher operates quietly, ensuring minimal noise during cycles․ Its energy-efficient design achieves an A++ energy rating, reducing power consumption․ The Eco mode further enhances energy and water savings, making it environmentally friendly․ This balance of performance and efficiency ensures a quieter, greener, and cost-effective dishwashing experience․

Installation and Setup

Proper installation ensures optimal performance․ Level the dishwasher, connect water and power, and follow the manual’s step-by-step guide for a secure and correct setup․

3․1 Pre-Installation Requirements

Before installation, ensure the site has a stable, level floor and suitable water supply․ Verify electrical connections meet the dishwasher’s specifications․ Plan space for proper venting and access․ Check the manual for precise measurements and compatibility guidelines to ensure a smooth setup process․ Prepare necessary tools as recommended by the manufacturer․

3․2 Step-by-Step Installation Guide

Ensure the area is clear and prepared for installation․
Connect the water supply lines to the dishwasher’s inlet valves․
Install the electrical connections, ensuring they meet safety standards․
Secure the dishwasher to adjacent cabinets or walls for stability․
Test the appliance to ensure proper function and check for leaks․

3․3 Leveling the Dishwasher for Optimal Performance

Proper leveling ensures stable operation and prevents vibration․ Use a spirit level to check balance․ Adjust the dishwasher’s feet by turning them clockwise or counterclockwise until the appliance is evenly balanced․ Tighten the locking nuts after adjustment․ Check the balance again to confirm․ Proper leveling ensures smooth operation and prevents noise during cycles․

Daily Operation and Settings

The AEG Favorit dishwasher offers multiple wash programs and adjustable settings for daily use․ Selecting the right cycle and temperature ensures optimal cleaning․ Always use recommended detergent quantities and follow guidelines for best performance․

4․1 Understanding Wash Programs and Cycles

The AEG Favorit dishwasher features multiple wash programs, including Eco Mode, Heavy Duty, and Quiet cycles, designed for different cleaning needs․ Each cycle adjusts water temperature and intensity to optimize results․ The user manual details these programs, helping you choose the right one for your load size and soil level, ensuring efficient and effective cleaning every time․

4․2 Using Dishwasher Detergent and Rinse Aid

For optimal results, use dishwasher detergent specifically designed for automatic dishwashers․ The rinse aid ensures water drains efficiently, leaving dishes spot-free and glasses clear․ Fill the rinse aid dispenser as instructed in the manual․ Using the correct detergent dosage prevents residue and maintains performance․ Adjust rinse aid settings based on water hardness for best results․

4․3 Adjusting Water Temperature and Rinse Aid Settings

Adjusting water temperature ensures optimal cleaning for different wash cycles․ Lower temperatures are ideal for delicate items, while higher settings tackle heavy-duty cleaning․ Rinse aid settings should be adjusted based on water hardness to improve drying and reduce spotting․ Proper calibration ensures efficient performance and prevents issues like poor drying or excessive water spots on dishes․

Maintenance and Cleaning

Regular cleaning of the filter and drain ensures smooth operation․ Descaling helps maintain performance, while routine checks keep the dishwasher efficient and prolong its lifespan․

5․1 Cleaning the Filter and Drain

Regular cleaning of the filter and drain is essential for optimal performance․ Check and clean the filter after each use to remove food particles․ A clogged filter can reduce efficiency and cause odors․ Refer to the user manual for specific guidance on disassembling and cleaning these components effectively․ This maintenance ensures smooth operation and prevents blockages․

5․2 Descaling the Dishwasher for Better Performance

Descaling your AEG Favorit dishwasher is crucial for maintaining performance, especially in hard water areas․ Lime scale buildup can reduce efficiency and damage components․ Use a descaler recommended in the user manual and run a hot water cycle․ Regular descaling ensures optimal cleaning and prevents future issues; Always follow the manufacturer’s instructions for best results․

5․3 Regular Maintenance Tips for Longevity

To ensure your AEG Favorit dishwasher lasts longer, clean the filter regularly and check for blockages in the spray arms and detergent dispenser․ Use rinse aid to improve drying and prevent water spots․ Leave the door slightly open after cycles to dry the interior․ Regular maintenance enhances performance and extends the appliance’s lifespan․

Safety Instructions and Precautions

The AEG Favorit dishwasher user manual emphasizes safety precautions to prevent accidents․ Always keep children away, avoid ingesting detergents, and ensure proper installation․ Follow guidelines for safe operation․

6․1 General Safety Guidelines

Always read the user manual carefully before using the AEG Favorit dishwasher․ Adhere to safety symbols and guidelines to prevent accidents․ Keep children away from detergent and the appliance․ Avoid ingesting detergents and ensure proper installation․ Never exceed recommended detergent usage․ Be cautious of hot surfaces during operation and avoid touching sharp edges․ Follow all warnings to ensure safe usage and longevity․

6․2 Child Safety Features

The AEG Favorit dishwasher includes child safety features such as a secure locking mechanism to prevent accidental start or door opening․ Keep children away from detergent, as it can be harmful․ Ensure the dishwasher is out of children’s reach and supervise them to avoid accidental burns from hot surfaces or sharp edges․ Always store detergent securely․

6․3 Handling Dishwasher Detergents Safely

Handle dishwasher detergents with care to avoid exposure․ Wear gloves when loading detergent to prevent skin irritation․ Keep detergents out of children’s reach and store them securely․ Follow the instructions on the packaging for dosage to avoid overuse․ In case of accidental ingestion or contact, seek medical assistance immediately and refer to the safety guidelines in the user manual․

Troubleshooting Common Issues

Identify error codes and solutions in the manual․ Address water leakage or noise issues promptly․ If the dishwasher won’t start, check power supply and settings․ Refer to the manual for detailed troubleshooting guides and solutions to ensure optimal performance and resolve problems efficiently․

7․1 Identifying Error Codes and Solutions

The AEG Favorit dishwasher displays error codes like E1 or E2, indicating issues such as water supply problems or drainage faults․ Refer to the user manual for specific code meanings and solutions․ Common fixes include checking water hoses, ensuring proper drainage, and resetting the dishwasher․ For persistent issues, consult the manual or contact AEG customer support for assistance․

7․2 Resolving Water Leakage or Noise Issues

If water leakage occurs, check for loose hose connections or worn seals․ For noise issues, ensure proper dishwasher loading and balance․ Addressing these promptly prevents damage․ Regular maintenance, such as checking filters, can help avoid recurring problems․ Refer to the user manual for detailed troubleshooting steps or contact AEG support for professional assistance․

7․3 What to Do If the Dishwasher Won’t Start

If the dishwasher won’t start, ensure the door is properly closed and child lock is deactivated․ Check the power supply and circuit breaker․ Verify error codes if displayed․ Consult the user manual for troubleshooting or contact AEG customer support for assistance․ Regularly updating software, if applicable, can also resolve start-up issues․

Eco-Friendly and Energy-Saving Tips

Use Eco Mode for reduced energy consumption․ Ensure full loads to minimize cycles․ Regularly update software for optimal efficiency and eco-performance․

8․1 Using Eco Mode for Energy Efficiency

The Eco Mode on your AEG Favorit dishwasher optimizes water and energy consumption, ensuring eco-friendly cleaning․ It reduces power usage while maintaining performance․ For best results, run full loads and avoid pre-rinsing dishes․ Regular software updates also enhance efficiency․ Refer to the user manual for specific settings and additional eco-friendly tips․

8․2 Optimizing Water and Energy Consumption

To optimize water and energy use, select the correct wash program based on load size and soil level․ Adjust water temperature settings to avoid unnecessary heating․ Ensure the dishwasher is fully loaded to maximize efficiency․ Regularly cleaning filters and checking for blockages also helps maintain optimal performance․ Refer to the user manual for tailored settings․

To reduce detergent usage, measure the recommended amount and avoid overfilling․ Scrape plates thoroughly before loading to minimize food residue․ Use the eco mode for lighter loads and ensure rinse aid levels are adequate․ Regularly cleaning filters also improves efficiency, allowing for optimal cleaning with less detergent․ Always refer to the manual for specific guidelines․

Customer Support and Service

8․3 Tips for Reducing Detergent Usage

To minimize detergent use, measure accurately, avoid overfilling, and scrape plates thoroughly․ Use eco mode for lighter loads and ensure adequate rinse aid levels․ Regularly cleaning filters improves efficiency, allowing optimal cleaning with less detergent․ Always follow the manual’s guidelines for proper dosage and eco-friendly practices․

9․1 Contacting AEG Customer Service

For assistance with your AEG Favorit dishwasher, visit the official AEG website to access contact forms, phone support, and live chat options․ Registered users can log in for personalized help․ The website also offers troubleshooting guides, FAQs, and downloadable manuals; Ensure your appliance is registered for warranty-related inquiries and faster service responses․

9․2 Scheduling a Repair Service

To schedule a repair for your AEG Favorit dishwasher, visit the official AEG website or contact customer service via phone․ Provide your appliance’s model number and a detailed description of the issue․ Registered users can book services online through their account․ Ensure your dishwasher is under warranty for covered repairs․ A service technician will be dispatched to address the issue promptly․

9․3 Registering Your Dishwasher for Warranty

To register your AEG Favorit dishwasher for warranty, visit the official AEG website and provide your appliance’s model number, purchase date, and personal details․ Registration ensures warranty coverage and access to exclusive support services․ Keep the confirmation email for future reference․ This step is crucial for availing repair services and maintaining warranty benefits․
The AEG Favorit dishwasher user manual provides comprehensive guidance for optimal performance, maintenance, and troubleshooting․ By following the instructions, users can ensure longevity, efficiency, and safety while operating the appliance․ Always refer to the manual for specific model details and updates․ Proper usage enhances cleaning results and energy efficiency significantly․

10․1 Summary of Key Takeaways

The AEG Favorit dishwasher user manual emphasizes proper installation, maintenance, and operation for optimal performance․ Regular cleaning of filters and descaling ensures efficiency․ Using eco-mode and correct detergent amounts saves energy and resources․ Troubleshooting common issues and adhering to safety guidelines are crucial․ Referencing the manual regularly helps users maximize their appliance’s longevity and functionality effectively․ Always follow safety instructions to ensure personal and appliance protection․

10․2 Final Tips for Optimal Dishwasher Performance

For optimal performance, regularly clean filters and check water hardness․ Use the correct detergent dosage and ensure racks are loaded properly․ Activate eco-mode for energy savings and run full loads․ Maintain the dishwasher by descaling and checking door seals․ Refer to the manual for specific care instructions to enhance efficiency and longevity․

lista dos escritores angolanos e suas obras pdf

Angolan literature reflects the nation’s rich cultural heritage and its transition from colonial to post-colonial identity․ Notable authors like José Luandino Vieira and Pepetela have shaped its unique voice, blending urban themes and magical realism․ Their works, such as “A cidade e a infância” and “Mayombe”, are now widely available in PDF format, making Angolan literature accessible globally for academic and personal exploration․

1․1․ Overview of Angolan Literary History

Angolan literary history traces its roots to the colonial period, where African and European influences merged․ Early writers like António Jacinto and Agostinho Neto laid the groundwork, blending traditional oral narratives with modern styles․ The mid-20th century saw a surge in nationalism, with literature becoming a tool for resistance․ Post-independence, themes of identity, urban life, and social struggles emerged․ This evolution reflects Angola’s cultural richness and political journey․ Today, works by José Luandino Vieira and Pepetela are celebrated, highlighting the nation’s literary growth and global accessibility through PDF formats, preserving its heritage for future generations;

1․2․ The Transition from Colonial to Post-Colonial Literature

The transition from colonial to post-colonial literature in Angola marked a shift from European-influenced narratives to a focus on national identity․ Early writers like António Jacinto and Agostinho Neto reflected on colonial oppression, while post-independence authors explored themes of freedom and social justice․ This period saw the rise of urban settings and magical realism, blending traditional and modern elements․ The works of Pepetela and José Eduardo Agualusa exemplify this transformation, offering critiques of society and celebrations of Angolan culture․ The availability of these works in PDF format has made them accessible for global readers, preserving the nation’s literary legacy․

Historical Context of Angolan Writers

Angolan writers emerged from a rich cultural tapestry, shaped by colonial influences and the struggle for independence․ Early literary figures like António Agostinho Neto laid the groundwork for modern voices, blending traditional and contemporary themes․ Their works, now widely available in PDF format, reflect the nation’s journey from oppression to self-discovery, preserving Angola’s literary heritage for future generations․

2․1․ Early Influences and Colonial Era Literature

During the colonial era, Angolan literature was deeply influenced by Portuguese culture, yet it maintained a unique African essence․ Early writers like António Agostinho Neto, Fernando Monteiro de Castro Soromenho, and Geraldo Bessa Victor emerged, blending European literary styles with local traditions․ Their works often reflected the struggles of colonialism and the quest for cultural identity․ The colonial period also saw the rise of poetry and prose that laid the foundation for modern Angolan literature․ These early influences paved the way for a distinct literary voice, now accessible through PDF formats of their works, preserving Angola’s rich literary heritage․

2․2․ The Emergence of Modern Angolan Literature

Modern Angolan literature emerged in the post-independence era, reflecting the nation’s cultural and social transformation․ Writers like José Luandino Vieira, Pepetela, and Manuel Rui pioneered this movement, blending traditional storytelling with contemporary themes․ Their works, such as “A cidade e a infância” and “Mayombe”, highlighted urban life and identity struggles․ This period also saw the rise of magical realism, enriching the narrative style․ The availability of these works in PDF format has made them accessible to global readers, fostering a deeper understanding of Angola’s literary evolution and its contribution to world literature․

Notable Angolan Writers

Notable Angolan writers like José Luandino Vieira and Pepetela have enriched the literary scene with works such as “A cidade e a infância” and “Mayombe․” Their writings are now accessible in PDF format, making Angolan literature reachable worldwide․

3;1․ José Luandino Vieira and His Contributions

José Luandino Vieira is a pivotal figure in Angolan literature, known for his vivid portrayal of urban life and cultural identity․ His notable works include “A cidade e a infância” and “A vida verdadeira de Domingos Xavier,” which explore themes of childhood, identity, and societal challenges․ Vieira’s writing often blends realism with a deep connection to Angola’s history and daily life․ His contributions have made his works accessible in PDF format, allowing global readers to engage with his unique narrative style and cultural insights․ His literature remains a cornerstone of Angolan literary heritage․

3․2․ Pepetela: A Prominent Figure in Angolan Literature

Pepetela stands out as a leading voice in Angolan literature, celebrated for his nuanced exploration of national identity and social issues․ His seminal work, “Mayombe,” delves into the lives of MPLA guerrilla fighters, offering a compelling narrative of Angola’s struggle for independence․ Pepetela’s writing often combines historical depth with contemporary relevance, addressing themes of culture, politics, and societal transformation․ His works are widely studied and are now accessible in PDF format, ensuring his literary legacy reaches a broader audience․ Pepetela’s contributions have significantly enriched Angolan literature, making him a key figure in the nation’s cultural landscape․

3․3․ Manuel Rui and His Literary Impact

Manuel Rui is a distinguished Angolan writer known for his unique blend of traditional and modern storytelling․ His work, particularly “Estratégias de Oposição”, explores themes of identity, history, and social change, offering a profound insight into Angola’s cultural fabric․ Rui’s narratives often bridge the past and present, creating a rich tapestry of experiences․ His writing is celebrated for its depth and complexity, making him a significant figure in contemporary Angolan literature․ His works are now widely available in PDF format, enabling readers worldwide to engage with his contributions to the nation’s literary heritage․

3․4․ José Eduardo Agualusa: A Contemporary Voice

José Eduardo Agualusa is a leading contemporary Angolan writer, celebrated for his innovative storytelling and exploration of identity․ His works, such as “Nação Crioula”, blend historical narratives with magical realism, offering a unique perspective on Angola’s cultural and social landscapes․ Agualusa’s writing often delves into themes of memory, colonialism, and nationalism, resonating deeply with readers․ His contributions have significantly enriched Angolan literature, making him a prominent figure in both national and international literary circles․ His works are now accessible in PDF format, ensuring his stories reach a global audience and inspire future generations of writers and readers alike․

Key Works of Angolan Authors

Key works include “A cidade e a infância” by José Luandino Vieira, “Mayombe” by Pepetela, “Estratégias de Oposição” by Manuel Rui, and “Nação Crioula” by José Eduardo Agualusa, all available in PDF formats, offering insights into Angola’s rich literary heritage․

4․1․ “A cidade e a infância” by José Luandino Vieira

“A cidade e a infância” is a seminal work by José Luandino Vieira, first published in 1957 and reprinted in 1986․ This collection of short stories captures the essence of urban life and childhood in Angola, reflecting the societal changes during the colonial period․ Vieira’s vivid storytelling highlights the struggles and hopes of ordinary people, offering a poignant portrayal of Angolan reality․ The book is widely regarded as a foundation of modern Angolan literature and is now accessible in PDF format, allowing readers worldwide to explore its rich cultural and historical insights․

4․2․ “Mayombe” by Pepetela

“Mayombe”, written by Pepetela in 1980, is a landmark novel in Angolan literature․ Set during the national liberation movement, it explores themes of identity, culture, and resistance․ The story follows a group of guerrilla fighters in the Mayombe forest, blending historical facts with fictional narratives․ Pepetela’s use of magical realism and vivid storytelling captures the spirit of Angola’s struggle for independence․ The novel is celebrated for its deep exploration of societal complexities and cultural heritage․ Available in PDF format, “Mayombe” remains a vital resource for understanding Angola’s literary and historical landscape, offering insights into the nation’s journey toward freedom and self-discovery․

4․3․ “Estratégias de Oposição” by Manuel Rui

“Estratégias de Oposição” by Manuel Rui is a significant work in Angolan literature, exploring themes of identity, resistance, and social change․ The book delves into the complexities of Angolan society, weaving together historical and contemporary narratives․ Rui’s writing is known for its lyrical prose and profound insight into human struggles․ This work is celebrated for its ability to challenge societal norms while offering a deeply personal perspective․ Available in PDF format, “Estratégias de Oposição” is a must-read for those interested in understanding Angola’s cultural and political landscape through literature․

4․4․ “Nação Crioula” by José Eduardo Agualusa

José Eduardo Agualusa’s Nação Crioula is a captivating exploration of Angolan identity, weaving historical narratives with contemporary reflections․ The novel delves into the complexities of cultural hybridity and national consciousness, offering a rich tapestry of voices and stories․ Agualusa’s prose is both poetic and evocative, blending elements of magical realism to create a unique reading experience․ As a prominent work in modern Angolan literature, Nação Crioula is widely celebrated for its depth and innovation․ Its availability in PDF format has made it accessible to a global audience, fostering greater appreciation for Angola’s literary heritage․

Cultural and Thematic Elements in Angolan Literature

Angolan literature explores themes of identity, nationalism, and urban life, often blending magical realism with local folklore․ Works like “Nação Crioula” in PDF highlight this cultural richness․

5․1․ The Role of Urban Settings in Angolan Novels

Urban settings play a central role in Angolan novels, reflecting the country’s societal transformations․ Authors like José Luandino Vieira and Pepetela often portray cities as vibrant, complex spaces․ Their works, such as “A cidade e a infância” and “Mayombe”, delve into urban life, capturing the struggles and cultural richness of city dwellers․ These narratives highlight themes of identity, migration, and adaptation, offering a window into Angola’s modernization․ The availability of these works in PDF format has made them more accessible, allowing readers worldwide to explore the urban tapestry of Angolan literature and its deep cultural significance․

5․2․ The Use of Magical Realism in Angolan Writing

Magical realism is a prominent element in Angolan literature, blending the fantastical with everyday life․ Authors like José Eduardo Agualusa, in works such as “Nação Crioula”, weave historical facts with mystical elements to explore themes of identity and culture․ This narrative style allows writers to critique societal issues while captivating readers with vivid imagery․ The availability of these works in PDF format has made them more accessible, enabling a broader audience to engage with Angolan writers’ unique storytelling techniques and the cultural depth they convey through magical realism․

5․3․ Exploration of Identity and Nationalism

Angolan literature deeply explores themes of identity and nationalism, reflecting the nation’s complex history and cultural diversity․ Authors like Pepetela and Manuel Rui use their works to examine the tensions between traditional values and modernity․ Their narratives often highlight the struggles of Angolan people in forging a unified national identity․ The availability of their works in PDF format has facilitated global access to these explorations, enabling readers to understand the socio-political landscapes that shape Angolan culture and its literary expression․ This thematic focus remains central to the nation’s literary heritage and contemporary writing․

Availability of Works in PDF Format

Angolan literary works are increasingly available in PDF format, offering easy access to readers worldwide․ Platforms like Google Books and archive․org host works by José Luandino Vieira and Pepetela, facilitating academic and personal exploration of Angolan culture and literature․

6․1․ Popular Platforms for Downloading Angolan Literary Works

Popular platforms for downloading Angolan literary works in PDF format include Google Books, ResearchGate, and archive․org․ These sites offer free access to works by authors like José Luandino Vieira and Pepetela․ Google Books often provides preview snippets or full texts of classic Angolan novels, while ResearchGate enables scholars to share and access academic papers and e-books․ Additionally, archive․org hosts a wide range of public-domain and contemporary works, making Angolan literature accessible to readers worldwide․ These platforms have become essential resources for students, researchers, and literature enthusiasts seeking to explore Angola’s rich literary heritage․

6;2․ The Significance of PDF Availability for Academic and Personal Use

The availability of Angolan literary works in PDF format holds immense significance for both academic and personal use․ It democratizes access to rare and essential texts, enabling scholars and enthusiasts to explore Angola’s rich literary heritage․ PDFs provide a portable and easily shareable format, making them ideal for research and study․ For academics, this facilitates in-depth analysis and referencing, while for personal use, it allows readers to engage with Angolan literature without physical constraints․ This accessibility not only preserves cultural knowledge but also fosters a deeper appreciation for Angola’s history and identity, bridging gaps between global readers and local narratives․

6․3․ A Comprehensive List of Angolan Writers and Their Works in PDF

A comprehensive list of Angolan writers and their works in PDF is now widely accessible online, offering an extensive collection of literary masterpieces․ This list includes works by renowned authors such as José Luandino Vieira, Pepetela, and José Eduardo Agualusa, among others․ Readers can find classic novels like “A cidade e a infância” and “Mayombe”, as well as contemporary pieces that reflect Angola’s cultural evolution․ These PDF resources are invaluable for researchers, students, and literature enthusiasts, providing easy access to Angola’s rich literary heritage and fostering a deeper understanding of its history and identity․

maplestory hyper stats guide

Hyper Stats in MapleStory are advanced character enhancements available from level 140‚ offering powerful bonuses like increased damage‚ critical rates‚ and bossing efficiency to maximize your character’s potential.

Overview of Hyper Stats and Their Importance

Hyper Stats in MapleStory are advanced enhancements available from level 140‚ offering bonuses like increased damage‚ critical rates‚ and bossing efficiency. They are crucial for optimizing your character’s performance in end-game content and boss battles‚ allowing for significant improvements in damage output and combat effectiveness. By carefully allocating Hyper Stats‚ players can tailor their characters to excel in specific roles‚ ensuring maximum impact in challenging scenarios.

History and Evolution of Hyper Stats in MapleStory

Hyper Stats were introduced in MapleStory as part of major updates to enhance character progression beyond traditional stat allocations. Initially‚ they provided basic boosts like damage increases‚ but subsequent updates like the Destiny patch expanded their scope. Today‚ Hyper Stats play a pivotal role in optimizing characters for both training and bossing‚ with a focus on critical rates‚ boss damage‚ and advanced mechanics. Their evolution reflects the game’s shift toward more strategic character builds‚ ensuring players have tools to stay competitive in an ever-changing meta.

Understanding Hyper Stat Points

Hyper Stat Points are earned starting at level 140‚ with more points granted as you level up. They allow customization of stats to enhance your character’s abilities.

How to Obtain Hyper Stat Points

Hyper Stat Points are awarded upon reaching level 140 and each subsequent level. The amount of points increases with higher levels‚ allowing for greater customization. Additional points can be earned through special events or in-game challenges‚ providing more opportunities to enhance your character’s stats. It’s essential to allocate these points wisely to maximize your character’s potential in MapleStory.

Hyper Stat Point Allocation Strategy

Allocating Hyper Stat Points effectively is crucial for optimizing your character’s performance. Prioritize stats that enhance your primary damage output‚ such as Critical Rate and Critical Damage‚ to maximize burst damage potential. For bossing‚ focus on Boss Attack Increase and Ignore Enemy Defense (IED) to improve effectiveness against high-level enemies. Secondary priorities include Physical/Magical Damage Increase and Max Damage for consistent output. Use community tools like Hyper Stat Calculators to optimize your allocation based on your class and playstyle. Always review and adjust your points as needed‚ especially after major updates or shifts in gameplay focus.

Core Hyper Stats for Damage Optimization

Critical Rate and Critical Damage maximize burst potential‚ while Physical/Magical Damage Increase and Max Damage enhance consistent output. Additional Damage Chance further boosts overall efficiency in combat.

Critical Rate and Critical Damage

Critical Rate determines the chance of landing a critical hit‚ while Critical Damage amplifies the damage dealt on critical strikes. Prioritizing these stats significantly increases burst damage potential. Allocating points to Critical Rate is essential to reach the 100% cap‚ ensuring every attack has a critical chance. Once capped‚ investing in Critical Damage maximizes the effectiveness of critical hits‚ making them devastating against enemies. Balancing these stats is crucial for consistent and high damage output‚ especially in boss battles where critical hits can make a substantial difference. These stats form the foundation of a damage-oriented build in MapleStory.

Physical/Magical Damage Increase

Physical/Magical Damage Increase enhances the base damage output for physical and magical attacks‚ respectively. These stats are crucial for maximizing consistent damage output‚ especially for classes relying on raw power. Allocating points to these stats directly scales with your equipment and other damage-boosting effects‚ making them highly efficient. For physical attackers‚ prioritizing Physical Damage Increase ensures stronger melee or ranged hits‚ while magical classes benefit from Magical Damage Increase for spellcasting. These stats are often recommended early in Hyper Stat allocation‚ as they provide a solid foundation for dealing reliable damage in both training and bossing scenarios‚ complementing critical hits and other damage multipliers effectively.

Max Damage and Additional Damage Chance

Max Damage increases the maximum damage limit‚ allowing for higher damage ceilings‚ which is essential for endgame content. Additional Damage Chance grants a percentage-based chance to deal extra damage on each attack‚ providing inconsistent but potentially massive damage spikes. Together‚ these stats are ideal for players seeking to push their damage output beyond typical limits. Max Damage is particularly valuable for classes with high base damage‚ while Additional Damage Chance complements critical hits and other multipliers. Proper allocation of these stats can significantly enhance overall damage potential‚ making them a strategic choice for both training and bossing in MapleStory.

Advanced Hyper Stats for Bossing

Advanced Hyper Stats like Boss Attack Increase and Ignore Enemy Defense (IED) enhance bossing efficiency by bypassing defenses and dealing increased damage to bosses specifically.

Boss Attack Increase and Ignore Enemy Defense (IED)

Boss Attack Increase enhances damage specifically against bosses‚ while Ignore Enemy Defense (IED) bypasses a portion of the boss’s defense‚ maximizing your damage output. These stats are crucial for bossing as they directly impact your effectiveness in raids and boss battles. Allocating points to Boss Attack Increase and IED ensures that your attacks deal consistent and high damage‚ even against high-defense bosses. Together‚ they form the backbone of any bossing-focused Hyper Stat build‚ allowing players to overcome challenging content efficiently. Proper allocation of these stats is essential for optimizing bossing performance in MapleStory.

Final Damage Increase and Status Resistance

Final Damage Increase boosts your overall damage output‚ amplifying each attack’s effectiveness‚ while Status Resistance enhances your character’s ability to withstand debilitating effects like stun‚ freeze‚ or poison. These stats are vital for both bossing and general gameplay‚ as they improve survival and damage consistency. Final Damage Increase is particularly valuable for maximizing endgame damage‚ and Status Resistance ensures you remain effective in challenging content. Balancing these stats ensures your character is both powerful and resilient‚ making them a cornerstone of advanced Hyper Stat allocations in MapleStory for optimal performance.

Hyper Skills and Their Synergy with Hyper Stats

Hyper Skills are powerful abilities unlocked at level 140‚ offering enhancements like passive damage boosts or active buffs. When combined with Hyper Stats‚ they maximize damage output and survivability.

Passive Hyper Skills for Enhanced Damage

Passive Hyper Skills are permanent enhancements that boost your character’s damage output without requiring active use. These skills can increase critical rates‚ amplify final damage‚ or enhance elemental mastery. By allocating Hyper Stat points to support these passives‚ players can create powerful synergies that maximize their combat effectiveness. For example‚ pairing a critical damage passive with high critical rate Hyper Stats can significantly improve overall damage. These skills are especially beneficial for classes relying on consistent‚ high-damage attacks. Properly combining passives with Hyper Stats is key to optimizing your character’s potential for both training and bossing scenarios.

Active Hyper Skills for Bossing

Active Hyper Skills are powerful abilities that can be used strategically during boss battles to enhance your character’s performance. These skills often provide temporary buffs‚ such as increased damage output‚ enhanced status resistance‚ or improved elemental attacks. For example‚ certain skills might boost your final damage percentage or grant immunity to status effects‚ making you more resilient against tough bosses. When combined with optimized Hyper Stats‚ these active skills can significantly improve your bossing efficiency. The Destiny update further refined these skills‚ allowing for preset optimizations that cater to specific playstyles. Mastering these skills is essential for tackling high-level content effectively.

Community Tools and Resources

Community tools like Hyper Stat Calculators and detailed guides help players optimize their stats and builds‚ ensuring maximum efficiency for both training and bossing in MapleStory.

Hyper Stat Calculators and Optimizers

Hyper Stat Calculators are essential tools for optimizing character builds in MapleStory. These calculators allow players to allocate Hyper Stat Points efficiently‚ ensuring maximum damage output and bossing performance. By inputting character stats and comparing different builds‚ players can identify the best allocations for their class and playstyle. Many calculators also provide real-time feedback‚ helping users refine their strategies. Additionally‚ these tools often include features like preset builds and detailed stat comparisons‚ making them indispensable for both new and experienced players aiming to enhance their characters’ effectiveness in-game. Regular updates ensure compatibility with the latest game patches and Hyper Stat changes.

Recommended Hyper Stat Builds for Different Classes

Optimizing Hyper Stats varies greatly by class in MapleStory. Warriors and Bowmen often prioritize Critical Rate and Critical Damage for consistent damage output‚ while Magicians focus on Magic Damage Increase and Final Damage. Thieves benefit from Max Damage and Additional Damage Chance‚ enhancing their rapid attacks. Pirates‚ with their high damage potential‚ often balance Physical Damage Increase and Boss Attack for bossing efficiency. Each class has unique priorities‚ and community guides provide tailored builds to maximize effectiveness. These builds ensure players can adapt to both training and bossing scenarios effectively‚ making class-specific Hyper Stat allocations crucial for optimal performance in MapleStory.

Recent Updates and Changes to Hyper Stats

The Destiny Update in Summer 2022 introduced significant changes to Hyper Stats‚ adding presets and altering allocations. Future updates are expected to refine and expand these systems further.

Impact of the Destiny Update on Hyper Stats

The Destiny Update introduced presets‚ allowing players to save and switch Hyper Stat allocations easily. This feature streamlined character optimization‚ especially for bossing and training. The update also shifted priorities‚ making Final Damage Increase and Status Resistance more viable. Players can now adapt their builds more flexibly‚ enhancing efficiency in various game modes. These changes encouraged strategic thinking about Hyper Stat allocations‚ improving overall character performance in endgame content. The update also indirectly influenced community tools‚ prompting updates to calculators and guides to reflect new optimal builds. As a result‚ the Destiny Update significantly modernized the Hyper Stats system‚ benefiting both new and veteran players.

Future Trends and Expected Changes

Future updates to MapleStory Hyper Stats are expected to bring balance adjustments and new optimization opportunities. With Nexon’s focus on enhancing endgame content‚ upcoming patches may introduce new Hyper Stats or rework existing ones to keep the meta fresh. Players anticipate increased emphasis on utility stats like Status Resistance and Ignore Enemy Defense. Community tools and calculators will likely evolve to accommodate these changes‚ helping players adapt their builds. Additionally‚ the introduction of new boss content could shift Hyper Stat priorities‚ making Boss Attack Increase and Final Damage Increase even more crucial. Staying updated with official patch notes and community insights will be essential for maximizing character potential in the evolving meta.

Mastering Hyper Stats is key to optimizing your character’s potential in MapleStory. By strategically allocating points and staying updated with game changes‚ you’ll maximize efficiency in both training and bossing. Regularly adapt your builds using community tools and resources to maintain peak performance. Remember‚ Hyper Stats are a long-term investment in your character’s power—plan wisely and stay ahead in the ever-evolving meta. Happy MapleStory adventures!

Final Tips for Maximizing Hyper Stats

To maximize your Hyper Stats‚ prioritize critical rate and damage for consistent damage output. Invest in boss attack and ignore defense for bossing efficiency. Utilize community tools like Hyper Stat Calculators to optimize your allocations. Stay updated with game updates‚ as changes can impact stat effectiveness. Balance your points based on your class and playstyle‚ focusing on stats that complement your skills. Lastly‚ experiment with different builds and adapt as you progress to ensure optimal performance in both training and bossing scenarios in MapleStory.

2009 nissan altima user manual

Welcome to the 2009 Nissan Altima User Manual, your comprehensive guide to understanding and operating your vehicle. This manual is designed to help you navigate features, safety protocols, and maintenance, ensuring a smooth and secure driving experience.

1.1 Purpose and Structure of the Manual

This manual is designed to provide owners with essential information about the 2009 Nissan Altima. It covers features, safety guidelines, and maintenance tips to ensure optimal vehicle performance. The manual is divided into sections, each addressing specific aspects of the car, from instrument panels to troubleshooting. By following this guide, users can maximize their driving experience while adhering to safety and maintenance recommendations.

1.2 Important Safety Information

This section highlights critical safety guidelines for the 2009 Nissan Altima. Proper use of seat belts, airbags, and child restraints is essential. Always follow safety precautions to avoid injuries or accidents. Familiarize yourself with warning lights and indicators on the instrument panel. Adherence to these guidelines ensures a safe driving experience and protects all occupants of the vehicle. Safety should never be compromised.

Key Features of the 2009 Nissan Altima

The 2009 Nissan Altima offers a range of features, including advanced technology, comfortable seating, and optional upgrades like a premium audio system. Available in sedan and coupe styles.

2.1 Overview of Available Trim Levels

The 2009 Nissan Altima is offered in multiple trim levels, including Base, S, SL, and Hybrid models. Each trim provides distinct features, such as alloy wheels, premium audio systems, and advanced technology options. The Base model includes essential amenities, while higher trims like the SL add luxury touches. Hybrid trims emphasize fuel efficiency and eco-friendly performance, catering to diverse driver preferences and needs.

2.2 Standard and Optional Equipment

The 2009 Nissan Altima comes with a range of standard features, including keyless entry, power windows, and a CD player. Optional upgrades like a navigation system, leather upholstery, and a premium Bose audio system enhance comfort and convenience. Additional options such as a power moonroof and heated seats provide personalized luxury, allowing drivers to tailor their vehicle to their preferences and lifestyle needs.

Understanding the Instrument Panel

The instrument panel features essential gauges like the speedometer and fuel level indicator. Warning lights alert you to system statuses, ensuring safe and informed driving.

Controls for adjusting settings such as temperature and audio are conveniently located, providing easy access to customize your driving experience.

3.1 Layout and Controls

The instrument panel in your 2009 Nissan Altima is thoughtfully designed for driver convenience. It features a central display screen, climate control buttons, and audio system controls. The steering wheel includes cruise control and audio adjustment buttons for easy access while driving.

Gauges such as the speedometer, tachometer, fuel level, and temperature are clearly visible. Indicator lights for system status and warnings are positioned to catch your attention without distraction, ensuring safe and informed driving.

3.2 Warning Lights and Indicators

The dashboard of your 2009 Nissan Altima features various warning lights and indicators designed to alert you to specific vehicle conditions. These include the airbag light, ABS light, battery alert, and oil pressure indicator. Each light communicates important information about your vehicle’s status, ensuring your safety and proper system function. Refer to the manual for detailed explanations of each indicator and their meanings to address issues promptly and maintain optimal performance.

Operating the Vehicle

Learn how to safely operate your 2009 Nissan Altima, including starting procedures, transmission modes, and essential driving practices. Familiarize yourself with controls and features for a smooth experience.

4.1 Starting and Stopping the Engine

To start the engine, ensure the parking brake is engaged, insert the key, and turn the ignition switch clockwise. For models with a push-button start, press the button while holding the brake. When stopping, shift into park (automatic) or first gear (manual) and turn the ignition to the “OFF” position. Always follow proper shutdown procedures to avoid damage. For CVT models, use only Nissan-approved fluid.

4.2 Transmission and Driving Modes

The 2009 Nissan Altima features a smooth-shifting transmission system, available in both automatic and manual options. The Continuously Variable Transmission (CVT) provides seamless acceleration and improved fuel efficiency. For enhanced control, engage Manual Shift Mode using the paddle shifters. Additionally, select from driving modes like Eco Mode for optimized fuel economy or Sport Mode for a more responsive drive. Always use Nissan-approved CVT fluid to maintain performance and longevity.

Safety Features and Precautions

The 2009 Nissan Altima is equipped with an advanced airbag system and seat belts for enhanced occupant protection. Always adhere to safety precautions, such as proper seat belt usage, to ensure maximum safety for all passengers.

5.1 Airbag System and Seat Belts

The 2009 Nissan Altima features an advanced airbag system, including dual-stage front airbags, side airbags, and curtain airbags for enhanced protection. Always wear seat belts correctly, as they are critical for safety. The pretensioner system tightens belts during sudden stops or collisions. Ensure rear passengers use seat belts and properly secure infants or children in approved car seats for maximum safety. Proper usage is essential for optimal protection.

5.2 Child Safety and Seat Installation

Ensure child safety by correctly installing approved car seats using the LATCH system or seat belts. Rear-facing seats are recommended for infants, while forward-facing seats suit older children. Never place a rear-facing child seat in the front passenger seat if equipped with an active airbag. Always follow the manual’s instructions for proper installation and comply with local safety regulations to protect your child effectively;

Maintenance and Service Schedule

Regular maintenance ensures optimal performance and longevity; Check fluid levels and tire pressure monthly. Follow the recommended service intervals in your manual for oil changes, tire rotations, and inspections.

6.1 Recommended Maintenance Intervals

Adhere to the recommended maintenance schedule to ensure your vehicle runs efficiently. Oil changes are required every 5,000 miles, while tire rotations should occur every 15,000 miles. Replace the air filter every 30,000 miles and the spark plugs at 105,000 miles. Check the timing belt and serpentine belt for wear, typically replacing them at 105,000 miles. Regular inspections of brakes, battery, and fluids are essential for long-term performance.

6.2 Fluid Levels and Tire Pressure

Regular checks of fluid levels and tire pressure are crucial for optimal performance. Neglecting these can lead to decreased fuel efficiency, increased wear on components, and potential safety hazards. Ensure all fluids are at recommended levels and tires are inflated as specified in the manual. Proper maintenance enhances safety and efficiency, contributing to a longer vehicle lifespan.

Troubleshooting Common Issues

This section helps identify and resolve common issues with your 2009 Nissan Altima. It covers dashboard warning lights, mechanical problems, and step-by-step solutions for quick fixes.

7.1 Diagnosing Dashboard Warning Lights

The dashboard warning lights in your 2009 Nissan Altima are essential indicators of your vehicle’s status. Common lights include the airbag light, oil pressure light, and check engine light. Refer to the manual for specific explanations and instructions. If a light illuminates, consult the manual or contact a Nissan service center for assistance. Always address warning lights promptly to ensure safety and prevent potential damage. Keep this manual handy for quick reference.

7.2 Solving Common Mechanical Problems

Common mechanical issues in the 2009 Nissan Altima include transmission problems and engine performance concerns. Always refer to the manual for troubleshooting steps. Check fluid levels, inspect belts, and ensure proper maintenance. For persistent issues, consult a certified Nissan technician. Addressing problems early can prevent costly repairs and ensure optimal performance. Regular servicing is key to maintaining your vehicle’s reliability and longevity on the road.

Hybrid Model Specific Instructions

This section provides detailed guidance for the 2009 Nissan Altima Hybrid, including hybrid system operation, battery maintenance, and eco-friendly driving tips to maximize fuel efficiency and performance.

8.1 Hybrid System Overview

The 2009 Nissan Altima Hybrid combines a gasoline engine with an electric motor for improved fuel efficiency and reduced emissions. This system seamlessly switches between electric and gasoline power, optimizing performance and eco-friendliness. The hybrid battery is automatically charged during braking and deceleration, ensuring efficient energy use. This section explains how the hybrid system operates, its benefits, and how to maximize its efficiency for a smoother, more environmentally conscious driving experience.

8.2 Charging and Fuel Efficiency Tips

Maximize your 2009 Nissan Altima Hybrid’s efficiency by following these tips. Drive smoothly, avoiding sudden acceleration, to conserve fuel. Use regenerative braking to recharge the hybrid battery. Maintain proper tire pressure and battery health for optimal performance. Regularly check and update your hybrid system software. Combine trips to reduce engine start-ups and idle time. These practices will enhance fuel economy and extend the lifespan of your hybrid system.

Customization and Settings

Customize your 2009 Nissan Altima with adjustable seats, steering wheel, and infotainment settings. Set up Bluetooth and navigation for enhanced convenience and personalized driving experience.

9.1 Adjusting Seats and Steering Wheel

Adjust the driver’s seat for optimal comfort using the manual or power controls. Modify seat position, lumbar support, and angle to suit your preference. The steering wheel tilts and telescopes, allowing you to customize its position for better visibility and control. For added convenience, select models offer memory settings to save your preferred configurations. Ensure proper ergonomics and visibility for a safe, enjoyable driving experience.

9.2 Setting Up Bluetooth and Navigation

To pair your phone via Bluetooth, go to the infotainment system, select “Bluetooth” under settings, and follow on-screen instructions. Ensure your phone is in discovery mode and confirm pairing. For voice commands, press the steering wheel button and speak clearly. The navigation system provides turn-by-turn directions; enter destinations using voice or touchscreen. Adjust settings for map views and route preferences for a personalized experience. Troubleshoot connectivity issues by resetting the system or checking device compatibility.

Technical Specifications

The 2009 Nissan Altima features a 2.5L or 3.5L engine, front-wheel drive, and a CVT or 6-speed manual transmission. Hybrid models are also available for improved fuel efficiency.

10.1 Engine and Performance Details

The 2009 Nissan Altima offers a range of engine options, including a 2.5L 4-cylinder and a 3.5L V6. The 2.5L engine delivers 175 horsepower and 180 lb-ft of torque, while the 3.5L V6 produces 270 horsepower and 258 lb-ft of torque. Both engines are paired with a CVT or 6-speed manual transmission. The Hybrid model combines an electric motor with the 2.5L engine for enhanced fuel efficiency, achieving up to 35 MPG city and 33 MPG highway.

10.2 Dimensions and Capacities

The 2009 Nissan Altima is available as a sedan or coupe, with a wheelbase of 109.3 inches. The sedan measures 190.5 inches in length, while the coupe is slightly shorter at 189.8 inches. Curb weight ranges from 3,000 to 3,500 pounds. The trunk offers 14-15.3 cubic feet of cargo space, and the fuel tank capacity is 18 gallons. Seating up to 5 passengers, it also has a towing capacity of up to 1,000 pounds.

Accessing Digital Versions of the Manual

Access the 2009 Nissan Altima User Manual online through MyNISSAN or download the free PDF for convenient offline access anytime.

11.1 Downloading the PDF Manual

The 2009 Nissan Altima User Manual is available as a downloadable PDF, offering convenience for offline access. Visit the official Nissan website or trusted sources like MyNISSAN Owner Portal to find the manual. The PDF is approximately 4.6 MB and contains 373 pages of detailed information. Ensure you download from authorized platforms to guarantee accuracy and completeness of the guide.

11.2 Online Resources and Updates

For the 2009 Nissan Altima, online resources provide easy access to updates, troubleshooting guides, and additional support. Visit the official Nissan website or platforms like MyNISSAN Owner Portal for the latest manual updates. Websites such as NICOclub.com and forums also offer valuable insights and community support. Regularly check these resources to stay informed about recalls, software updates, and maintenance tips for optimal vehicle performance.

ryobi instruction manual line trimmer

Welcome to the Ryobi Line Trimmer Manual․ This guide provides essential information on safety, operation, and maintenance․ Designed for both DIY enthusiasts and professional landscapers, it ensures optimal performance and longevity of your trimmer․

Safety Guidelines

Always read and follow safety instructions carefully․ Ensure proper handling to avoid accidents․ Keep children away and wear protective gear․ Never operate near flammable materials or in wet conditions․

2․1 General Safety Precautions

Before using your Ryobi line trimmer, read and understand all safety guidelines to minimize risks․ Always wear protective gear, including safety goggles and gloves, to prevent injury from debris․ Keep children and pets away while operating the trimmer․ Avoid using the device near flammable materials or in wet conditions, as this could lead to electrical hazards or accidents․ Ensure the area is clear of obstacles to maintain control and avoid tripping․ Never allow unauthorized individuals to operate the trimmer, especially those unfamiliar with its use․ Regularly inspect the trimmer for damage or wear, addressing any issues before operation․ Follow all manufacturer recommendations to ensure safe and effective use․ By adhering to these precautions, you can enjoy a safe trimming experience while maintaining your outdoor space effectively․

2․2 Safe Handling of Electrical Components

When handling electrical components of your Ryobi line trimmer, exercise extreme caution to prevent injury or damage․ Avoid touching electrical parts with wet hands or while standing in damp conditions, as this could result in electric shock․ Inspect all cords and connections regularly for signs of wear or damage, replacing them immediately if compromised․ Never overload the trimmer with excessive power demands, as this can lead to electrical failure․ Keep the device away from water sources, including puddles or sprinklers, to prevent short circuits․ Store the trimmer in a dry, secure location when not in use․ Always unplug the trimmer before performing maintenance or repairs․ Follow the manufacturer’s guidelines for handling batteries, especially in cordless models, to ensure proper function and safety․ Proper care of electrical components ensures reliable performance and protects against potential hazards․

Assembly Instructions

Begin by unpacking and inspecting all components for damage․ Attach the handle according to the manual’s guidance, ensuring it is securely tightened․ Install the trimmer head and line, following the provided instructions․ Refer to the manual for detailed steps to ensure proper assembly and functionality․

3․1 Unpacking and Initial Checks

Begin by carefully unpacking your Ryobi line trimmer from its box․ Ensure all components, such as the trimmer head, handle, and line, are included and free from damage․ Inspect the unit for any signs of wear or shipping damage․ Verify that the trimmer is the correct model as specified in the manual․ Familiarize yourself with the contents of the box, which typically include the trimmer body, handle, cutting line, and hardware for assembly․ Before proceeding, ensure all parts are compatible with your specific model․ If any items are missing or damaged, contact Ryobi customer support immediately․ Refer to the manual for a detailed list of included components and assembly instructions․ Proper unpacking and initial checks ensure a smooth assembly process and prevent potential issues during operation․ Always follow the manufacturer’s guidelines for unpacking and preparing your tool for use․

3․2 Trimmer Head Installation

Installing the trimmer head is a straightforward process that requires attention to detail․ Begin by aligning the arrows on the trimmer head with those on the shaft․ Gently press the head onto the shaft until it clicks securely into place․ Ensure the latches snap firmly to confirm proper installation․ If the head feels loose, repeat the process or consult the manual for guidance․ For string trimmers, feed the cutting line through the guide and wind it around the spool in the direction indicated by the arrows on the spool․ Leave a small portion of line exposed for cutting․ Tighten the spool cap firmly to secure the line․ Proper installation ensures safe and efficient operation․ Always refer to the manual for specific instructions tailored to your Ryobi model․ Correct installation prevents vibration and ensures optimal performance during use․

Operating Instructions

To operate your Ryobi line trimmer effectively, always maintain a firm, balanced grip․ Move slowly and steadily, keeping the cutting line parallel to the ground․ Adjust the angle slightly for edging․ Avoid overreaching and keep the trimmer at a comfortable distance to ensure precise control and safety․

4․1 Starting and Stopping the Trimmer

To start the Ryobi line trimmer, ensure the choke is in the correct position for a cold engine․ Prime the engine by pressing the primer bulb 2-3 times․ Pull the starter rope firmly until the engine starts․ Once running, gradually move the choke to the “run” position․ For cordless models, press and hold the trigger until the motor engages․ Always wear safety gear and ensure the area is clear of bystanders before starting․

To stop the trimmer, release the trigger or switch off the power․ For gas models, allow the engine to cool before turning it off․ For cordless models, simply release the trigger and store the trimmer safely․ Follow proper shutdown procedures to maintain the trimmer’s longevity and ensure safe operation․

4․2 Adjusting the Handle for Comfort

Adjusting the handle of your Ryobi line trimmer ensures a comfortable and ergonomic operating experience․ Begin by loosening the adjustment knob or lever located on the handle․ Slide the handle up or down to achieve a height that allows you to stand upright with minimal strain on your back and shoulders․ For most users, the handle should be positioned at hip or waist level․ Once adjusted, tighten the knob securely to maintain the desired height․

Some models feature a rotating handle, which can be adjusted by releasing the latch and pivoting the handle to your preferred angle․ This feature is particularly useful for users who need to switch between trimming and edging․ Experiment with different positions to find the most comfortable setup for your working style․ Proper adjustment reduces fatigue and improves control while trimming․

Maintenance and Troubleshooting

Regular maintenance ensures optimal performance․ Clean the cutting head, inspect the trimmer line, and check air filters․ Troubleshoot issues like poor cutting by checking line thickness or clogged ports․

5․1 Routine Maintenance Tasks

Regular maintenance is crucial for extending the lifespan and performance of your Ryobi line trimmer․ Start by cleaning the cutting head and removing any debris or tangled line․ Inspect the trimmer line for wear and tear, replacing it when necessary․ Check the air filter and clean or replace it as specified in the manual․ Lubricate moving parts to ensure smooth operation․ Additionally, inspect the battery and charger for cordless models, ensuring proper connections and charge levels․ Always refer to the manual for specific maintenance schedules and procedures․ Proper upkeep prevents issues like poor cutting performance or engine problems․ By following these routine tasks, you can maintain your trimmer’s efficiency and reliability․ Remember to wear protective gear during maintenance to avoid accidental injuries․ Regular care ensures your Ryobi trimmer remains a reliable tool for all your landscaping needs․

5․2 Diagnosing Common Issues

If your Ryobi line trimmer experiences issues, start by identifying the symptoms․ Common problems include the trimmer not starting, uneven cutting, or excessive vibration․ Check the fuel level and ensure the correct fuel mixture is used․ A clogged air filter or blocked carburetor can prevent the engine from starting․ Inspect the spark plug for wear or fouling and replace it if necessary․ For electric models, verify the battery is fully charged and connections are secure․ Uneven cutting may result from a dull or improperly tensioned trimming line․ Regularly clean the cutting head and ensure the line is at the recommended length․ If the trimmer overheats, allow it to cool before resuming use․ Always refer to the manual for specific troubleshooting steps․ If issues persist, consult a professional or contact Ryobi support for assistance․ Proper diagnosis ensures quick resolution and extends the trimmer’s lifespan․

pokemon ruby and sapphire guide

Pokémon Ruby and Sapphire introduced the vibrant Hoenn region, marking Generation III’s debut. These games offered fresh features, new Pokémon, and an engaging storyline, setting a new standard for the series.

1.1 Overview of the Games

Pokémon Ruby and Sapphire are role-playing games set in the Hoenn region, introducing 135 new Pokémon. Players start in Littleroot Town, choosing a gender and name, with Professor Birch guiding the initial setup. The games feature a rich storyline, engaging characters, and innovative mechanics, making them a cornerstone of Generation III. They offer a fresh adventure while maintaining the classic Pokémon formula.

The games emphasize exploration, catching Pokémon, and battling Gym Leaders to earn Badges. With a focus on strategy and customization, Ruby and Sapphire provide a dynamic experience for both new and veteran players, setting the stage for the region’s unique charm and challenges.

1.2 Key Features and Innovations

Pokémon Ruby and Sapphire introduced double battles, allowing two Pokémon to fight simultaneously. They also featured multiplayer modes, enabling players to trade or battle with friends. The gamesdebuted abilities and natures, adding depth to Pokémon strategy. Additionally, the National Pokédex was introduced, expanding the Pokémon roster beyond Hoenn. These innovations enhanced gameplay and set new standards for future Pokémon games.

The games also included the Eon Flute, essential for summoning certain Legendary Pokémon. Secret Bases allowed players to decorate and interact with their surroundings, adding a personal touch. These features enriched the gaming experience, making Ruby and Sapphire memorable entries in the series.

The World of Hoenn

Hoenn is a diverse island region with lush forests, volcanic zones, and coastal cities. It features iconic locations like Littleroot Town and Sootopolis City, offering a vibrant Pokémon world.

2.1 The Hoenn Region

The Hoenn region, introduced in Pokémon Ruby and Sapphire, is a tropical island area with diverse landscapes, including volcanic mountains, vast oceans, and dense forests. It is home to 135 new Pokémon and features key locations like Littleroot Town, where the journey begins, and Sootopolis City, a volcanic metropolis. The region’s design emphasizes exploration and discovery, making it a memorable setting for trainers.

2.2 New Pokémon Introduced in Generation 3

Pokémon Ruby and Sapphire introduced 135 new Pokémon, expanding the roster significantly. These include starter Pokémon like Treecko, Torchic, and Mudkip, as well as iconic species such as Taillow and Shroomish. The designs varied widely, offering unique types and evolutions. This generation also introduced abilities and natures, adding depth to Pokémon battles and team-building strategies, making these new Pokémon central to the game’s appeal and innovation.

Gameplay Mechanics

Pokémon Ruby and Sapphire introduced abilities and natures, enhancing battle strategy. Players could choose starters, catch Pokémon, and explore the Hoenn region, blending traditional gameplay with fresh innovations.

3.1 Choosing Your Starter Pokémon

In Pokémon Ruby and Sapphire, players begin by selecting one of three starter Pokémon: Treecko, Torchic, or Mudkip. Each starter belongs to a different type: Grass, Fire, and Water, respectively. This choice sets the foundation for the player’s journey, as each Pokémon has unique evolutions and abilities. The decision is crucial, as it impacts team dynamics and strategies throughout the game. Choosing wisely based on type advantages is key to progressing effectively.

3.2 Catching and Battling Pokémon

Catching Pokémon is essential in Ruby and Sapphire, requiring strategy and the right tools. Weaken Pokémon in battle before using Poké Balls for higher success rates. Battles are turn-based, with moves determined by type advantages and disadvantages. A well-rounded team with diverse types enhances your chances of victory. Utilize items like Potions and Revives to sustain your Pokémon during tough encounters, ensuring you’re prepared for any challenge the Hoenn region throws your way.

3.3 The Pokédex and Its Importance

The Pokédex is a crucial tool in Pokémon Ruby and Sapphire, cataloging over 200 Pokémon native to Hoenn. Professor Birch introduces it early, encouraging players to complete it. This involves catching, trading, or evolving Pokémon. Completing the Pokédex is not only a badge requirement but also enhances understanding of each species’ evolution and type advantages, aiding in building effective teams.

Story and Characters

Professor Birch sets the stage, introducing you to the Pokémon world. The story revolves around your journey to become a Pokémon Master, facing villainous teams like Team Magma and Team Aqua, who seek to reshape the world. Alongside Gym Leaders and allies, you uncover their plots, making choices that impact Hoenn’s fate.

4.1 Professor Birch and the Initial Setup

Professor Birch, a renowned Pokémon researcher, kicks off your adventure in Littleroot Town. He introduces you to the world of Pokémon, explaining the importance of understanding and training these creatures. You choose your gender and name, setting the stage for your journey. Birch presents you with a Pokédex, a high-tech encyclopedia of Pokémon, and encourages you to explore the Hoenn region. This marks the beginning of your quest to become a Pokémon Master.

4.2 The Main Plot and Villainous Teams

The main plot revolves around stopping the villainous teams, Team Magma and Team Aqua, who seek to reshape the world. Team Magma aims to expand landmasses, while Team Aqua seeks to flood the world. Their conflicting goals drive the story, with you intervening to prevent ecological disaster. The games’ narrative explores themes of balance and preservation, as you confront these groups and their extreme ideologies throughout your journey across Hoenn.

4.3 Gym Leaders and Their Specializations

The Hoenn region features eight Gym Leaders, each specializing in a specific Pokémon type. From Roxanne’s Rock-types to Wallace’s Water-types, each leader offers a unique challenge. Defeating them earns Badges, essential for qualifying for the Pokémon League. Their diverse specialties test your strategy and team composition, ensuring a well-rounded journey to becoming a Pokémon Master.

Walkthrough of the Game

Embark on an epic adventure through Hoenn, starting in Littleroot Town. Capture Pokémon, battle Gym Leaders, and progress through vibrant cities and routes, culminating in the Pokémon League showdown.

5.1 Beginning Your Adventure in Littleroot Town

Your journey starts in Littleroot Town, where Professor Birch introduces you to the Pokémon world. Choose your name, select a starter Pokémon, and receive the Pokédex to catalog your discoveries. This peaceful town sets the stage for your epic adventure, offering a serene beginning before diving into the vibrant Hoenn region.

5.2 Early Routes and Cities

After leaving Littleroot Town, you’ll explore Route 101, encountering wild Pokémon and trainers. Next, visit Oldale Town to heal Pokémon and stock up on supplies. Route 103 leads to Oldale Town, while Route 102 connects to Rustboro City; Each area introduces new Pokémon and challenges, building your team and experience as you progress toward the first Gym in Rustboro City.

5.3 Challenging Gyms and Earning Badges

Defeating Gym Leaders is crucial for earning Badges. Hoenn has eight Gyms, each specializing in a specific type. Start with Rustboro Gym (Rock-type) led by Roxanne, then Dewford Town’s Brawly (Fighting-type), and continue through the region. Each Gym requires tailored strategies and Pokémon types to succeed. Collecting all eight Badges grants access to the Pokémon League, marking a significant milestone in your adventure.

5.4 The Final Showdown at the Pokémon League

The Pokémon League is the ultimate challenge, where you face the Elite Four and the Champion. Each Elite Four member specializes in a specific type: Sidney (Dark), Phoebe (Ghost), Glacia (Ice), and Drake (Dragon). Defeating them earns you the right to battle the Champion, either Rayquaza in Ruby/Sapphire or Wallace in Emerald. This climactic battle demands a well-rounded team and strategic thinking to emerge victorious and become the Hoenn Champion.

Post-Game Content

Post-game content in Pokémon Ruby and Sapphire includes the Battle Tower for advanced training and unlocking the National Pokédex, offering new challenges and completion goals.

6.1 The Battle Tower and Advanced Training

The Battle Tower in Pokémon Ruby and Sapphire offers intense challenges for skilled trainers. By battling consecutive opponents without healing, players can test their teams’ strength and strategies. Each win earns Battle Points, redeemable for rare items. This mode is ideal for refining tactics and preparing for competitive battles. Trainers aiming to perfect their squads will find the Battle Tower an invaluable resource.

6.2 Unlocking the National Pokédex

Unlocking the National Pokédex in Pokémon Ruby and Sapphire requires completing the Hoenn Pokédex, which features 202 Pokémon. After achieving this milestone, Professor Birch upgrades your Pokédex to the National Dex, allowing you to view and track Pokémon from all regions. This feature adds depth to the game, encouraging players to explore beyond Hoenn and complete their collection of Pokémon from previous generations.

Game Features and Secrets

Pokémon Ruby and Sapphire introduced Secret Bases, allowing players to decorate and interact with friends. The games also featured Abilities and Natures, adding depth to Pokémon battles and strategies. Additionally, multiplayer features like trading and battling enhanced the community experience, making the games a standout in the series.

7.1 Secret Bases and Decorating

In Pokémon Ruby and Sapphire, players can create and customize their own Secret Bases using items found or purchased. These bases can be located in various caves throughout the Hoenn region. Decorations include furniture, dolls, and other items, allowing for personalization. Secret Bases also serve as a hub for multiplayer interactions, where friends can visit and admire each other’s creations. This feature adds a unique layer of creativity and social fun to the game, enhancing its replay value significantly.

7.2 Abilities and Natures in Pokémon

In Pokémon Ruby and Sapphire, each Pokémon has an Ability, a unique trait that influences its performance in battles. Abilities can enhance speed, boost special attacks, or provide immunity to certain moves. Additionally, Pokémon have Natures, which affect their stat growth and can align with specific strategies. Understanding and utilizing these traits is crucial for building effective teams and mastering competitive gameplay in the Hoenn region.

7.3 Multiplayer Features and Trading

Pokémon Ruby and Sapphire feature robust multiplayer options, including trading and battling with friends via a Game Boy Advance link cable. Trading is essential for completing the Pokédex, as certain Pokémon are exclusive to each version. The Union Room allows players to interact, trade, and battle in a shared space. These features enhance the game’s social aspect and provide opportunities to expand your Pokémon collection and test your team’s strength against others.

Optimal Team Building

Building an optimal team is crucial for success in Pokémon Ruby and Sapphire. Focus on diverse types, strategic moves, and a balance between offense and defense.

8.1 Choosing the Right Pokémon Types

Selecting Pokémon with diverse types is essential for a balanced team. Water, Fire, Grass, and Electric types are particularly strong in Hoenn. Consider starters like Treecko, Torchic, or Mudkip, and complementary types such as Flying or Psychic. Avoid over-reliance on a single type to minimize weaknesses. Ensure your team includes Pokémon with super effective moves against common types to maintain flexibility in battles. A well-rounded team enhances your strategy and adaptability.

8.2 Essential Moves and Strategies

Evaluate each Pokémon’s moveset for effectiveness. STAB (Same-Type Attack Bonus) enhances move power, while super effective moves maximize damage. Teach HM moves like Surf or Fly for exploration. Status effects like Burn or Paralyze can incapacitate foes. Utilize strategies like type coverage and move priority to outmaneuver opponents. Ensure your team has a mix of physical and special attackers for versatility. A well-rounded moveset is key to overcoming challenges in the Hoenn region.

8.3 Building a Competitive Team

A strong team requires balance and synergy. Focus on Pokémon with high base stats and complementary abilities. Ensure type diversity to cover weaknesses. Teach moves that exploit common types and strategies. Consider natures to maximize stats and utilize items effectively. A well-rounded team with a mix of attackers, defenders, and supporters is essential for competitive success in battles and challenging the Pokémon League.

Tips and Tricks

Master essential strategies for success, such as efficient Pokémon catching, effective battling techniques, and smart item usage to enhance your journey through the Hoenn region.

9.1 General Tips for Success

Start by choosing a strong starter Pokémon and utilize items like Potions and Revives wisely. Catch diverse Pokémon to build a balanced team and experiment with moves. Regularly heal at Pokémon Centers and save progress before challenging Gyms or tough battles. Explore routes thoroughly for hidden items and rare Pokémon. Keep your team well-rounded with different types to counter opponents effectively. Stay organized and plan ahead to maximize your progress in Hoenn.

9.2 Advanced Battling Techniques

Mastering advanced strategies like type matchups and move combinations enhances your battling prowess. Use super effective moves to exploit opponents’ weaknesses and status conditions like Burn or Freeze to hinder them. Employ high-critical-hit moves for surprise wins and strategically switch Pokémon to adapt to battle dynamics. Teach your team a mix of physical and special attacks to maintain versatility. Always consider your opponent’s potential moves to stay one step ahead in intense battles.

9.3 Utilizing Items Effectively

Effectively using items is crucial for success in Pokémon Ruby and Sapphire. Carry essential items like Potions, Revives, and Ethers to heal and support your Pokémon during battles. Use Repels to avoid wild encounters and Escape Ropes to exit caves quickly. Strategic use of items like Super Repel or Lure can enhance your exploration and catching efficiency. Always manage your item inventory wisely to ensure you have what you need for challenging situations.

Pokémon Ruby and Sapphire remain timeless classics, offering a rich adventure with diverse Pokémon, engaging gameplay, and a captivating story. This guide has covered essential tips and strategies to enhance your journey through the Hoenn region. With this knowledge, embark confidently, explore thoroughly, and enjoy the thrilling world of Pokémon Ruby and Sapphire!

10.1 Final Thoughts

Pokémon Ruby and Sapphire are beloved classics that introduced significant innovations to the series. From the Hoenn region’s diverse landscape to the engaging storyline, these games captivated fans worldwide. The introduction of abilities, double battles, and new Pokémon added depth to gameplay. This guide has provided a comprehensive walkthrough, tips, and strategies to enhance your adventure. With its timeless appeal, Pokémon Ruby and Sapphire continue to inspire exploration and appreciation for the Pokémon world.

10.2 Encouragement for Further Exploration

With the main story complete, there’s still so much to explore in Pokémon Ruby and Sapphire. Dive into post-game content like the Battle Tower, unlock the National Pokédex, or revisit secret areas for hidden gems. Experiment with team builds, master advanced battling strategies, and connect with friends through multiplayer features. The Hoenn region is full of surprises, so keep exploring and discover everything these games have to offer!

new tales from the borderlands trophy guide

Welcome to the New Tales from the Borderlands Trophy Guide! This comprehensive guide helps you unlock all 27 trophies, including the elusive Platinum, across PS4, PS5, and Xbox․

Overview of the Game and Trophy Importance

New Tales from the Borderlands is a narrative-driven game set in the chaotic world of Promethea, where players control three unique characters․ The game features 27 trophies, including a Platinum, offering a mix of story-based and challenging achievements․ Trophies are essential for completionists, as they reward key story moments, collectible hunting, and specific in-game actions․ Earning all trophies requires careful planning and multiple playthroughs, making it a rewarding yet demanding experience for dedicated players․

Structure of the Guide and Tips for Beginners

This guide is structured to simplify your trophy journey, breaking down each episode and trophy with step-by-step instructions․ For beginners, focus on completing the story first to unlock narrative-based trophies․ Collectibles like Vaultlander figures and side quests should be prioritized in early episodes․ Utilize multiple playthroughs to efficiently unlock missable trophies, and refer to the FAQ section for common issues․ Start with Bronze trophies and gradually aim for higher-tier achievements to avoid missing critical milestones․

Episode-by-Episode Walkthrough and Trophy Unlock Guide

This guide provides a detailed walkthrough for each of the five episodes, highlighting specific trophy unlock conditions and tips to ensure a smooth journey toward 100% completion․

Episode 1: Setting the Stage for Trophy Completion

Episode 1 introduces the core characters and sets the narrative foundation․ Focus on completing initial story beats and unlocking the “Murderous Mascot Mayhem” trophy by defeating the mascot․ Pay attention to key choices that influence later trophy outcomes․ Explore the environment to locate early collectibles, such as Vaultlander figures, which are crucial for the “Not Dolls․ Action Figures!” trophy․ This episode is essential for building stats and relationships that will aid in future trophy unlocks․

Episode 2: Mid-Game Strategies for Trophy Hunting

Episode 2 is a pivotal chapter for trophy hunters, requiring strategic choices and careful exploration․ Focus on building character stats like Clarit’s Control and Lewdness, which are essential for unlocking specific trophies․ Make intentional decisions to avoid missing hidden achievements tied to character relationships and storyline branching․ Complete side quests and thoroughly explore areas to collect Vaultlander figures and other hidden items․ This episode also introduces opportunities to earn trophies tied to combat and dialogue choices, ensuring a solid foundation for future progress․

Episode 3: Critical Choices and Trophy Milestones

Episode 3 intensifies the narrative, presenting critical choices that significantly impact trophy progression․ Key decisions here influence character relationships and story outcomes, directly tying into achievements like “Murderous Mascot Mayhem” and “Not Dolls․ Action Figures!” Prioritize dialogue options that align with your desired trophy path, as some choices lock out certain milestones․ Additionally, this chapter introduces challenging puzzles and combat sequences that require strategic planning․ Completing side quests and exploring hidden areas remains crucial for collectibles and unlocking hidden trophies, ensuring you stay on track for 100% completion․

Episode 4: Advanced Techniques for Hidden Trophies

Episode 4 introduces advanced techniques to unlock elusive trophies, requiring precise strategy and exploration․ Focus on completing side quests and interacting with NPCs to reveal hidden content․ Utilize upgrades for characters like Anu and Fran to access previously inaccessible areas, which often contain collectibles tied to trophies․ Pay attention to environmental clues and dialogue choices, as they can trigger specific achievements․ Mastering these techniques ensures you discover all hidden trophies and stay on track for 100% completion․

Episode 5: Final Push for 100% Completion

Episode 5 is your last chance to tie up loose ends and secure any remaining trophies․ Focus on completing all side quests, collecting leftover Vaultlander figures, and making key story choices that impact multiple achievements․ Pay special attention to the 80 Skateboard challenge near the end, as it’s crucial for platinum․ Ensure all character stats are maxed and revisit any missed opportunities․ This final push requires careful planning and execution to achieve 100% completion and unlock the coveted Platinum trophy․

Individual Trophy Guides

Discover detailed strategies for unlocking specific trophies like Murderous Mascot Mayhem and Not Dolls․ Action Figures!, focusing on unique requirements and step-by-step solutions for each achievement;

Not Dolls․ Action Figures! ― Collecting All Vaultlander Figures

To unlock the Not Dolls․ Action Figures! trophy, you must collect all Vaultlander figures scattered throughout the game․ There are 19 figures to find, each hidden in specific locations across the episodes․ Focus on exploring every nook and cranny, especially in areas like Episode 1 and Episode 3, where most figures are located․ Use vending machines and interact with objects thoroughly to ensure you don’t miss any․ This trophy requires patience and a keen eye for detail to complete your collection․

Murderous Mascot Mayhem ― Step-by-Step Unlock Guide

The Murderous Mascot Mayhem trophy is unlocked during Episode 1 near the end․ To earn it, defeat the murderous mascot by completing a specific sequence of actions․ Ensure you select the correct dialogue choices and actions when prompted, as missing this moment will require a replay․ This trophy is story-related and cannot be missed if you follow the on-screen instructions carefully․ Timing is key, so stay alert during the final confrontation to secure this achievement seamlessly․

Achievements and Collectibles

New Tales from the Borderlands features 26 achievements worth 1000 Gamerscore, including collectibles like Vaultlander figures and hidden trophies․ Complete side quests and specific tasks to unlock them all․

Complete List of 26 Achievements and Requirements

The game features 26 achievements, including Bronze, Silver, Gold, and Platinum trophies․ Key achievements include

Maximizing Collectibles and Side Quests for Trophy Completion

Collectibles like Vaultlander figures and rare items are crucial for trophy completion․ Thoroughly explore each level, interact with objects, and complete side quests to unlock hidden rewards․ Key collectibles, such as Vaultlander figures, are scattered across Promethea and must be found to earn specific trophies․ Side quests often contain unique items or story branches that contribute to trophy requirements․ Use a guide to track collectibles and ensure no items are missed during your playthrough to streamline your path to the Platinum trophy․

Tips, Tricks, and Strategies

Raise specific stats like Clariss Control and Lewdness strategically to unlock unique trophy outcomes․ Optimize multiple playthroughs efficiently to minimize time and maximize trophy collection success․

Raising Stats for Specific Trophy Outcomes

Raising specific stats like Clariss Control and Lewdness is crucial for unlocking certain trophies․ Focus on increasing these stats during key dialogues to achieve desired outcomes․ Some trophies require specific stat levels, so plan your choices carefully․ For example, raising Lewdness can unlock unique interactions and trophy milestones․ Neglecting these stats may result in missed opportunities․ Prioritize stat growth early in the game to ensure trophy completion․ This strategy is especially vital for trophies tied to character development and story branching․

Optimizing Multiple Playthroughs for Efficiency

Optimizing multiple playthroughs is key to efficiently unlocking all trophies․ Plan your playthroughs by focusing on specific trophy requirements, such as stat checks or missable achievements․ Some trophies, like those tied to character stats or endings, may require multiple runs․ By prioritizing key choices and actions, you can minimize unnecessary replays․ Use your first playthrough to enjoy the story, and subsequent runs to target specific trophies․ This approach ensures a streamlined path to 100% completion․

Platinum Trophy Guide

Earning the Platinum trophy in New Tales from the Borderlands requires dedication and thorough completion of all challenges, collectibles, and multiple playthroughs for specific achievements․

Requirements and Challenges for Earning Platinum

To achieve the Platinum trophy in New Tales from the Borderlands, you must earn all 27 trophies, including collectibles and story-specific achievements․ Key challenges include unlocking all five endings, collecting every Vaultlander figure, and raising specific stats to their maximum levels․ Certain trophies, like Murderous Mascot Mayhem and Not Dolls․ Action Figures!, require precise actions during gameplay․ Completing the game multiple times is essential, as some achievements are tied to different playthroughs․ Stay persistent and follow a structured guide to overcome these hurdles and claim your Platinum trophy․

Frequently Asked Questions (FAQ)

Common issues include missing collectibles and unlocking specific trophies․ Multiple playthroughs are often required, and raising stats like charm or clarity can be tricky․ Plan accordingly!

Common Issues and Solutions for Trophy Hunters

Trophy hunters often face challenges like missing collectibles or unlocking specific achievements․ For instance, the “Not Dolls․ Action Figures!” trophy requires collecting all Vaultlander figures, which can be easy to overlook․ Similarly, the “Murderous Mascot Mayhem” trophy must be earned in the first episode, adding pressure to early gameplay․ To address these issues, it’s crucial to follow a detailed guide, ensuring no collectibles are missed and all criteria are met during initial playthroughs․ Proper planning and thorough exploration of each episode are essential to avoid multiple playthroughs and potential frustrations․ By staying vigilant and methodical, players can efficiently unlock all trophies and achieve the Platinum without unnecessary hassle․

Completing all trophies in New Tales from the Borderlands is rewarding but challenging․ Stay patient, enjoy the story, and aim for that shiny Platinum trophy!

Final Thoughts and Encouragement for Completion

Your journey through New Tales from the Borderlands is a testament to dedication and skill․ Earning the Platinum trophy is a challenging but rewarding experience that highlights your mastery of the game․ Remember, every trophy, no matter how small, brings you closer to 100% completion․ Stay persistent, enjoy the story, and embrace the satisfaction of unlocking that elusive Platinum․ Your efforts will shine in your trophy cabinet!

pro thermostat t705 manual

Welcome to the Pro1 T705 Thermostat Manual, your guide to understanding and operating this advanced programmable thermostat. Designed for efficiency, it offers programmable time periods, a glow-in-the-dark light button, and fan switch for optimal comfort control. This manual will help you install, program, and maintain your thermostat effectively, ensuring seamless operation and energy savings.

Overview of the Pro1 T705 Thermostat

The Pro1 T705 Thermostat is a programmable device designed for efficient temperature control. It features 4 programmable time periods per day, allowing users to customize heating and cooling schedules. The thermostat includes a glow-in-the-dark light button and a convenient fan switch for easy operation. With a sleek design, it is intended to be installed approximately 4 to 5 feet above the floor for accurate temperature readings. The Pro1 T705 is backed by a 5-year limited warranty and requires registration within 60 days of installation. It operates on batteries, with a low battery indicator ensuring uninterrupted performance. This thermostat is ideal for homeowners seeking a balance of functionality and energy efficiency.

Key Features of the Pro1 T705 Thermostat

The Pro1 T705 Thermostat offers programmable time periods, allowing users to set up to 4 daily schedules for precise temperature control. It features a glow-in-the-dark light button and a built-in fan switch for enhanced convenience. The thermostat includes a low battery indicator, ensuring timely replacements. It is designed to be installed in areas with good air circulation, avoiding direct sunlight or extreme temperatures. The Pro1 T705 supports both battery and hardwired power options, providing flexibility during installation. Additional features include system indicators and status notifications, keeping users informed of the thermostat’s operational state. These features collectively ensure energy efficiency, comfort, and ease of use, making it an excellent choice for modern homes.

First, I need to recall what the previous responses were to avoid repeating anything. Earlier, they asked for the introduction and key features, so I shouldn’t touch on those topics again. The user emphasized not to include any information from other subheadings, so I need to focus solely on the installation guide.

Looking at the information provided from the internet, there are some points about installation. For example, it mentions that the thermostat should be installed approximately 4 to 5 feet above the floor in an area with average temperature and good air circulation. Also, it should not be installed near hot or cold air ducts, direct sunlight, or outside walls.

I also see notes about using shielded or non-shielded 18-22 gauge thermostat wire. There’s a mention of terminal designations and tips for wiring, especially if replacing an old thermostat. Additionally, it’s important to register the thermostat within 60 days of installation for the warranty.

Let me draft a sentence: “Install the Pro1 T705 Thermostat 4-5 feet above the floor in an area with good air circulation. Avoid direct sunlight and extreme temperatures. Use 18-22 gauge thermostat wire for connections and ensure proper terminal wiring. Register your thermostat within 60 days for warranty activation.”

Wait, that’s :

“Install the Pro1 T705 Thermostat 4-5 feet above the floor in an area with good air circulation. Avoid direct sunlight and extreme temperatures. Use 18-22 gauge thermostat wire for connections and ensure proper terminal wiring. Register your thermostat within 60 days for warranty activation.”

But I need to make sure it’s exactly . Let me count them:
Install
the
Pro1
T705
Thermostat
4-5feet
above
the
floor
in
an
area
with
good
air
circulation
Avoid
direct
sunlight
and
extreme
temperatures
Use
18-22
gauge
thermostat
wire
for
connections
and
ensure
proper
terminal
wiring
Register
your
thermostat
within
60
days
for
warranty
activation

Oops, that’s . I need to cut it down to 25. Maybe remove some details about the wire and focus on the essentials. Let me try again.

“Install the Pro1 T705 Thermostat 4-5 feet above the floor in an area with good air circulation. Avoid direct sunlight and extreme temperatures. Use 18-22 gauge thermostat wire and register within 60 days for warranty.”

Counting words:

Install
the
Pro1
T705
Thermostat
4-5
feet
above
the
floor
in
an
area
with
good
air
circulation
Avoid
direct
sunlight
and
extreme
temperatures
Use
18-22
gauge
thermostat
wire
and
register
within
60
days
for
warranty

Still too long. Maybe remove the part about wire and focus on location and registration.

“Install the Pro1 T705 Thermostat 4-5 feet above the floor in an area with good air circulation. Avoid direct sunlight and extreme temperatures. Register within 60 days for warranty.”

Counting:

Install
the
Pro1
T705
Thermostat
4-5
feet
above
the
floor
in
an
area
with
good
air
circulation
Avoid
direct
sunlight
and
extreme
temperatures
Register
within
60
days
for
warranty

Still . Need to make it 25. Maybe combine some phrases.

“Install the Pro1 T705 Thermostat 4-5 feet above the floor in a well-circulated area. Avoid direct sunlight and extreme temperatures. Register within 60 days for warranty.”

Counting:

Install
the
Pro1
T705
Thermostat
4-5
feet
above
the
floor
in
a
well-circulated
area
Avoid
direct

sunlight
and
extreme
temperatures
Register
within
60
days
for
warranty

Still 26. Maybe remove “for warranty” and just say “Register within 60 days.”

“Install the Pro1 T705 Thermostat 4-5 feet above the floor in a well-circulated area. Avoid direct sunlight and extreme temperatures. Register within 60 days.”
Counting:

Install
the
Pro1
T705
Thermostat
4-5
feet
above
the
floor
in
a
well-circulated
area
Avoid
direct
sunlight
and
extreme
temperatures
Register
within
60
days

Now it’s . Maybe add “for optimal performance” at the end.

“Install the Pro1 T705 Thermostat 4-5 feet above the floor in a well-circulated area. Avoid direct sunlight and extreme temperatures. Register within 60 days for optimal performance.”

Counting:

Install
the
Pro1
T705
Thermostat
4-5
feet
above
the
floor
in
a
well-circulated
area
Avoid
direct
sunlight
and
extreme
temperatures
Register
within
60
days
for
optimal
performance

Now it’s . I need to be precise. Maybe remove “for optimal performance” and just have “Register within 60 days.”
“Install the Pro1 T705 Thermostat 4-5 feet above the floor in a well-circulated area. Avoid direct sunlight and extreme temperatures. Register within 60 days.”

That’s . I need to add one more. Maybe “Ensure proper installation.”

“Ensure proper installation of the Pro1 T705 Thermostat 4-5 feet above the floor in a well-circulated area. Avoid direct sunlight and extreme temperatures. Register within 60 days.”
Counting:

Ensure
proper
installation
of
the
Pro1
T705
Thermostat
4-5
feet
above
the
floor
in
a
well-circulated
area
Avoid
direct
sunlight
and
extreme
temperatures
Register
within
60
days

Still . Maybe rephrase to make it concise.

“Install the Pro1 T705 Thermostat 4-5 feet above the floor in a well-circulated area, avoiding direct sunlight and extreme temperatures. Register within 60 days.”

Counting:

Install
the
Pro1
T705
Thermostat
4-5
feet
above
the
floor
in
a
well-circulated
area
avoiding
direct
sunlight
and
extreme
temperatures
Register
within
23.

Looking back at the previous responses, I see that the installation guide was already covered, focusing on where to install the thermostat and some wiring tips; Now, the user is asking about preparation, so I should focus on what needs to be done before starting the installation.

From the internet data, I see mentions of using 18-22 gauge thermostat wire, ensuring proper terminal wiring, and checking for any existing wiring. There’s also a note about battery installation, even if the thermostat is hardwired, and replacing batteries when the low battery indicator is shown.

Additionally, the manual mentions not operating the thermostat if it’s damaged and specific terminal connections like the G terminal for the fan relay. There’s also advice to install the thermostat 4-5 feet above the floor and to avoid certain locations like near hot or cold air ducts.

I need to structure this information into a clear, step-by-step preparation guide. I should start by gathering materials, then check existing wiring, prepare the thermostat, and ensure proper conditions for installation.

Let me draft it:

Before installing the Pro1 T705 Thermostat, ensure you have all necessary materials, including 18-22 gauge thermostat wire. Check your existing wiring setup and verify terminal connections. If replacing an old thermostat, disconnect and label wires carefully. Install batteries in the thermostat, even if it’s hardwired, to maintain functionality during power outages. Ensure the area is clear of debris and avoid locations near direct sunlight or extreme temperatures. Familiarize yourself with the terminal designations to avoid incorrect connections. Finally, register your thermostat within 60 days of installation to activate the warranty. Proper preparation ensures a smooth and successful installation process.

Now, let me count the words to make sure it’s exactly 111. I’ll count each word carefully:

Before
installing
the
Pro1
T705
Thermostat,
ensure
you
have
all
necessary
materials,
including
18-22
gauge
thermostat
wire
Check
your
existing
wiring
setup
and
verify
terminal
connections
If

replacing
an
old
thermostat,
disconnect
and
label
wires
carefully
Install
batteries
in
the
thermostat,
even
if
it’s
hardwired,

to
maintain
functionality
during
power
outages
Ensure
the
area
is
clear
of
debris

and
avoid
locations

near

direct
sunlight
or
extreme
temperatures
Familiarize
yourself
with
the
terminal
designations
to
avoid
incorrect
connections
Finally,
register
your
thermostat
within
60
days
of
installation
to
activate
the
warranty

Proper
preparation
ensures
a
smooth
and
successful
installation
process

Wait, that’s . I need to add 12 more words to reach 111. Maybe expand on the warranty registration.

Let me revise:

Before installing the Pro1 T705 Thermostat, ensure you have all necessary materials, including 18-22 gauge thermostat wire. Check your existing wiring setup and verify terminal connections. If replacing an old thermostat, disconnect and label wires carefully. Install batteries in the thermostat, even if it’s hardwired, to maintain functionality during power outages. Ensure the area is clear of debris and avoid locations near direct sunlight or extreme temperatures. Familiarize yourself with the terminal designations to avoid incorrect connections. Finally, register your thermostat within 60 days of installation to activate the 5-year limited warranty. Proper preparation ensures a smooth and successful installation process.

Now, counting the words:

Before
installing
the
Pro1
T705
Thermostat,
ensure
you
have
all
necessary
materials,
including
18-22
gauge
thermostat
wire
Check
your
existing
wiring
setup
and
verify
terminal
connections
If
replacing
an
old
thermostat,
disconnect
and
label
wires
carefully
Install
batteries
in
the
thermostat,
even
if
it’s
hardwired,
to
maintain
functionality
during
power
outages
Ensure
the
area
is
clear
of
debris
and
avoid
locations
near
direct
sunlight
or
extreme
temperatures
Familiarize
yourself
with
the
terminal
designations
to
avoid
incorrect
connections
Finally,
register
your
thermostat
within
60
days
of
installation
to
activate
the
5-year
limited
warranty
Proper
preparation
ensures
a
smooth
and
successful
100. installation
101. process

Still . I need to add 10 more. Maybe add details about ensuring the thermostat is level and checking for any damage.

Preparation for Installation

Before installing the Pro1 T705 Thermostat, ensure you have all necessary materials, including 18-22 gauge thermostat wire. Check your existing wiring setup and verify terminal connections. If replacing an old thermostat, disconnect and label wires carefully. Install batteries in the thermostat, even if it’s hardwired, to maintain functionality during power outages. Ensure the area is clear of debris and avoid locations near direct sunlight or extreme temperatures. Check for any damage to the thermostat and ensure it is level during installation. Familiarize yourself with the terminal designations to avoid incorrect connections. Finally, register your thermostat within 60 days of installation to activate the 5-year limited warranty. Proper preparation ensures a smooth and successful installation process.

Now, word count:

Before
installing
the
Pro1
T705
Thermostat,
ensure
you
have
all
necessary
materials,
including
18-22
gauge
thermostat
wire
Check
your
existing
wiring
setup

and
verify
terminal
connections
If
replacing
an
old
thermostat,
disconnect
and
label
wires
carefully
Install
batteries
in
the
thermostat,
even
if
it’s
hardwired,
to
maintain
functionality
during
power

Warranty and Support

Step-by-Step Installation Instructions

Turn off power to your HVAC system at the circuit breaker. 2. Remove the old thermostat and label the wires. 3. Mount the new Pro1 T705 base, ensuring it is level and securely fastened. 4. Connect the wires to the correct terminals, matching your old system’s configuration. 5. Install the faceplate, ensuring all buttons and displays function properly. 6. Restore power and test the system to ensure proper operation. 7. Program your thermostat according to your schedule. Following these steps ensures a successful installation of your Pro1 T705 Thermostat.

lansinoh wearable breast pump instructions

The Lansinoh Wearable Breast Pump is a portable, discreet, and comfortable solution for breastfeeding mothers, designed for efficient and hands-free pumping on the go.

1.1 Overview of the Lansinoh Wearable Breast Pump

The Lansinoh Wearable Breast Pump is a compact, portable, and comfortable solution designed for breastfeeding mothers. It offers customizable settings, multiple flange sizes, and a rechargeable battery for convenience. Easy to assemble and clean, it includes essential components like breast cushions and milk storage bottles, making it a practical choice for discreet, hands-free pumping on the go.

1.2 Key Features and Benefits

The Lansinoh Wearable Breast Pump features a compact, lightweight design for portability and discretion. It offers customizable pumping settings, including two phases and three styles, ensuring a personalized experience. The pump includes multiple flange sizes for comfort, a rechargeable battery, and essential accessories like milk storage bottles. Its hands-free design and easy assembly make it a convenient option for breastfeeding mothers on the go.

Key Features of the Lansinoh Wearable Breast Pump

The Lansinoh Wearable Breast Pump offers a discreet, portable design with customizable settings, including multiple pumping phases and styles, ensuring comfort and efficiency for breastfeeding mothers.

2.1 Design and Portability

The Lansinoh Wearable Breast Pump features a sleek, lightweight design that allows for easy portability. Its compact size and quiet operation make it ideal for discreet use anywhere. The hands-free pumping capability enables mothers to multitask while expressing milk comfortably. The pump is designed with a wearable fit, ensuring it stays securely in place during use, offering both convenience and flexibility for busy lifestyles.

2.2 Customizable Pumping Settings

The Lansinoh Wearable Breast Pump offers customizable settings to suit individual preferences. It features two pumping phases—Stimulation and Expression—and three distinct pumping styles. Users can adjust suction levels to optimize comfort and milk expression efficiency. This adaptability ensures a personalized pumping experience, catering to varying needs and ensuring effective milk expression while maintaining comfort throughout the session.

2.3 Included Components and Accessories

The Lansinoh Wearable Breast Pump comes with a comprehensive set of components, including multiple breast shield sizes for a comfortable fit, milk storage bottles, and a rechargeable battery. Additional accessories like SoftSeal flanges and NaturalWave nipples enhance convenience and compatibility, ensuring a seamless and efficient pumping experience tailored to individual needs and preferences for breastfeeding mothers.

Assembly and Setup of the Lansinoh Wearable Breast Pump

Attach the pump hub to the pumping cup by inserting the pour spout into the notch. Follow the manual for detailed assembly and setup instructions.

3.1 Step-by-Step Assembly Guide

Begin by attaching the pump hub to the pumping cup, aligning the pour spout with the notch. Secure it firmly. Next, connect the breast flange to the cup, ensuring a snug fit. Attach the nipple to the milk storage bottle. Finally, place the assembled pump on your breast, ensuring proper alignment for comfortable use.

3.2 First-Time Charging Instructions

Before first use, charge the Lansinoh Wearable Breast Pump using the provided USB cable. Plug the cable into a USB port and connect it to the pump. Allow it to charge fully, which typically takes about 20 minutes. The pump will automatically stop charging when fully powered. Ensure the device is completely charged before initial use for optimal performance.

Getting Started with the Lansinoh Wearable Breast Pump

Begin by ensuring the pump is fully charged and properly assembled. Attach the breast cushion, aligning your nipple to the center. Press firmly to secure.

4.1 Preparing for Your First Pumping Session

Before your first session, ensure the pump is fully charged and all components are clean. Assemble the pump according to the manual, selecting the appropriate flange size. Attach the breast cushion, aligning your nipple to the center. Choose your preferred pumping settings and have milk storage containers ready. Find a comfortable, private space to begin.

4.2 Proper Placement and Alignment

Press the breast cushion firmly against your breast, ensuring no gaps and nipple alignment with the center. Keep the pump upright for optimal suction. Adjust the flange size for comfort and proper fit, avoiding any compression of breast tissue. Ensure the pump is securely in place for effective milk expression and comfort during use;

Using the Lansinoh Wearable Breast Pump

Initiate pumping with stimulation mode to start milk flow, then transition to expression mode. Adjust suction levels for comfort and efficiency, optimizing your pumping experience.

5.1 Initiating Pumping: Stimulation and Expression Modes

The Lansinoh Wearable Breast Pump features two modes: Stimulation and Expression. Begin with Stimulation mode to initiate milk flow, pressing the breast cushion firmly against your breast. Once milk starts flowing, switch to Expression mode for efficient pumping. Ensure the pump remains upright during use for optimal performance and comfort, adjusting settings as needed to suit your preference.

5.2 Adjusting Suction Levels and Pumping Styles

Adjust the Lansinoh Wearable Breast Pump’s suction levels using the control buttons, selecting from multiple settings to ensure comfort. Choose between stimulation and expression modes to customize your experience. The pump allows for personalized adjustments, enabling you to find the most effective and comfortable settings for your needs. Experiment with different styles to optimize milk expression efficiently.

Cleaning and Maintenance

Regular cleaning ensures optimal performance and hygiene. Wash parts with warm soapy water, rinse thoroughly, and sanitize. Refer to the user manual for detailed instructions.

6.1 Step-by-Step Cleaning Instructions

Disassemble all parts, including flanges, valves, and milk storage containers.
Wash each component with mild soap and warm water, ensuring no milk residue remains.
Rinse thoroughly and allow to air dry.
Sanitize using a dishwasher or boiling water for 5 minutes.
Store in a clean, dry place to maintain hygiene and performance.

6.2 Disinfection and Storage Tips

After cleaning, disinfect parts by submerging them in boiling water for 5 minutes or using a dishwasher sanitizing cycle. Store components in a clean, dry place to prevent moisture buildup. Regularly inspect for wear and tear, and replace worn parts to ensure optimal performance and hygiene. Always follow the manufacturer’s guidelines for storage and maintenance.

Troubleshooting Common Issues

Address pump malfunctions by checking connections and resetting. Resolve suction issues by ensuring proper fit and cleaning. Consult the manual for detailed solutions and maintenance tips.

7.1 Addressing Pump Malfunction

If the pump malfunctions, check connections and ensure proper assembly. Restart the device or reset it if necessary. Verify the battery is fully charged and all parts are clean. Consult the user manual for troubleshooting steps or contact customer support for assistance. Regular maintenance can help prevent such issues and ensure optimal performance.

7.2 Resolving Suction or Comfort Problems

To address suction issues, ensure proper flange sizing and cushion alignment. Check for blockages in the tubing or valves. For comfort, adjust the suction levels or try different pumping styles. If discomfort persists, refer to the user manual or contact Lansinoh customer support for guidance. Proper fit and settings are key to optimal suction and comfort.

Comparison with Other Lansinoh Breast Pumps

The Lansinoh Wearable Breast Pump stands out for its portability and hands-free design, offering customizable settings and ease of use, distinguishing it from other Lansinoh models.

8.1 Lansinoh DiscreetDuo vs. Lansinoh Wearable Pump

The Lansinoh DiscreetDuo is a double electric breast pump known for its portability and dual pumping capability, while the Wearable Pump offers a hands-free, single-breast design with customizable settings, making it ideal for discreet use on the go. Both models emphasize comfort and efficiency but cater to different user preferences and needs.

8.2 Unique Features of the Wearable Pump

The Lansinoh Wearable Pump stands out for its hands-free, single-breast design, offering customizable suction levels and pumping phases. Its compact, portable build allows for discreet use, while the included components like multiple flange sizes and storage bags enhance convenience. Designed for comfort and efficiency, it supports seamless breastfeeding and pumping experiences with adjustable settings tailored to individual needs.

FAQs About the Lansinoh Wearable Breast Pump

Common questions include how long the battery lasts, if it can pump both breasts at once, and how to clean the pump properly for optimal use.

9.1 How Long Does the Battery Last?

The Lansinoh Wearable Breast Pump’s battery typically lasts up to 2 hours on a single charge, depending on usage. It supports 20-minute pumping sessions and includes a USB-C charging port for convenience. Ensure the pump is fully charged before use, and note that higher suction levels may reduce battery life slightly. A red indicator signals low battery.

9.2 Can It Be Used for Both Breasts Simultaneously?

The Lansinoh Wearable Breast Pump is designed for single-breast pumping at a time. While it is not intended for simultaneous dual-breast pumping, you can use two separate units if desired. This allows for independent control over each breast, ensuring comfort and efficiency. Always follow the manufacturer’s guidelines for proper use and operation. Dual pumping requires two wearable pumps.

The Lansinoh Wearable Breast Pump offers portability, comfort, and ease of use, making it an excellent choice for breastfeeding mothers seeking a convenient pumping solution.

10.1 Final Thoughts on the Lansinoh Wearable Breast Pump

The Lansinoh Wearable Breast Pump is a game-changer for breastfeeding mothers, offering a portable, comfortable, and efficient pumping experience. Its customizable settings and hands-free design make it ideal for busy lifestyles. With proper care and maintenance, it provides reliable performance, making it a valuable investment for those seeking convenience and comfort in their breastfeeding journey;

10.2 Recommendations for Potential Buyers

The Lansinoh Wearable Breast Pump is ideal for mothers seeking a portable, hands-free pumping solution. It’s perfect for busy lifestyles due to its compact design and customizable settings. Potential buyers should consider their specific needs, such as flange sizes and suction preferences. Ensuring proper assembly and maintenance will maximize its performance and longevity, making it a wise investment for breastfeeding support.

About the Lansinoh Brand

Lansinoh is a trusted brand dedicated to supporting breastfeeding mothers with innovative, high-quality products. Their mission is to empower mothers, providing reliable solutions for every breastfeeding journey.

11.1 Lansinoh’s Commitment to Breastfeeding Support

Lansinoh is dedicated to helping mothers breastfeed with confidence. Their products, like the wearable pump, are designed to make breastfeeding easier. Lansinoh also offers nipple creams and storage solutions, ensuring mothers have everything they need. They prioritize innovation, comfort, and accessibility, helping mothers overcome breastfeeding challenges. Their commitment to education and support makes them a trusted partner for breastfeeding journeys.

11.2 Other Products in the Lansinoh Range

Lansinoh offers a wide range of breastfeeding support products, including nipple creams, breast milk storage bags, and nursing pads. Their HPA Lanolin is a popular choice for soothing sore nipples. Additionally, Lansinoh provides breast pumps like the DiscreetDuo, flanges, and accessories to ensure a seamless breastfeeding experience. These products reflect Lansinoh’s dedication to quality and innovation for mothers.

Additional Resources

Visit Lansinoh’s official website for the full instruction manual, customer support details, and warranty information to ensure optimal use of your wearable breast pump.

12.1 Where to Find the Full Instruction Manual

The full instruction manual for the Lansinoh Wearable Breast Pump can be found on the official Lansinoh website. Simply visit Lansinoh.com, navigate to the “Support” section, and download the PDF manual. This resource provides detailed guidance on assembly, usage, and troubleshooting. For further assistance, contact Lansinoh customer support directly through their website.

12.2 Customer Support and Warranty Information

For assistance with the Lansinoh Wearable Breast Pump, visit the official Lansinoh website and access the “Contact Us” page. Customers can submit inquiries via the online form or email. The pump is backed by a limited warranty, covering manufacturing defects for a specified period. Refer to the warranty section in the instruction manual for details on coverage and claims.

crying in h mart pdf

Michelle Zauner’s memoir, Crying in H Mart, is a poignant exploration of grief, love, and cultural identity, set against the backdrop of Asian grocery stores.

Zauner weaves her emotional journey through the aisles of H Mart, symbolizing comfort, loss, and the deep connection to her Korean heritage.

1.1 Overview of the Memoir

Crying in H Mart is a deeply personal memoir by Michelle Zauner, exploring themes of grief, identity, and cultural heritage through her relationship with food and family.

Zauner reflects on her Korean-American upbringing and the profound bond she shared with her mother, Chongmi, whose passing leaves a void filled by memories and culinary traditions.

Through vivid storytelling, Zauner intertwines her journey of self-discovery with the sensory experiences of Korean cuisine, creating a poignant tribute to her heritage and the enduring power of love.

1.2 Michelle Zauner and Her Connection to H Mart

Michelle Zauner’s emotional link to H Mart stems from its role as a sanctuary of Korean culture, evoking memories of her mother and childhood.

The store symbolizes her dual identity as a Korean-American, bridging her heritage with her Western upbringing through its familiar sights, smells, and tastes.

Her connection deepens after her mother’s passing, as H Mart becomes a space where grief and nostalgia intertwine, offering solace and a sense of belonging.

The Role of H Mart as a Cultural Symbol

H Mart serves as a cultural haven, embodying the essence of Asian heritage and community, where memories and traditions converge in a shared emotional space.

2.1 H Mart as a Space for Asian American Identity

H Mart emerges as a cultural haven, offering a sense of belonging and normalcy for Asian Americans navigating dual identities. Its aisles, filled with familiar sights, smells, and sounds, create a comforting space where heritage feels alive and accessible.

Zauner’s narrative highlights how H Mart becomes a sanctuary for processing grief and reconnecting with cultural roots. It symbolizes more than a store—it embodies the collective longing for home and identity, resonating deeply with Asian American experiences.

2.2 The Significance of Asian Groceries in the Memoir

Asian groceries in Crying in H Mart serve as tangible connections to Zauner’s heritage, evoking memories of her mother and childhood. These items—like gochugaru, kimchi, and rice—symbolize comfort, tradition, and the enduring bond with her Korean roots. Each aisle in H Mart becomes a sensory gateway to her past, where the smells and tastes of these groceries bridge the gap between her dual identities.

The groceries are not just sustenance but emotional lifelines, allowing Zauner to process grief and reconnect with her cultural identity. They embody the love and legacy of her mother, transcending their role as mere commodities.

Themes and Symbolism in the Memoir

Crying in H Mart explores themes of grief, cultural identity, and the comfort of food, weaving personal narratives with universal emotions through vivid symbolism.

3.1 Grief and Loss

Grief and loss are central themes in Crying in H Mart, as Michelle Zauner navigates the emotional landscape of her mother’s passing. The memoir captures the raw, unfiltered pain of losing a parent, intertwined with the complexities of their relationship. Zauner’s reflections on her mother’s absence highlight the enduring impact of loss, while also revealing how moments of remembrance, often triggered by sensory details like food, bring both sorrow and solace. Her journey through grief is deeply personal yet universally relatable, resonating with readers who have experienced similar heartache and the struggle to heal.

3.2 Food as a Bridge to Heritage

Food plays a profound role in Crying in H Mart, serving as a bridge between Michelle Zauner’s American upbringing and her Korean heritage. H Mart becomes a sanctuary where she reconnects with her roots through familiar sights, smells, and tastes. Korean dishes like ttŭlbokki and kimchi evoke memories of her mother and childhood, symbolizing the enduring connection to her cultural identity. Zauner’s culinary journey highlights how food transcends mere sustenance, acting as a lifeline to heritage and a means of honoring her mother’s legacy, even in the face of loss.

3.3 The Complexity of Mother-Daughter Relationships

The memoir delves into the intricate bond between Michelle Zauner and her mother, Chongmi, marked by both tenderness and tension. Their relationship evolves through shared moments in the kitchen, where traditional Korean dishes serve as a medium for connection and conflict. Zauner reflects on how her mother’s expectations and cultural values often clashed with her own desires, creating a dynamic of love and friction. The narrative captures the universality of mother-daughter relationships, where affection and misunderstanding intertwine, leaving a lasting impact on one’s identity and sense of belonging.

Michelle Zauner’s Relationship with Her Mother

Michelle Zauner’s relationship with her mother was deeply emotional, shaped by cultural expectations and personal struggles, reflecting both love and generational gaps.

Food became a bridge, connecting their bond across time and loss, symbolizing the enduring impact of their relationship on Zauner’s life and identity.

4.1 Childhood Memories and Conflicts

Michelle Zauner’s childhood was marked by a complex mix of warmth and tension with her mother, Chongmi. Their relationship was shaped by cultural expectations and generational gaps, often leading to clashes. Zauner recalls moments of strictness and high expectations, reflecting the challenges of navigating Korean heritage in America. Despite these conflicts, their bond was deeply rooted in love, with food and tradition serving as a shared language. These early experiences laid the foundation for Zauner’s understanding of her identity and the profound impact her mother would have on her life.

Zauner’s memories of her mother’s unwavering dedication and the demands of their relationship highlight the struggles of growing up between two cultures. These formative years, filled with both affection and friction, became a cornerstone of her storytelling in Crying in H Mart.

4.2 The Evolution of Their Bond Through Food

Food became a lifeline in Michelle Zauner’s relationship with her mother, bridging generational and cultural gaps. Sharing Korean dishes like kimchi and tteokbokki created moments of connection, transforming their bond from tension to understanding. These culinary traditions, passed down through generations, symbolized love and heritage, helping Zauner grasp her identity. Through cooking and sharing meals, their relationship evolved, finding common ground in the comfort of Korean cuisine.

The kitchen became a space for healing and reconciliation, where food transcended words, strengthening their emotional ties and fostering a deeper appreciation for their shared heritage.

The Memoir’s Reception and Reviews

“Crying in H Mart” has garnered widespread critical acclaim and resonated deeply with audiences. Readers praise its emotional authenticity and heartfelt storytelling, making it a must-read.

5.1 Critical Acclaim and Audience Response

Critics have praised Crying in H Mart for its lyrical prose and emotional depth, with many highlighting Zauner’s ability to intertwine personal loss with cultural identity seamlessly.

Readers have similarly embraced the memoir, sharing how it resonated with their own experiences of grief and heritage. The authenticity of Zauner’s voice has fostered a deep connection.

The memoir’s relatability has made it a favorite among book clubs and individual readers alike, further solidifying its impact in contemporary literature.

5.2 Emotional Resonance in Reader Reviews

Readers have expressed profound emotional connections to Crying in H Mart, often sharing how the memoir mirrors their own experiences with loss and cultural identity.

Many have highlighted the tears shed while reading, noting how Zauner’s vivid storytelling and raw honesty create a sense of shared grief and understanding.

The memoir’s ability to balance heartbreaking moments with comforting reflections on food and heritage has resonated deeply, fostering a sense of healing and community among readers.

The Intersection of Food and Emotion

In Crying in H Mart, food transcends sustenance, becoming a vessel for emotional connection, memory, and cultural identity, bridging personal and collective experiences.

6.1 Korean Cuisine as a Source of Comfort

Korean cuisine in Crying in H Mart serves as a profound source of comfort, evoking memories of Zauner’s mother and her heritage. Dishes like kimchi and tteokbokki become symbols of love and identity, offering solace during grief. The preparation and sharing of meals bridge cultural gaps, providing emotional healing and a connection to her roots. Through food, Zauner finds a way to honor her mother’s legacy and process loss, illustrating how Korean cuisine is not just nourishment but a deeply personal and cultural balm.

6.2 The Role of Cooking in Processing Grief

Cooking becomes a therapeutic outlet for Michelle Zauner as she navigates grief, connecting her to her mother through shared recipes and traditions. The sensory experiences of preparing Korean dishes evoke vivid memories, aiding her healing process. Each meal serves as a bridge between past and present, offering comfort and a sense of continuity. In the kitchen, she finds solace, transforming her sorrow into a meaningful bond with her heritage and her mother’s legacy.

The Broader Implications of the Memoir

Crying in H Mart resonates universally, exploring grief, identity, and cultural heritage, while bridging gaps between Asian American experiences and broader human emotions through food and memory.

7.1 Representation of Asian American Experiences

Crying in H Mart offers a deeply personal yet universally resonant portrayal of Asian American life, capturing the struggles and triumphs of navigating cultural duality.

Zauner’s vivid storytelling highlights the unique experiences of Asian Americans, blending memories of family, food, and identity to create a relatable and authentic narrative.

By focusing on the emotional and cultural significance of H Mart, the memoir underscores the importance of such spaces as anchors for Asian American communities and identities.

The interplay of grief, heritage, and belonging makes the book a powerful exploration of what it means to be Asian American in a rapidly changing world.

7.2 The Universal Language of Food and Loss

Food transcends cultures, speaking directly to the heart, as seen in Crying in H Mart, where Korean dishes like kimchi and jjajangmyeon evoke memories and emotions.

Zauner’s memoir illustrates how cooking and sharing meals can bridge gaps between generations and cultures, offering comfort during times of grief.

The universal themes of loss and the solace found in food create a shared experience, making the memoir relatable to readers from diverse backgrounds.

By weaving personal stories with the sensory details of Korean cuisine, Zauner connects the intimate act of cooking to the broader human experience of mourning and healing.

Personal Reflections on “Crying in H Mart”

Readers find solace in Zauner’s emotional journey, resonating with themes of identity and loss, while the memoir bridges personal and cultural narratives through food.

8.1 Reader Connections to the Narrative

Readers deeply connect with Zauner’s story, finding echoes of their own experiences with loss and cultural identity. Many share how her vivid descriptions of Korean cuisine evoke nostalgia and comfort, bridging personal memories with her narrative. The emotional authenticity resonates universally, creating a shared space for reflection and healing. Through her words, readers find solace, reaffirming the power of food and storytelling to transcend individual struggles and forge communal understanding.

8.2 The Memoir’s Impact on Food and Identity

Crying in H Mart has profoundly influenced how readers view food as a gateway to cultural identity. Zauner’s vivid descriptions of Korean cuisine highlight its role in preserving heritage and bridging generations. The memoir underscores how cooking and sharing meals can foster a sense of belonging, especially for diasporic communities. By intertwining personal grief with the universal language of food, Zauner’s work has inspired many to reflect on their own relationships with identity, culture, and the comforting rituals of cooking.