Proper beef cutting techniques ensure high-quality results, requiring precision and the right tools to achieve tender, flavorful cuts for various dishes, while maintaining safety and efficiency.
Understanding the Basics of Beef Cutting
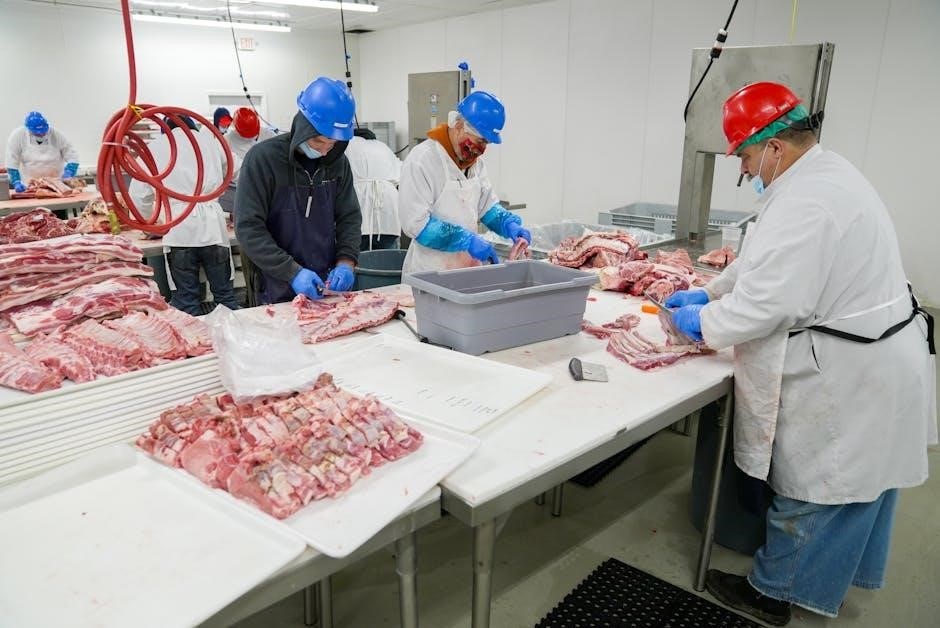
Beef cutting involves mastering fundamental techniques to divide the animal into primal cuts, sub-primals, and retail portions. Understanding the anatomy of the carcass is crucial, as it determines how cuts are made. Sharp tools and proper knife skills are essential for precision. Basics include distinguishing between muscle groups and bone structures, which guide how cuts are portioned. Safety and efficiency are key, ensuring each cut maximizes flavor and tenderness while minimizing waste. This foundation is vital for achieving high-quality results in any beef preparation.
Importance of Proper Cutting Techniques
Proper cutting techniques are vital for achieving tender, flavorful results and maximizing the value of your beef. Sharp tools and smooth, controlled motions ensure precise cuts, minimizing waste and enhancing quality. Improper cutting can lead to tough, uneven portions, reducing the overall dining experience; Safety and efficiency are also critical, as poor techniques can lead to accidents or subpar outcomes. Mastering these skills ensures every cut meets your culinary standards, whether for steaks, roasts, or ground beef.
Tools and Equipment Needed for Beef Cutting
The right tools are essential for efficient and safe beef cutting. A sharp chef’s knife or boning knife is crucial for precise cuts, while a meat saw or cleaver handles larger tasks like portioning primal cuts. Other necessities include a sturdy cutting board, protective gloves, and a meat grinder for ground beef. Proper equipment ensures clean, even cuts, preventing waste and improving overall quality. Investing in high-quality tools enhances both safety and the final product’s consistency and flavor.
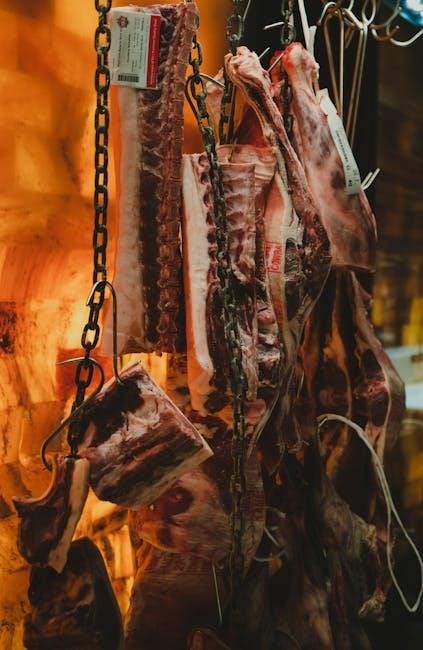
Beef Primal Cuts
Beef primal cuts, such as Chuck, Rib, Loin, and Round, are divided into sub-cuts for steaks, roasts, or ground beef, ensuring efficient use of the animal.
Overview of Beef Primal Cuts
Beef primal cuts, including Chuck, Rib, Loin, and Round, are the primary divisions of the carcass. These sections are further subdivided into sub-primals and retail cuts. The Chuck, often used for ground beef and roasts, comes from the shoulder area. The Rib section is known for its marbling and rich flavor, ideal for steaks and roasts. The Loin, including the Short Loin and Sirloin, offers tender cuts like T-bones and sirloin steaks; The Round, leaner and tougher, is commonly used for roasts or thinly sliced steaks. Understanding these primal cuts is essential for customizing your beef processing preferences and ensuring optimal flavor and texture in your final products.
Chuck, Rib, Loin, and Round Sections
The Chuck, Rib, Loin, and Round are the primary beef primal cuts. The Chuck, from the shoulder, is ideal for ground beef and hearty roasts. The Rib section, known for its marbling, offers rich, flavorful steaks and roasts. The Loin, including the Short Loin and Sirloin, provides tender cuts like T-bones and sirloin steaks. The Round, leaner and tougher, is often used for roasts or thinly sliced steaks. Each section’s characteristics guide how they’re processed for optimal flavor and texture.
Understanding Sub-Primal Cuts
Sub-primal cuts are smaller, more specific divisions within primal cuts, offering greater customization. They allow for precise processing into steaks, roasts, ground beef, or stew meat. For example, the Chuck can be split into Arm and Blade portions, while the Loin may be divided into Short Loin and Sirloin. These cuts are tailored to achieve desired textures and flavors, ensuring versatility for various cooking methods while maintaining quality and consistency in the final beef products.
Beef Cutting Tools and Equipment
Essential tools include sharp knives, meat saws, and cleavers, ensuring precise cuts and efficient processing. Proper equipment is vital for safety and achieving desired beef cut quality.
Essential Knives for Beef Cutting
A sharp chef’s knife and boning knife are indispensable for precise beef cutting. The chef’s knife excels at slicing larger cuts, while the boning knife navigates around bones effortlessly. A cleaver is ideal for breaking bones, and a fillet knife is perfect for trimming fat. High-carbon steel blades are recommended for durability and edge retention. Regular sharpening ensures optimal performance, preventing tears and uneven cuts. The right knives, maintained properly, are crucial for achieving professional-quality beef cuts safely and efficiently.
Meat Saws and Cleavers
Meat saws are essential for cutting through bones, enabling precise portioning of larger beef sections. Manual or electric saws are ideal for tasks like dividing primal cuts into manageable sizes. Cleavers, with their broad, heavy blades, are perfect for chopping bones and breaking joints. They also excel at flattening or crushing meat for dishes like schnitzel. Selecting high-quality, durable tools ensures efficiency and safety. Regular maintenance, like sharpening, is crucial for optimal performance and clean cuts.
Other Equipment for Beef Processing
Beyond knives and saws, essential tools include meat grinders for creating ground beef and vacuum packers to preserve freshness. Meat slicers are ideal for deli-thin cuts, while tenderizers enhance texture. Sharpeners maintain tool efficiency, and bone scrapers help prepare cuts. Trays and containers keep work areas organized, ensuring cleanliness. These tools collectively streamline the beef processing workflow, contributing to consistent, high-quality results and safer handling of beef cuts.
Beef Cutting Techniques
Mastering beef cutting involves precise knife skills, smooth even cuts, and attention to safety. Using sharp tools and proper techniques ensures tender, high-quality results every time.
Basic Cutting Techniques for Beef
Mastering basic beef cutting involves using sharp knives and smooth, controlled motions. Start with a clean, stable surface and ensure the knife is razor-sharp for precise cuts. Always cut against the grain to enhance tenderness. For even portions, use a steady hand and visualize the cuts before making them. Trimming excess fat and connective tissue improves the quality of the final product. Practice safety by keeping fingers away from the blade and maintaining a firm grip on the meat.
Advanced Techniques for Precision Cutting
Advanced beef cutting involves specialized tools like meat saws and cleavers for intricate cuts. Use a smooth, rocking motion with a sharp knife for even slices. For precision, cut against the grain and maintain consistent thickness. To achieve uniform portions, measure cuts visually or use a guide. For bone-in cuts, carefully navigate around bones to preserve structure. Practice handling larger sections like roasts by tying them for even cooking. These techniques ensure professional-quality results and customizable cuts tailored to specific recipes or preferences.
Safety Precautions While Cutting Beef
Safety Precautions While Cutting Beef
Always use sharp knives and tools to prevent accidents. Wear cut-resistant gloves to protect hands from cuts. Ensure proper lighting to maintain clear visibility. Keep long hair tied back and avoid loose clothing. Secure the meat firmly on a stable surface to prevent slipping. Avoid cutting toward your body and maintain a firm grip on the knife. Store tools safely, out of children’s reach. Clean and sanitize all equipment regularly to maintain hygiene and prevent contamination.

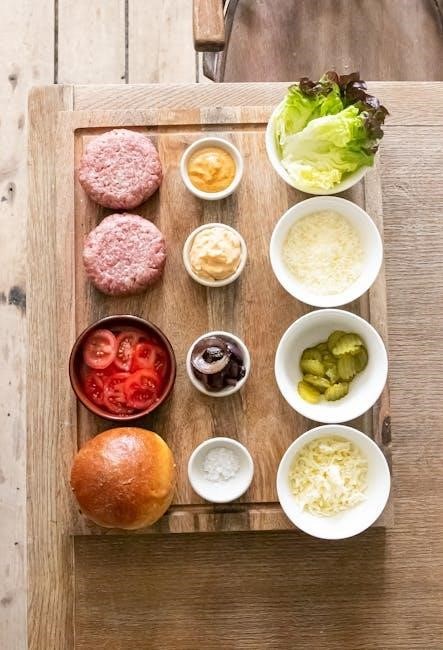
Ground Beef Processing
Ground beef processing involves grinding leaner cuts, controlling fat content for flavor, and portioning for convenience. Proper handling ensures safety and maintains meat quality.
How to Grind Beef at Home
Grinding beef at home allows for customization and freshness. Start by selecting lean cuts like chuck or round, trimming excess fat if desired. Use a meat grinder or food processor for consistent results. Keep the meat cold to prevent overheating, which can affect texture. Add fat if needed for juiciness, typically 10-20%. Process in small batches for even grinding. Store ground beef in airtight containers, labeling with dates. Ensure all tools are sharp and sanitized for safety and efficiency.
Best Practices for Ground Beef
For optimal results, grind beef just before use to maintain freshness and texture. Use lean cuts like chuck or round, trimming excess fat to achieve desired leanness. Avoid over-processing to prevent a dense texture. Add fat if needed for flavor and juiciness, typically 10-20%. Store ground beef in airtight containers, keeping it cold at 38°F or below. Freeze for longer storage, ensuring proper packaging to prevent freezer burn. Always handle with sanitized tools and surfaces to ensure food safety and quality.
Portion Control for Ground Beef
Portion control ensures consistent results when using ground beef. Standardize patties to 1/4lb or 1/3lb each for uniform cooking. Use a kitchen scale to measure accurately. Package ground beef in 1lb or 2lb airtight containers for freshness. For freezing, divide into smaller portions to avoid thawing large quantities. Keep raw beef separate from ready-to-eat foods to prevent cross-contamination. Label packages with dates and contents for easy identification. Proper portioning enhances cooking efficiency and maintains quality, ensuring every dish meets your expectations.

Popular Beef Cuts
Popular beef cuts include steaks like Ribeye and Sirloin, roasts such as Chuck and Brisket, and versatile options like Flank Steak and Short Ribs for various dishes.
Steaks: Ribeye, Sirloin, and T-Bone
Steaks like Ribeye, Sirloin, and T-Bone are popular for their rich flavor and texture. Ribeye, known for its marbling, offers a tender and juicy experience. Sirloin steaks are leaner and ideal for grilling. T-Bone combines the richness of a Porterhouse with the tenderness of a Sirloin. Typically cut to desired thickness, these steaks can be bone-in or boneless, providing versatility for any preference.
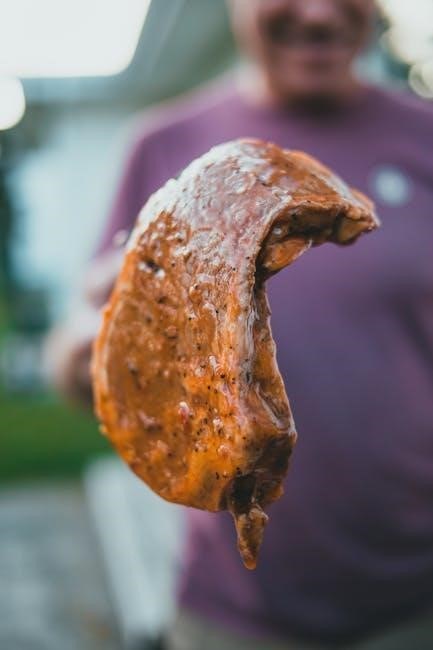
Roasts: Chuck, Brisket, and Rump
Chuck roasts are hearty and flavorful, often cut into 3-4 lb portions, ideal for slow cooking. Brisket roasts are perfect for braising or smoking, offering rich, tender meat. Rump roasts are leaner but remain tender when cooked low and slow. These roasts are typically bone-in or boneless, depending on preference. Proper cutting ensures even cooking and enhances the natural flavors of each cut, making them ideal for comforting family meals or special occasions.
Other Popular Cuts: Flank Steak and Short Ribs
Flank steak is a lean, flavorful cut, often sliced thin for dishes like fajitas or stir-fries. Short ribs are meaty and ideal for slow-cooking methods like braising or BBQ. Both cuts are versatile and popular for their rich taste and texture. Flank steak is typically cut against the grain, while short ribs are often left whole or cut into smaller portions for even cooking. These cuts add variety to meals, offering a balance of tenderness and bold flavor.

Beef Cutting for Stew and Soup
Choosing the right cuts ensures tender, flavorful results. Chuck or round cuts are ideal for stew, while thin slices or small cubes work best for soups.
Choosing the Right Cuts for Stew
For hearty stews, chuck or round cuts are ideal due to their rich flavor and tender texture when slow-cooked.
Chuck cuts, with their marbling, add depth, while round cuts provide leaner meat.
Short ribs and brisket are also excellent choices for robust, fall-apart results.
Optimal cuts are typically cubed into 1-2 inch pieces for even cooking.
Proper cutting ensures meat remains tender and flavors meld seamlessly, enhancing the overall dish.
Preparing Beef for Soup
For soups, tougher cuts like chuck, round, or shank are ideal as they become tender with slow cooking.
Trim excess fat to avoid greasiness and cut meat into 1-1.5 inch cubes for even cooking.
Shank slices add rich flavor to broths, while lean cuts can be used for clearer soups.
Proper portioning ensures balanced flavor and texture.
Packaging in airtight containers preserves freshness for later use.

Beef Cutting for Roasts
Beef roasts are cut to maximize flavor and tenderness.
Proper sizing ensures even cooking, while bone-in options enhance richness and moisture.
Boneless roasts offer easier carving and portioning.
Size and Weight Considerations for Roasts
Roasts are typically cut between 3 to 4 pounds for optimal cooking. Larger roasts, like a 5-pound chuck roast, are ideal for special occasions, while smaller cuts suit everyday meals. The size and weight of the roast directly impact cooking time and portion control. Ensuring uniform thickness and even fat distribution guarantees consistent flavor and tenderness. Proper sizing also prevents overcooking, making the roast more enjoyable. Always consider the number of servings needed when selecting roast size for the best results.
Bone-In vs. Boneless Roasts
Bone-in roasts, like prime rib, offer enhanced flavor and moisture due to the bone acting as an insulator. They often present better for special occasions. Boneless roasts, such as rolled chuck or round, are easier to slice evenly and portion. Bone-in options may require longer cooking times but deliver richer, more complex flavors. Boneless roasts are more convenient for uniform cooking and simpler serving. Both options provide delicious results, catering to different preferences and cooking needs.
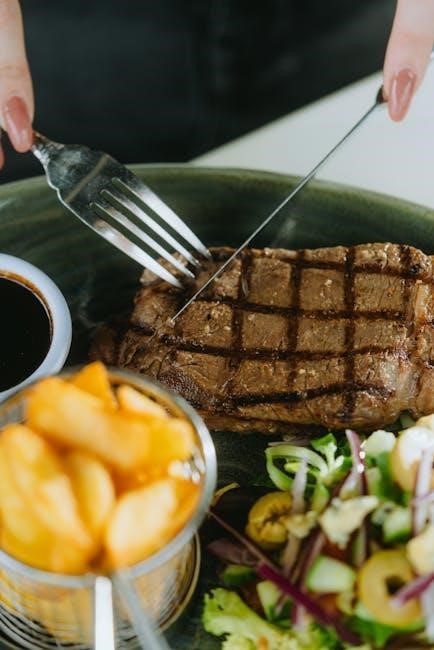
Beef Cutting for Steaks
Beef cutting for steaks involves precision to ensure quality and flavor. Customize steak thickness and choose bone-in or boneless options for desired texture and presentation. Proper cutting enhances tenderness and juiciness, while packaging ensures freshness and convenience for grilling or cooking. Optimal steak cuts are essential for a superior dining experience, tailored to personal preferences and cooking methods.
Steak Thickness and Portion Size
Steak thickness and portion size are crucial for achieving the perfect dining experience. Most steaks are cut between 1 to 1.5 inches thick, ensuring even cooking and tenderness. Portion sizes typically range from 6 to 8 ounces per steak, balancing flavor and satisfaction without excess. Customization allows for thicker cuts for grilling or thinner slices for dishes like Carne Asada. Proper sizing ensures each steak meets quality standards, providing a generous yet efficient serving size for every meal.
Bone-In vs. Boneless Steaks
Bone-in steaks offer richer flavor and juicier texture, as the bone acts as an insulator during cooking. They are ideal for slow-cooking methods like braising or roasting. Boneless steaks, however, provide greater convenience and portion control, making them perfect for grilling or pan-frying. The choice between the two often depends on personal preference and cooking goals, with bone-in options suited for enhanced flavor and boneless cuts offering ease and uniform cooking results.

Miscellaneous Beef Cuts
Flank steak and skirt steak are popular for their bold flavor, often used in stir-fries or fajitas. Brisket and tri-tip are ideal for slow-cooking or BBQ, offering rich, tender results.
Flank Steak and Skirt Steak
Flank steak and skirt steak are popular for their bold flavor and versatility in dishes like stir-fries, fajitas, and steak frites. Flank steak is lean and best cooked to medium-rare, while skirt steak has a fattier texture, enhancing its rich taste. Both cuts are ideal for marinating and grilling or pan-frying. They can be served whole or sliced thin for uniform portions. Proper cutting ensures tenderness, making them perfect for various international cuisines.
Brisket and Tri-Tip
Brisket, from the chest area, is ideal for slow cooking, offering rich, tender results when braised or smoked. It can be kept whole or divided into flat and point cuts for specific recipes. Tri-tip, a triangular cut from the bottom sirloin, is perfect for grilling or roasting, delivering bold flavor and a hearty texture. Both cuts are versatile, with options to grind brisket into ground beef or slice tri-tip thinly for sandwiches, making them excellent choices for diverse culinary needs;
Special Instructions for Beef Cutting
Customize your beef cut sheet with specific preferences, such as grind size, bone handling, and special requests like patty formation or boneless options for tailored results.
Customizing Your Beef Cut Sheet
Customizing your beef cut sheet allows you to tailor the processing to your preferences. Specify steak thickness, roast size, and ground beef quantity. Indicate bone handling—bone-in or boneless—and request specialized cuts like patty formation or cube steaks. Consider adding stew meat, soup bones, or short ribs. Balance your preferences with the butcher’s expertise to ensure optimal use of the beef. Proper customization ensures you receive exactly what you need, enhancing your cooking experience with perfectly suited cuts for every dish.
Special Requests for Processing
Special requests for processing allow for personalized touches, ensuring your beef is prepared to your exact liking. Specify bone handling—bone-in or boneless—and request unique cuts like flank steak or brisket. Indicate preferences for steak thickness, roast size, and ground beef packaging. Additionally, you can request special items such as soup bones, short ribs, or hamburger patties. These customizations ensure your beef is tailored to your culinary needs, providing a seamless and satisfying experience for every meal.
Mastering beef cutting instructions ensures a seamless and satisfying experience, providing high-quality results tailored to your preferences. Proper techniques, tools, and attention to detail are key to achieving tender, flavorful cuts. Whether customizing steaks, roasts, or ground beef, precise processing enhances every meal. By following guidelines and understanding options, you maximize the value of your beef, ensuring safety and efficiency in every step.