aeg oven competence user manual

Aeg Oven Competence User Manual: Comprehensive Guide

Welcome! This manual provides detailed instructions for your Aeg Competence oven, ensuring optimal performance and safe operation. Explore features and enjoy culinary success!

Congratulations on choosing the Aeg Competence oven! This appliance represents a significant investment in your kitchen and is designed to deliver exceptional cooking results for years to come. The Aeg Competence range is renowned for its innovative technology, user-friendly interface, and commitment to quality.

This oven isn’t simply a cooking appliance; it’s a culinary partner. It’s engineered to handle a diverse range of cooking tasks, from delicate pastries to hearty roasts, with precision and ease. Whether you’re a seasoned chef or a novice cook, the Aeg Competence oven offers features to enhance your skills and inspire creativity.

This user manual is your comprehensive guide to unlocking the full potential of your new oven. We strongly recommend taking the time to read it thoroughly before first use. It contains vital information regarding safety precautions, operating instructions, cleaning procedures, and troubleshooting tips. Understanding these details will ensure safe, efficient, and enjoyable cooking experiences.

Safety Precautions

Important Safety Information: Your safety is paramount. Before operating the Aeg Competence oven, carefully review these precautions to minimize the risk of injury or damage. Always supervise children when the oven is in use or immediately after, as surfaces become hot.

Never use abrasive cleaners or scouring pads on the oven’s surfaces, as they can cause scratches and damage. Ensure proper ventilation during and after cooking, especially when using the grill function. Avoid placing flammable materials near the oven. Do not attempt to repair the oven yourself; contact a qualified technician for any maintenance or repairs.

Be cautious when opening the oven door, as hot steam may escape. Use oven mitts or pot holders when handling hot cookware. Never immerse the oven or its electrical cord in water. Disconnect the oven from the power supply before cleaning. Failure to follow these safety guidelines could result in serious consequences. Prioritize safety for a positive cooking experience.

General Safety Warnings

Crucial Warnings for Safe Operation: This Aeg Competence oven generates significant heat during use. Avoid touching heating elements or interior surfaces while hot to prevent burns. Always use oven mitts or appropriate protection when handling hot cookware. Ensure the oven is properly grounded to prevent electrical shock.

Never operate the oven with a damaged cord or plug. If the oven malfunctions, immediately disconnect it from the power supply and contact authorized service personnel. Do not modify the oven in any way. Keep the oven area free from flammable materials, such as curtains, paper, or aerosols.

Supervise children closely when the oven is in operation. Do not allow anyone to sit or stand on the oven door. Regularly inspect the oven for any signs of damage. Improper use can lead to fire, electric shock, or personal injury. Adhering to these warnings ensures a safe and enjoyable cooking experience with your Aeg Competence oven.

Installation Safety

Important Installation Guidelines: Ensure the Aeg Competence oven is installed by a qualified technician, adhering to local electrical codes and regulations. The oven must be placed on a stable, level surface capable of supporting its weight. Maintain adequate ventilation around the oven – do not obstruct air intake or exhaust vents.

Verify the voltage and frequency of your power supply match the oven’s specifications (refer to the Technical Specifications section). A dedicated circuit breaker is recommended for optimal performance and safety. Do not install the oven near flammable materials or sources of moisture.

Carefully remove all packaging materials before installation. Inspect the oven for any damage incurred during transport. If damage is detected, do not install the oven and contact your retailer immediately. Proper installation is crucial for safe and efficient operation. Incorrect installation may void the warranty and pose a safety hazard. Always prioritize safety during the installation process.

Oven Components & Features

Discovering Your Oven: The Aeg Competence oven boasts a range of components designed for versatile cooking. Key elements include a spacious oven cavity, constructed with durable enamel for easy cleaning. Multiple rack positions allow for flexible arrangement of cookware. A powerful interior light illuminates the cooking process, while a quiet fan ensures even heat distribution.

The oven door features a viewing window and a soft-close mechanism for added convenience and safety. The exterior remains relatively cool to the touch, minimizing burn risks. The control panel, detailed in the next section, provides intuitive access to various cooking modes and settings. Understanding these components will enhance your cooking experience.

This oven is engineered for performance and longevity. Familiarize yourself with each feature to unlock its full potential. Regular inspection of these components will help maintain optimal functionality and ensure years of reliable service.

Control Panel Overview

Navigating the Interface: The Aeg Competence oven’s control panel is designed for intuitive operation. A central digital display clearly shows temperature, cooking time, and selected functions. Rotary dials allow for precise temperature and time adjustments. Dedicated buttons provide direct access to frequently used cooking modes like Conventional, Fan, and Grill.

A ‘Start/Pause’ button initiates and interrupts the cooking process. The ‘Timer’ function operates independently of the oven, useful for reminders. Several indicator lights illuminate to show when the oven is preheated, actively cooking, or in standby mode. A ‘Menu’ button accesses advanced settings and special features like Steam Baking and the Pizza setting.

The panel also includes options for child lock, ensuring safety, and a display brightness control for optimal visibility. Refer to the diagram accompanying this section for a visual guide to each button and dial’s function. Mastering the control panel is key to unlocking the oven’s full capabilities.

Interior Oven Features (Racks, Lights, Fan)

Optimizing Cooking Space: The Aeg Competence oven interior is thoughtfully designed for efficient cooking. It features multiple shelf positions to accommodate various dish sizes and types. Durable, chrome-plated racks slide smoothly, providing stable support for your culinary creations. A bright interior light illuminates the cavity, allowing clear visibility during cooking without opening the door and losing heat.

The oven incorporates a powerful, yet quiet, fan system. This fan ensures even heat distribution throughout the cavity, crucial for consistent results when using Fan Assisted cooking modes. The fan’s speed automatically adjusts based on the selected function. A rear panel houses the heating elements, while the catalytic liners aid in grease absorption.

Proper rack placement is vital; lower positions are best for roasting, while higher positions suit baking. Regularly check the oven light and ensure the fan operates smoothly for optimal performance.

Getting Started: Initial Setup

Preparing for First Use: Before your first culinary adventure with the Aeg Competence oven, a few simple steps are required. Ensure all packaging materials have been removed from both inside and outside the oven cavity. Verify that all accessories, such as racks and baking trays, are present and correctly positioned.

Connect the oven to a properly grounded electrical outlet, matching the voltage requirements specified on the appliance’s rating plate. Familiarize yourself with the control panel layout – a detailed overview is provided in the ‘Control Panel Overview’ section. Before cooking food, it’s essential to perform the ‘First-Time Use – Burning Off Protective Coatings’ procedure.

This initial burn-off eliminates any manufacturing residues and ensures optimal performance. Finally, accurately set the clock and time to enable timer functions and delayed start options. Refer to the ‘Setting the Clock & Time’ section for detailed instructions.

First-Time Use – Burning Off Protective Coatings

Important Initial Step: Before cooking food for the first time, it’s crucial to burn off the protective coatings applied during manufacturing. This process eliminates any potential odors and ensures optimal oven performance. To begin, ensure the oven is completely empty – remove all racks, trays, and accessories.

Select the highest temperature setting, typically around 250°C (482°F), using the conventional heating mode. Set the timer for approximately one hour. During this burn-off period, some smoke and a slight odor may be emitted – this is normal and indicates the coatings are being removed.

Ventilation is Key: Ensure adequate ventilation by opening windows or using a range hood. After the hour has elapsed, allow the oven to cool completely before installing the accessories and commencing regular cooking. This initial burn-off is a one-time procedure and significantly improves the oven’s long-term usability.

Setting the Clock & Time

Accurate Timekeeping: Correctly setting the clock is essential for utilizing the oven’s timer functions and ensuring precise cooking durations. To set the clock, first, press the ‘Clock’ or ‘Time Set’ button on the control panel – the button’s label may vary slightly depending on your specific model. The display will begin to flash, indicating you can adjust the hour.

Use the arrow buttons (▲ or ▼) or the numeric keypad to set the correct hour. Once the hour is set, press the ‘Clock’ or ‘Time Set’ button again to confirm and move to setting the minutes. Repeat the process using the arrow buttons or keypad to input the correct minutes.

Confirmation: After setting the minutes, press the ‘Clock’ or ‘Time Set’ button one final time to save the settings. The clock will now display the current time. If your oven features a 24-hour or 12-hour format option, consult the control panel overview section for instructions on switching between them.

Cooking Modes Explained

Versatile Cooking Options: Your Aeg Competence oven offers a range of cooking modes designed to cater to diverse culinary needs. Understanding each mode is key to achieving optimal results. These modes provide tailored heat distribution and functionality for various dishes.

Mode Selection: Access the cooking modes via the control panel. Common modes include Conventional Heating, Fan Assisted Cooking, Grill, and specialized settings like Pizza mode or Steam Baking. Each mode is indicated by a specific symbol or text label on the panel. Selecting a mode activates the corresponding heating elements and fan settings.

Optimizing Results: The following sections detail each cooking mode, explaining its characteristics, ideal applications, and recommended temperature ranges. Experimenting with different modes will allow you to master your oven and consistently produce delicious meals. Remember to consult recipe guidelines for specific mode recommendations.

Conventional Heating

Traditional Baking: Conventional Heating utilizes heat from the top and bottom heating elements, creating a classic oven environment. This mode is ideal for traditional baking recipes like cakes, pastries, and biscuits where even, gentle heat is crucial for proper rising and texture development.

Heat Distribution: Unlike fan-assisted modes, conventional heating relies on natural convection. This means heat circulates more slowly, potentially leading to slight temperature variations within the oven. For best results, avoid overcrowding the oven and consider rotating dishes halfway through the cooking process.

Temperature Control: Recommended temperature ranges for conventional heating typically fall between 150°C and 220°C (300°F and 430°F), depending on the recipe. Preheating is essential to ensure accurate temperature control. This mode is also suitable for roasting meats, though cooking times may be slightly longer compared to fan-assisted options.

Fan Assisted Cooking

Efficient & Even Cooking: Fan Assisted Cooking employs a heating element combined with a fan to circulate hot air throughout the oven cavity. This results in faster preheating times and more uniform temperature distribution, eliminating hot spots and ensuring consistent cooking results.

Versatile Application: This mode is exceptionally versatile, suitable for a wide range of dishes including roasting meats, baking multiple trays of cookies simultaneously, and cooking casseroles. The circulating air helps to seal in moisture, resulting in juicier roasts and evenly browned baked goods.

Temperature Adjustment: When converting recipes from conventional to fan-assisted cooking, it’s generally recommended to reduce the temperature by approximately 20°C (30°F). This prevents over-browning or drying out. Always monitor your food closely, especially during initial use, to determine the optimal cooking time and temperature for your specific oven and recipe.

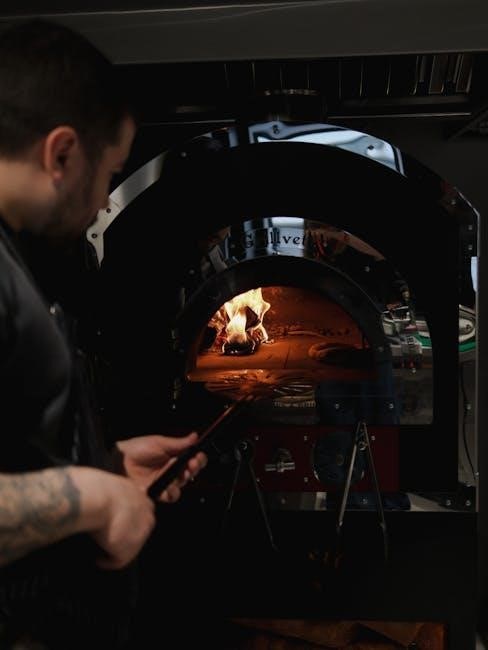
Grill Function – Variations & Uses

Intense Top-Down Heat: The grill function utilizes a high-intensity heating element located at the top of the oven to deliver direct, radiant heat. This is ideal for browning, searing, and quickly cooking foods.

Grill Variations: Your Aeg Competence oven may offer variations like full grill (entire element active) and half grill (only part of the element active). The half grill is useful for smaller portions or delicate items to prevent burning. Some models also feature a variable grill setting for precise heat control;

Suitable Dishes: Excellent for grilling steaks, chops, sausages, and fish. It’s also perfect for browning the tops of dishes like gratins and lasagnas, or for toasting bread. Always use grill-proof cookware and keep a close watch on food while grilling, as it cooks very quickly. Position the shelf appropriately – closer for intense heat, further away for gentler grilling.

Using Special Features

Enhanced Cooking Experience: Your Aeg Competence oven boasts several special features designed to elevate your cooking. These functions automate processes and optimize settings for specific dishes, delivering consistently excellent results with minimal effort.

Exploring the Options: Familiarize yourself with the dedicated buttons or menu options on the control panel. These may include features like ‘Steam Baking’ for moist breads and cakes, a ‘Pizza Setting’ for perfectly crisp crusts, or a ‘Slow Cooking’ function for tender, flavorful meals.

Optimized Performance: Each special feature pre-programs the oven with the ideal temperature, cooking time, and heating element combination. Refer to the detailed descriptions within this manual for specific instructions on utilizing each function effectively. Experiment with these features to unlock the full potential of your oven and discover new culinary possibilities!

Steam Baking – Achieving Perfect Results

Unlock Bakery-Quality Breads: The Steam Baking function introduces moisture into the oven cavity during the initial stages of baking. This creates a humid environment, preventing the crust from setting too quickly, allowing for maximum rise and a beautifully soft interior – perfect for artisan breads, pastries, and even cakes.

How it Works: Your Aeg Competence oven utilizes a water reservoir to generate steam. Ensure the reservoir is filled before selecting the Steam Baking mode. The oven will automatically regulate steam production throughout the baking cycle.

Tips for Success: For optimal results, use recipes specifically designed for steam baking. Avoid opening the oven door during the initial steam phase to maintain the humid environment. Experiment with different steam durations to achieve your desired crust texture. Enjoy consistently moist and flavorful baked goods!

Pizza Setting – Optimized for Crispy Crusts

Perfect Pizza Every Time: The dedicated Pizza Setting on your Aeg Competence oven is engineered to deliver restaurant-quality pizza with a delightfully crispy crust and perfectly melted toppings. This mode utilizes a combination of high heat and precise temperature control to mimic the conditions of a traditional pizza oven.

How it Works: When activated, the Pizza Setting preheats the oven to an exceptionally high temperature, often exceeding standard baking temperatures. It may also engage the bottom heating element more prominently to ensure a thoroughly cooked and crisp base.

Tips for Success: For best results, use a pizza stone or baking steel preheated alongside the oven. Avoid overcrowding the oven with too many pizzas at once. Consider using a perforated pizza pan for enhanced airflow and crisping. Enjoy homemade pizza night with consistently excellent results!

Cleaning & Maintenance

Maintaining Your Oven’s Performance: Regular cleaning and maintenance are crucial for ensuring the longevity and optimal performance of your Aeg Competence oven; This section details both self-cleaning options and manual cleaning procedures to keep your appliance functioning efficiently and hygienically.

Importance of Regular Cleaning: Food splatters and residue can build up over time, impacting cooking results and potentially creating unpleasant odors. Consistent cleaning prevents these issues and maintains the oven’s aesthetic appeal. Always disconnect the oven from the power supply before undertaking any cleaning tasks.

Frequency: We recommend utilizing the self-cleaning cycle (when available) every few months, supplemented by manual cleaning as needed to address spills and messes promptly. Following these guidelines will keep your Aeg Competence oven in top condition for years to come.

Self-Cleaning Cycle – Instructions & Precautions

Utilizing the Pyrolytic Self-Clean: Your Aeg Competence oven features a pyrolytic self-cleaning cycle, which uses high temperatures to burn away food residue into ash. Before starting, remove all racks, baking stones, and any cookware from the oven cavity. Ensure the oven door can lock securely.

Initiating the Cycle: Select the self-clean function on the control panel and choose the desired cleaning duration (typically 2-4 hours, depending on soil level). The door will automatically lock during the cycle and remain locked until the oven cools sufficiently.

Important Precautions: Never interrupt the self-clean cycle. Avoid opening the door manually. Fumes may be released during the process; ensure adequate ventilation in the kitchen. Keep children and pets away from the oven during operation and cooling. Once cooled, wipe away the remaining ash with a damp cloth.

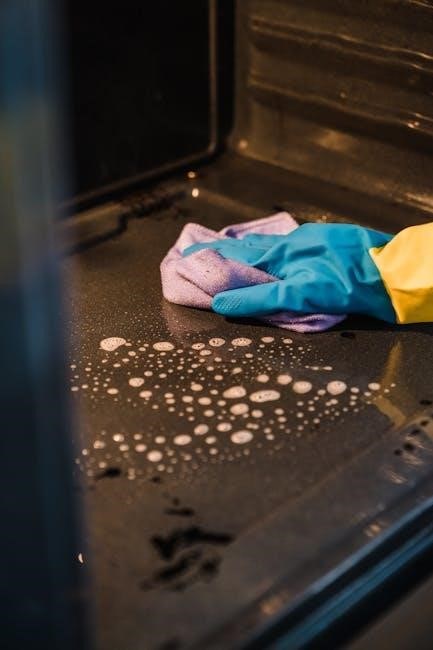
Manual Cleaning – Recommended Products & Techniques

For regular maintenance, manual cleaning is recommended. Allow the oven to cool completely before beginning. Avoid abrasive cleaners, scouring pads, or harsh chemicals, as these can damage the enamel coating. A mild dish soap solution is generally sufficient.

Effective Cleaning Solutions: A paste of baking soda and water is excellent for stubborn stains. Apply, let sit for 30 minutes, then wipe clean. Commercial oven cleaners specifically designed for enamel surfaces can also be used, following the manufacturer’s instructions carefully.

Cleaning Process: Wipe down interior surfaces with a damp cloth and your chosen cleaning solution. Pay attention to the door, walls, and the area around the heating elements. For the glass door, a glass cleaner works best. Rinse thoroughly with clean water and dry with a soft cloth. Regular cleaning prevents buildup and maintains oven performance.

Troubleshooting Common Issues

Oven Not Heating: Check the power supply and ensure the oven is properly connected. Verify the timer is set correctly or if child lock is activated. If the issue persists, contact a qualified technician.

Uneven Cooking: Ensure the oven racks are positioned correctly and food isn’t overcrowded. Rotate dishes during cooking for even browning; Calibrate the oven temperature if necessary (refer to ‘Setting the Clock & Time’ section).

Error Codes: Refer to the full error code list in the appendix of this manual. These codes indicate specific problems and can help diagnose the issue. Smoke During Use: This may occur during initial use or when cooking fatty foods. Ensure adequate ventilation. If excessive smoke continues, stop using the oven.

If problems continue after attempting these solutions, do not attempt repairs yourself. Contact Aeg customer support for assistance.

Technical Specifications

Model Number: BEO43612X (Example – verify your specific model).

Energy Efficiency Class: A (May vary based on specific model).

Oven Capacity: 71 Litres.

Power Consumption: 220-240V, 50Hz, 3000W (Maximum).

Grill Power: 1700W.

Dimensions (H x W x D): 88.8 x 59.7 x 60.0 cm (Approximate).

Weight: 55 kg (Approximate).

Temperature Range: 50°C – 275°C.

Timer Duration: Maximum 12 hours;

Interior Oven Light: 25W Halogen.

Fan Power: 15W.

Steam Function Capacity: 1.0 Litre.

Safety Features: Child Lock, Automatic Shut-off, Cool Touch Door.

These specifications are subject to change without prior notice. Please refer to the product label for the most accurate information.

fujitsu air con remote manual

This manual provides essential guidance for operating and maintaining your Fujitsu air conditioner remotely, ensuring optimal performance and efficiency in controlling your indoor climate comfortably.

Overview of the Fujitsu Air Conditioner Remote Control

The Fujitsu air conditioner remote control is a user-friendly device designed to regulate temperature, fan speed, and operation modes effortlessly. It features a sleek design with intuitive buttons for seamless control. The remote allows users to adjust cooling, heating, or fan settings, ensuring comfort in various environments. Advanced functions include timer operations, swing mode for air distribution, and dry mode to remove humidity. Additionally, the remote provides access to energy-saving settings and silent operation features. The device is powered by batteries, ensuring wireless convenience. The manual offers detailed instructions on optimizing these functions, making it an essential guide for efficient and personalized climate control.

Importance of the Remote Manual for Optimal Usage

The remote manual is crucial for maximizing the functionality of your Fujitsu air conditioner. It provides detailed instructions on using advanced features like timer settings, swing operation, and dry mode. Understanding the remote’s button layout and symbols ensures precise control over temperature and airflow. The manual also highlights safety precautions, such as avoiding direct exposure to air conditioner winds and proper handling during thunderstorms. By following the guide, users can troubleshoot common issues, like connectivity problems or error codes, and maintain energy efficiency. Regular maintenance tips, such as cleaning the remote and replacing batteries, are also included to ensure long-term performance and reliability.

Installation and Setup Instructions

Professional installation is recommended for your Fujitsu air conditioner. Ensure proper setup, including connecting the remote controller and checking power supply for smooth operation and safety.

Precautions for Installing the Air Conditioner

  • Always ensure the air conditioner is installed by qualified personnel to avoid safety risks and ensure proper functionality.
  • Avoid exposing yourself to direct airflow for extended periods to prevent discomfort or health issues.
  • Do not insert fingers or objects into the air conditioner vents or grilles to prevent damage or injury.
  • Keep the remote controller away from water and extreme temperatures to maintain its performance.
  • During thunderstorms, turn off the air conditioner using the remote and avoid touching the unit or power plug to prevent electric shock.

Connecting the Remote Controller to the Air Conditioner

To ensure proper functionality, the remote controller must be correctly paired with the air conditioner. Most Fujitsu remotes are pre-synced, but if pairing is required, refer to the manual for specific instructions. Ensure batteries are installed correctly in the remote and that no obstacles block the infrared signal. Point the remote directly at the air conditioner’s sensor to establish a clear connection. Test basic functions like turning the unit on/off and adjusting temperature to confirm successful pairing. Regularly check for signal interference from other devices or physical obstructions. If issues persist, consult the manual or contact Fujitsu support for assistance.

Remote Control Features and Functions

The Fujitsu air conditioner remote offers advanced features like timer settings, swing mode, and dry operation, ensuring precise temperature control and energy efficiency for optimal comfort.

Understanding the Button Layout and Symbols

The Fujitsu air conditioner remote features an intuitive button layout designed for easy operation. The remote is constructed from high-quality, eco-friendly materials, ensuring durability and comfort. The buttons are clearly labeled with symbols and text, making it simple to navigate functions like cooling, heating, fan speed, and swing modes. Key buttons include the power toggle, mode selection, temperature adjustment, fan speed control, swing operation, timer settings, and dry mode activation. The remote also displays icons for operational modes, such as cooling, heating, fan-only, and swing functions. Understanding these symbols ensures seamless control of your air conditioner, enhancing overall user experience and efficiency.

Timer Functions and Scheduling Operations

The Fujitsu air conditioner remote offers advanced timer functions, allowing users to schedule operations effortlessly. The timer can be set to turn the unit on or off at specific times, optimizing energy usage. For instance, the OFF TIMER ensures the air conditioner stops operation at a designated time, while the ON TIMER activates it when needed. The remote also features a 24-hour timer, enabling users to program their comfort preferences throughout the day. Additionally, the timer functions can be combined with other modes, such as dry mode, to maintain ideal indoor conditions. This feature enhances convenience and energy efficiency, making it a valuable tool for smart home management.

Advanced Features Like Swing Operation and Dry Mode

The Fujitsu air conditioner remote offers advanced features like swing operation and dry mode for enhanced comfort. The swing operation allows the air flow direction louvers to adjust automatically, ensuring even air distribution. This feature optimizes cooling and heating by directing air to different parts of the room. The dry mode, on the other hand, removes excess moisture from the air, preventing mold growth and keeping the unit clean. These functions can be easily activated via the remote, providing users with precise control over their indoor climate. They contribute to energy efficiency and maintain a healthy, comfortable environment year-round.

Maintenance and Care Tips

Regularly clean the remote controller and air conditioner units to maintain performance. Replace batteries promptly and ensure proper functionality. Check for blockages and refer to the manual for detailed care routines.

Cleaning the Remote Controller and Air Conditioner Units

Regular cleaning of the remote controller and air conditioner units is crucial for optimal performance. Use a soft cloth to gently wipe the remote, ensuring no buttons are damaged. For the air conditioner, clean the filter and exterior with mild detergents, avoiding harsh chemicals. Remove dust buildup to improve airflow and efficiency. Proper maintenance prevents mold growth and ensures a clean, healthy indoor environment. Refer to the manual for specific cleaning instructions tailored to your Fujitsu model to maintain warranty and functionality.

Replacing Batteries and Ensuring Proper Functionality

To maintain seamless control, replace the remote batteries when low. Use high-quality, compatible batteries to ensure proper functionality. Align the polarity correctly to avoid damage. After replacing, test all buttons to confirm they work. Clean battery terminals with a dry cloth to prevent corrosion. If issues persist, consult the manual or contact support. Regular battery checks prevent unexpected malfunctions, ensuring your Fujitsu air conditioner operates efficiently and reliably throughout the year. Proper battery maintenance is essential for consistent performance and user satisfaction.

Troubleshooting Common Issues

Check battery levels and signal reception. Ensure proper alignment and no obstructions. Restart the air conditioner and remote. Consult the manual for error code solutions and basic fixes.

Resolving Connectivity Problems Between Remote and AC

If the remote isn’t communicating with your Fujitsu air conditioner, first replace the batteries and ensure they are inserted correctly. Check for any obstructions between the remote and the AC unit. Verify the remote’s signal strength and ensure it is within range. Restart both the air conditioner and the remote controller to reset the connection. If issues persist, consult the manual for pairing instructions or error codes. Ensure the remote is compatible with your AC model and that no interference is caused by other devices. Always maintain a clear line of sight between the remote and the AC unit for optimal functionality.

Addressing Error Codes and Unusual Operations

If your Fujitsu air conditioner displays error codes or operates unusually, refer to the remote manual for specific troubleshooting guidelines. Common issues include faulty sensors or power supply problems. Check the LED indicators on the AC unit and remote for error codes. Ensure the remote is functioning correctly by replacing batteries if necessary. Reset the air conditioner by turning it off and on again using the remote. If issues persist, clean the sensor or check for blockages in airflow. Consult the manual for detailed error code explanations and solutions. Contact Fujitsu customer support if the problem remains unresolved after following these steps.

Additional Resources and Support

Visit Fujitsu’s official website for the full service manual, detailing specifications, diagrams, and troubleshooting guides. Contact Fujitsu customer support for personalized assistance with your air conditioner.

Accessing the Full Fujitsu Service Manual Online

The Fujitsu service manual is available for free download on Fujitsu’s official website in PDF format. This comprehensive guide provides detailed information on air conditioner operation, installation, and maintenance. It includes technical specifications, diagrams, and part lists for various models, such as the inverter split type. The manual also covers troubleshooting tips, error code explanations, and remote controller functions. To access it, visit the Fujitsu support page and search for your specific model. This resource is essential for understanding advanced features and ensuring optimal performance. Regularly updated, it offers reliable guidance for users and technicians alike, ensuring efficient operation and maintenance of your Fujitsu air conditioner.

Contacting Fujitsu Customer Support for Assistance

For any queries or issues with your Fujitsu air conditioner, contacting customer support is straightforward. Visit the official Fujitsu website and navigate to the support section. Here, you can find contact details, including phone numbers, email addresses, and live chat options. Support agents are available to assist with troubleshooting, repair requests, and technical guidance. Ensure you have your air conditioner’s model number ready for efficient service. Additionally, the website offers a wealth of resources, including FAQs and downloadable manuals, to help resolve common issues independently. Fujitsu’s dedicated support team is committed to providing timely and effective solutions for optimal product performance.

binding financial agreement template pdf

A Binding Financial Agreement (BFA) is a legally enforceable contract outlining financial arrangements between couples, ensuring clarity and protection of assets in case of separation.

1.1 Definition and Purpose

A Binding Financial Agreement (BFA) is a legal contract between couples that outlines financial arrangements, protecting assets and clarifying obligations. Governed by the Family Law Act 1975, it applies to married or de facto relationships, including same-sex couples, ensuring financial matters are resolved without litigation. Its purpose is to provide certainty and security, addressing property settlement, spousal maintenance, and financial resource disclosure.

1.2 Legal Framework Governing BFAs

Binding Financial Agreements are governed by the Family Law Act 1975, specifically sections 90G and 205ZN, ensuring enforceability; They apply to both married and de facto couples, including same-sex relationships, and must comply with legal requirements to be valid. The framework mandates full financial disclosure and independent legal advice to protect both parties’ interests and ensure agreements are fair and legally binding.

Types of Binding Financial Agreements

BFAs vary based on relationship status, including agreements for married couples, de facto partners, and those entering or exiting relationships, each tailored to specific legal and financial needs.

2.1 Agreements for Married Couples

A Binding Financial Agreement for married couples outlines property settlement, spousal maintenance, and financial responsibilities, protecting both parties’ assets. It can be created before or after marriage, ensuring clarity and fairness in asset distribution. These agreements must comply with the Family Law Act 1975 and require independent legal advice to be enforceable, safeguarding each partner’s financial interests in case of separation.

2.2 Agreements for De Facto Relationships

A Binding Financial Agreement for de facto relationships is a legal contract outlining financial arrangements, such as property settlement and spousal maintenance. It can be established before or during the relationship, providing clarity on asset distribution. These agreements must comply with the Family Law Act 1975, specifically section 90UB, and require independent legal advice to ensure enforceability, protecting both parties’ financial interests in case of separation.

2.3 Agreements Before a De Facto Relationship

A Binding Financial Agreement before a de facto relationship is a legal contract outlining financial arrangements for assets, property, and responsibilities. It is governed under section 90UB of the Family Law Act 1975, ensuring both parties’ financial interests are protected. These agreements clarify ownership and financial obligations, preventing future disputes. Legal advice is required for enforceability, making them a proactive step for couples entering a de facto relationship.

2.4 Agreements After Separation

A Binding Financial Agreement after separation formalizes financial arrangements post-breakdown, addressing property settlement and spousal maintenance. Governed under section 90UB of the Family Law Act 1975, these agreements ensure clarity and finality. They are enforceable and legally binding, preventing future disputes. Legal advice is required for validity, making them a crucial step in finalizing separation arrangements efficiently and fairly.

Key Components of a Binding Financial Agreement

A BFA must include property settlement, spousal maintenance, financial disclosure, and independent legal advice to ensure compliance with the Family Law Act 1975.

3.1 Property Settlement Clause

The Property Settlement Clause outlines the division of assets and liabilities between parties. It ensures clarity and fairness in property distribution, covering valuation, ownership, and future assets. This clause is legally binding and must comply with the Family Law Act 1975, providing a clear framework for asset separation.

3.2 Spousal Maintenance Provisions

Spousal Maintenance Provisions detail financial support obligations between parties post-separation. These clauses specify the type, duration, and amount of support, ensuring compliance with legal requirements. They provide clarity and security for both partners, addressing financial responsibilities comprehensively.

3;3 Financial Resources Disclosure

Financial Resources Disclosure requires both parties to fully disclose all assets, liabilities, and financial interests. This ensures transparency and fairness in negotiations. Each party must provide detailed information about properties, investments, debts, and income sources. This disclosure is essential for creating a balanced and legally binding agreement, protecting both parties from future disputes and ensuring all financial obligations are clearly understood.

3.4 Independent Legal Advice Requirements

Each party must receive independent legal advice before signing a Binding Financial Agreement. This ensures they fully understand the terms and implications. A certificate of independent legal advice must be attached, confirming that both parties were advised on the agreement’s implications. This requirement prevents future disputes and ensures the agreement’s validity, protecting both parties’ interests.

Benefits and Advantages

A Binding Financial Agreement offers protection of assets, avoids litigation, and provides clarity in financial obligations, ensuring legal enforceability and customization for individual circumstances.

4.1 Protection of Assets

A Binding Financial Agreement (BFA) protects both parties’ assets by legally outlining ownership and distribution, ensuring clarity and security. It safeguards current and future assets, preventing disputes during separation. By defining property rights and financial entitlements, a BFA provides peace of mind, knowing assets are protected according to agreed terms. This ensures fair division without legal challenges, maintaining financial stability for both individuals.

4.2 Avoidance of Litigation

By establishing clear financial terms upfront, a Binding Financial Agreement significantly reduces the likelihood of costly and time-consuming legal disputes. It provides a structured resolution process, minimizing court involvement and emotional strain. This proactive approach ensures both parties’ financial interests are protected, promoting a smoother separation without the uncertainty and expense of litigation.

4.3 Clarity in Financial Obligations

Clarity in financial obligations is crucial for ensuring both parties understand their responsibilities and rights. A Binding Financial Agreement provides transparent terms, eliminating ambiguities and potential conflicts. It outlines property distribution, spousal maintenance, and financial resource disclosures, ensuring both parties are aware of their commitments. This transparency fosters trust and certainty, preventing future disputes and providing peace of mind for all involved.

Risks and Limitations

Binding Financial Agreements carry risks like legal challenges, drafting complexity, and consequences of inadequate disclosure, requiring careful preparation and legal expertise to mitigate potential issues effectively.

5.1 Potential for Legal Challenges

A Binding Financial Agreement may face legal challenges if it does not comply with the Family Law Act 1975, such as violations of sections like 90G. Challenges can arise from procedural errors, inadequate disclosure, or unconscionable terms. Courts may overturn agreements if they are deemed unfair or not legally binding, especially if drafted without proper legal advice or failing to meet formal requirements.

5.2 Complexity of Drafting

Drafting a Binding Financial Agreement is complex due to the need for precise legal language and compliance with the Family Law Act 1975. Ensuring all clauses align with legal standards requires expertise, as errors can lead to enforceability issues. Proper customization of templates is essential to reflect individual circumstances accurately, making professional legal advice indispensable to avoid pitfalls and ensure validity.

5.3 Inadequate Disclosure Consequences

Inadequate disclosure of financial resources in a Binding Financial Agreement can lead to severe legal consequences, including the agreement being deemed unenforceable. Failure to fully disclose assets, liabilities, or financial interests can result in one party challenging the validity of the agreement, potentially leading to costly litigation and financial harm.

Both parties must ensure complete transparency to maintain the agreement’s enforceability and avoid future disputes.

How to Create a Binding Financial Agreement

Creating a Binding Financial Agreement involves consulting legal professionals to ensure compliance with Family Law Act 1975. Drafting the agreement requires precise language and thorough negotiation of terms to reflect both parties’ financial interests and obligations. Proper execution and certification by lawyers are essential to validate the document. This process ensures the agreement is legally enforceable and protects both parties’ rights effectively.

6.1 Consulting Legal Professionals

Consulting legal professionals ensures your Binding Financial Agreement complies with the Family Law Act 1975. Lawyers provide expert guidance on drafting, negotiations, and compliance, ensuring enforceability and fairness for both parties. Legal advice is essential to protect assets and clarify financial obligations, making the agreement legally binding and reducing future disputes. Proper certification by legal professionals validates the document and ensures it meets all legal requirements effectively.

6.2 Negotiating Terms and Conditions

Negotiating terms and conditions in a Binding Financial Agreement involves collaborative discussions between both parties to outline clear financial arrangements. This step ensures mutual understanding and agreement on property settlements, spousal maintenance, and financial disclosures. Legal professionals often facilitate negotiations to ensure fairness and compliance with the Family Law Act 1975, promoting a balanced and enforceable agreement that aligns with both parties’ interests and avoids future disputes effectively.

6.3 Drafting the Agreement

Drafting a Binding Financial Agreement requires precision to ensure legal enforceability. Legal professionals typically use templates as a foundation, incorporating specific clauses tailored to the couple’s circumstances. The document must detail property settlements, spousal maintenance, and full financial disclosure. Compliance with the Family Law Act 1975 is crucial, and the agreement must avoid generic terms to ensure it accurately reflects the parties’ intentions and financial arrangements clearly.

After drafting, both parties must execute the agreement by signing it in the presence of independent legal professionals. Certification involves lawyers attesting that each party has received independent advice, understands the implications, and consents to the terms. Proper execution ensures the agreement’s validity and enforceability, minimizing the risk of future legal challenges or disputes over its legitimacy.

Legal Implications and Enforcement

6.4 Execution and Certification

Execution involves signing the agreement before independent witnesses. Certification by legal professionals ensures both parties understand the terms, validating the agreement under family law requirements.

7.1 Compliance with Family Law Act 1975

Binding Financial Agreements must comply with the Family Law Act 1975, particularly sections 90G and 205ZN, ensuring enforceability. Adherence to these provisions guarantees legal validity, protecting both parties’ rights and assets. Proper execution and certification by legal professionals are essential to meet the act’s requirements, avoiding potential challenges or invalidation of the agreement.

7.2 Consequences of Breach

Breaching a Binding Financial Agreement can lead to legal action, financial penalties, or compensation claims. Courts may enforce the agreement or declare it invalid if non-compliance is proven. Parties failing to uphold their obligations risk facing disputes, potential asset redistribution, and loss of legal protection. Legal advice is crucial to address and resolve breaches effectively, ensuring fairness and adherence to the agreement’s terms.

7.3 Amendment and Termination Procedures

Amending or terminating a Binding Financial Agreement requires mutual consent and must comply with legal standards. Parties must follow specific procedures outlined in the Family Law Act 1975, such as Section 90G, to ensure validity. Failure to adhere to these processes may result in the agreement being deemed unenforceable. Legal advice is essential to navigate these complexities effectively and ensure all parties’ rights are protected.

Binding Financial Agreement Templates

Binding Financial Agreement templates are readily available online, offering structured formats for drafting agreements. Sources include LegalVision, LawLive, and specialized legal websites, ensuring professional quality and ease of customization.

8.1 Sources for Free Templates

Free Binding Financial Agreement templates are available from reputable sources like LegalVision, LawLive, and government legal aid websites. These templates are typically provided in PDF or Word formats, allowing easy customization. However, users should exercise caution, as free templates may lack the specificity and legal scrutiny required for complex financial situations, potentially leading to enforceability issues if not properly tailored to individual circumstances.

8.2 Paid Templates and Their Advantages

Paid templates offer enhanced customization and legal compliance, ensuring they meet specific requirements under the Family Law Act 1975. They often include comprehensive clauses for property settlement, spousal maintenance, and financial disclosure. Professional templates are drafted by lawyers, reducing errors and potential legal challenges. Platforms like pdfFiller provide editable and secure options, making it easier to draft and manage agreements effectively while maintaining confidentiality and enforceability.

8.3 Customization Options

Binding Financial Agreement templates in PDF format allow users to tailor clauses to their specific needs, such as property settlement and spousal maintenance. Editable options enable parties to input personal details and financial specifics. Platforms like pdfFiller offer tools to customize templates securely, ensuring compliance with legal requirements. While templates provide flexibility, legal advice is recommended to ensure accuracy and enforceability, particularly under the Family Law Act 1975.

A Binding Financial Agreement is a vital tool for ensuring financial security and clarity in relationships. Using a template guarantees legal compliance and protects both parties’ interests effectively.

9.1 Importance of Proper Execution

Proper execution of a Binding Financial Agreement ensures legal enforceability, protecting both parties’ interests. Compliance with the Family Law Act 1975 and independent legal advice are critical. The agreement must be in writing, signed by both parties, and witnessed to avoid future disputes. Proper execution guarantees clarity and finality, making it binding on heirs and assigns, ensuring long-term financial security and peace of mind for all involved.

9.2 Final Thoughts on Utilizing BFAs

Utilizing a Binding Financial Agreement offers couples a proactive approach to financial planning, ensuring asset protection and clear obligations. Templates provide a structured framework, but customization and legal advice are essential. Properly drafted BFAs prevent costly disputes and foster peace of mind, making them a valuable tool for securing financial futures in any relationship scenario.

tontine electric blanket manual pdf

The Tontine Electric Blanket Manual PDF is a comprehensive guide designed to help users safely operate, maintain, and troubleshoot their electric blanket, ensuring optimal comfort and longevity.

Overview of the Tontine Electric Blanket

The Tontine Electric Blanket is a high-quality, innovative product designed to provide exceptional comfort and warmth during colder months. It features multiple heat settings, a timer, and energy-efficient options to ensure a cozy sleeping experience. The blanket is crafted with soft, durable materials and includes a removable controller for easy operation. Safety is a priority, with built-in protections to prevent overheating and ensure safe usage. The design caters to various preferences, offering versatility for different lifestyles and bedding setups. Whether for personal use or as a gift, the Tontine Electric Blanket is a practical and luxurious addition to any home, promising consistent performance and long-lasting comfort.

Safety Instructions for Using the Tontine Electric Blanket

Ensure the blanket and mains lead are not trapped or entangled. Avoid using on adjustable beds and keep the plug properly fitted in polarized outlets for safe operation.

General Safety Guidelines

Always prioritize safety when using your Tontine electric blanket. Ensure the blanket and its mains lead are not trapped or entangled, as this can pose risks of tripping or damage. Never use the blanket on an adjustable bed, and avoid tucking the blanket or cord into furniture. The plug is polarized for safety, so it should only fit into a compatible outlet in one direction. Avoid overloading the outlet with other appliances. Keep the blanket away from water and never use it if it is wet. Regularly inspect the cord and blanket for signs of wear or damage. If damaged, stop use immediately and contact customer support. Following these guidelines ensures safe and enjoyable use of your electric blanket.

Specific Warnings and Precautions

Adhere to specific warnings to ensure safe operation of your Tontine electric blanket. Never use the blanket on an adjustable bed, as this can cause safety hazards. Avoid trapping the blanket or its cord under furniture or bedding, as this may lead to overheating or damage. Keep the blanket out of reach of children and pets to prevent accidental tangling or chewing of the cord. Do not use the blanket while sleeping, as prolonged heat exposure can be harmful. Regularly inspect the cord and blanket for signs of wear, such as fraying or discoloration, and discontinue use if damage is found. Always follow the manufacturer’s instructions for cleaning and maintenance to avoid electrical risks. By adhering to these precautions, you can enjoy a safe and comfortable experience with your Tontine electric blanket.

Operating the Tontine Electric Blanket

To operate your Tontine Electric Blanket, plug in the controller, adjust heat settings, and set the timer. Ensure proper placement and avoid overheating for safe use.

Setting Up the Electric Blanket

Setting up your Tontine Electric Blanket is straightforward. Begin by carefully unrolling the blanket and placing it on your bed, ensuring it lies flat and evenly. Plug the controller into a nearby power outlet, making sure the connection is secure. Attach the controller to the blanket by aligning the connectors and gently pushing until it clicks. Avoid tangles in the cord and ensure the blanket is fully visible, not trapped under bedding or furniture. Once connected, test the controls to confirm they function properly. Always follow the manual’s guidelines to ensure safe and efficient operation. Proper setup ensures optimal performance and longevity of your electric blanket.

Using the Controls and Features

Using the controls and features of your Tontine Electric Blanket is simple and intuitive. The blanket comes with a removable controller that allows you to adjust heat settings, set the timer, and customize your comfort experience. To operate, plug in the controller, select your desired heat level using the buttons, and set the timer if needed. The blanket features multiple heat settings, ensuring you can find the perfect temperature for relaxation. Additionally, the timer function allows you to pre-set the blanket to turn off after a specific duration, promoting energy efficiency. Always ensure the controller is securely attached and the cords are not tangled or trapped; Regularly review the manual for updated tips on maximizing the blanket’s features safely and effectively.

Features of the Tontine Electric Blanket

The Tontine Electric Blanket offers multiple heat settings, a programmable timer, and a removable controller for easy operation and customization, ensuring a cozy and energy-efficient experience.

Heat Settings and Customization Options

The Tontine Electric Blanket features multiple heat settings, allowing users to adjust the temperature to their preference. With a range of options, from gentle warmth to higher heat, the blanket ensures personalized comfort. The controller provides easy access to these settings, enabling seamless adjustments without disrupting relaxation. Additionally, the blanket’s design allows for even heat distribution, maintaining a consistent temperature throughout. This customization ensures that users can tailor their experience, whether they prefer a subtle warmth or deeper heat, making it ideal for various comfort needs and preferences throughout the night or during leisure time.

Timer and Energy Efficiency Features

The Tontine Electric Blanket is equipped with a built-in timer and energy-efficient features to enhance user convenience and safety. The timer allows users to set a specific duration for the blanket’s operation, ensuring it turns off automatically after the selected time. This feature not only conserves energy but also prevents overheating, making it a practical choice for overnight use. Additionally, the blanket’s energy-efficient design minimizes power consumption while maintaining optimal warmth. The automatic shut-off function further adds to the blanket’s safety, turning it off if it detects any irregularities. These features collectively ensure a safe, energy-conscious, and comfortable experience for users, making the Tontine Electric Blanket a reliable and eco-friendly option for cold weather.

Maintenance and Care of the Electric Blanket

Regular maintenance ensures the electric blanket remains safe and functional. Follow washing and drying instructions carefully, avoid bleach, and store properly when not in use. Always refer to the manual for detailed care tips.

Cleaning Instructions for the Blanket

To maintain your Tontine electric blanket, follow specific cleaning guidelines. Remove the controller before washing and machine wash the blanket on a cold, gentle cycle. Avoid using bleach or harsh detergents, as they may damage the fabric or wiring. Gently reshape the blanket while it’s damp to maintain its form. Do not tumble dry; instead, allow it to air dry away from direct sunlight. For stains, gently spot clean with a soft cloth and mild detergent before washing. Regular cleaning ensures hygiene and extends the blanket’s lifespan. Always refer to the manual for detailed cleaning procedures to avoid damaging the product. Proper care ensures safety and optimal performance.

Storage and Handling Tips

Proper storage and handling of your Tontine electric blanket are crucial to maintain its quality and safety. When not in use, store the blanket in a cool, dry place, away from direct sunlight. Avoid folding or creasing the blanket, as this may damage the heating elements. Instead, roll it gently or lay it flat. Use the original packaging if available to protect it from dust and moisture. Keep the blanket out of reach of pets and children to prevent accidental damage. Before storing, ensure the blanket is completely dry and unplugged. Regularly inspect the blanket for signs of wear or damage. Proper storage ensures the blanket remains safe and functional for future use.

Troubleshooting Common Issues

Identify error codes and resolve issues like uneven heating or blanket not turning on. Check connections, ensure controls are functioning, and refer to the manual for specific solutions.

Common Problems and Solutions

One of the most common issues with the Tontine Electric Blanket is uneven heating, which can be resolved by ensuring the blanket is properly spread and not bunched up. Another frequent problem is the blanket not turning on, often due to a loose connection or an incorrect outlet. Users should check that the power cord is securely plugged in and that the outlet is functioning. If the blanket’s controls malfunction, resetting the unit or replacing the controller may be necessary. Always refer to the manual for specific troubleshooting steps to address these issues effectively and safely. Proper maintenance and regular checks can prevent many of these problems from occurring.

Understanding Error Codes and Indicators

The Tontine Electric Blanket may display error codes or indicators to signal specific issues. Common codes include E1, E2, or E3, which often relate to overheating, power supply problems, or controller malfunctions. If an error code appears, refer to the manual for a detailed explanation. For example, a blinking light on the control unit may indicate a faulty connection or an overheat protection trigger. To resolve these issues, ensure the blanket is properly connected, avoid blocking air vents, and reset the unit if necessary. Always consult the manual for guidance on interpreting and addressing these codes to ensure safe and effective operation. Regular maintenance and proper usage can help minimize errors and extend the blanket’s lifespan.

The Tontine Electric Blanket Manual PDF serves as an essential resource for users, providing clear instructions and helpful tips to ensure safe and effective use. By following the guidelines outlined in the manual, users can enjoy a warm, comfortable, and restful sleep while maintaining the blanket’s longevity. The manual emphasizes safety, proper maintenance, and troubleshooting to address common issues. Whether you’re setting up the blanket, adjusting heat settings, or resolving errors, the manual offers comprehensive support; Always refer to the manual for guidance to maximize your experience with the Tontine Electric Blanket and ensure years of reliable performance. Keep it handy for future reference to maintain optimal comfort and safety.