Welcome to the President Randy II user manual! This guide helps you unlock the full potential of your CB radio, ensuring optimal performance and functionality. Read carefully to understand features, setup, and operation for enhanced communication experiences.
Overview of the President Randy II CB Radio
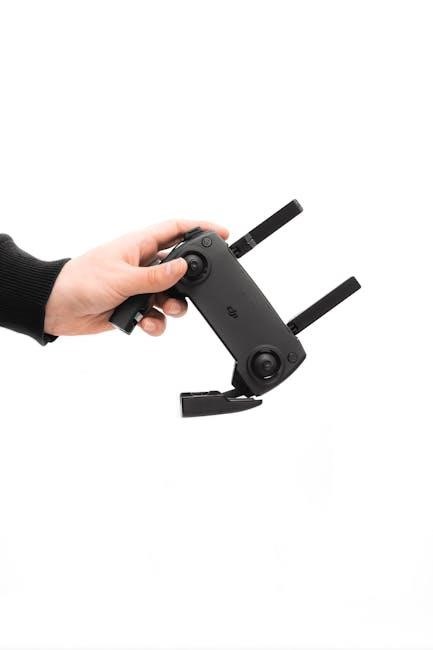
The President Randy II is a high-performance AM/FM handheld CB radio designed for reliable communication. With 40 channels, it offers versatile connectivity and crystal-clear sound. Its compact, durable design makes it ideal for both professional and casual use. The radio features a multi-function LCD display, manual squelch, and ASC for optimal signal control. Built with cutting-edge technology, it ensures robust performance in challenging environments. The Randy II supports FCC compliance, making it a trusted choice for users seeking dependable two-way communication solutions.
Importance of Reading the Manual
Reading the President Randy II user manual is essential to fully understand and utilize its features. It provides detailed instructions for setup, operation, and troubleshooting, ensuring optimal performance. The manual explains how to configure AM/FM modes, adjust power settings, and use the LCD display effectively. Proper understanding of the manual prevents misuse and extends the device’s lifespan. It also covers FCC compliance, helping users operate legally. By following the guidelines, users can enhance communication quality and resolve common issues efficiently, making it a vital resource for both beginners and experienced operators.

Key Features of the President Randy II
The President Randy II offers AM/FM modes, adjustable power settings, and a clear LCD display. It features long battery life and durable construction for reliable communication.
AM/FM Modes for Enhanced Communication
The President Randy II supports both AM and FM modes, offering versatility for different communication needs. AM mode provides reliable performance in challenging conditions, while FM mode delivers clearer audio with reduced noise. This dual capability ensures optimal connectivity, whether you’re using it for professional or recreational purposes. Switching between modes is straightforward, allowing users to adapt to varying environments and ensure high-quality communication consistently. This feature makes the Randy II a versatile choice for diverse user requirements.
Power Settings and Battery Life
The President Randy II features two power settings: low and high. Low power extends battery life, making it ideal for prolonged use, while high power ensures maximum transmission strength for clear communication. Battery life varies depending on usage and mode, with low power conserving energy for longer operation. Proper charging with the included drop-in charger maintains battery health. Always charge when the battery is low to prevent deep discharge, ensuring optimal performance and longevity. This balance of power and efficiency makes the Randy II reliable for diverse communication needs.
Channel Selection and LCD Display
The President Randy II offers 40 AM/FM channels for versatile communication. The up/down channel selector allows quick navigation between frequencies. The multi-function LCD display shows the current channel, frequency, and S-meter for signal strength. Manual squelch and ASC features help refine receptions, reducing noise for clearer calls. The display’s clarity ensures easy monitoring of settings and real-time adjustments. This combination of intuitive controls and visual feedback enhances usability, making channel management and communication seamless for users in any environment.
Installation and Setup
Proper installation ensures optimal performance. Follow antenna recommendations and charger setup guidelines. Read the manual carefully before use for best results and durability.
Antenna Recommendations and Installation
For optimal reception, use a high-quality antenna compatible with the President Randy II’s TNC connector. The Abbree 42-inch blade whip or Albrecht 90-inch rubber duck antenna are highly recommended. Ensure the antenna is securely mounted to avoid damage. For the Abbree blade whip, a BNC to TNC adapter is required. Proper installation ensures maximum signal strength and clarity. Follow the manual’s guidelines for antenna placement and alignment to achieve the best performance. Regularly inspect the antenna for damage or loose connections to maintain optimal functionality.
Charger Setup and Battery Maintenance
Use the President Randy II’s drop-in charger base for convenient charging. Ensure the charger is compatible with the radio’s battery type. Avoid overcharging to prolong battery life. Clean the battery contacts regularly to maintain proper charging. Store the battery in a cool, dry place when not in use. Follow the manual’s guidelines for charging times and battery care to ensure optimal performance and longevity. Proper maintenance will help preserve your radio’s reliability and functionality over time.
Operating the President Randy II
Master the basics of using your President Randy II with ease. Learn to navigate channels, adjust volume, and optimize squelch settings for clear communication. Refer to the manual for detailed guidance on advanced features and troubleshooting.
Basic Controls and Functions
The President Randy II features intuitive controls designed for easy operation. The up/down channel selector allows quick navigation between 40 AM/FM channels, while the volume knob ensures seamless audio adjustment. The manual squelch control helps minimize background noise, and the ON/OFF switch provides straightforward power management. The multi-function LCD display shows essential information like frequency and channel number, with an S-meter for signal strength monitoring. Familiarize yourself with these controls to maximize your communication experience and ensure smooth functionality in various environments.
Advanced Settings for Optimal Performance
The President Randy II offers advanced settings to fine-tune your communication experience. Utilize the compander feature to reduce noise and enhance audio clarity. Adjust frequency settings for precise channel alignment and minimize interference. Customize squelch levels to filter weak signals and optimize reception. Explore these settings to tailor the radio’s performance to your specific needs, ensuring crystal-clear communication in diverse operating conditions. Refer to the manual for detailed guidance on accessing and configuring these features effectively.

Troubleshooting Common Issues
Address common issues like squelch interference, channel alignment, and battery drainage. Refer to the manual for detailed solutions to ensure smooth operation and optimal performance of your President Randy II.
Resolving Squelch and Channel Interference
Experiencing squelch or channel interference? Adjust the squelch control to minimize background noise. Ensure proper antenna installation and tuning for optimal signal reception. Use the manual squelch and ASC features to filter unwanted signals. Regularly check and clean connections to prevent interference. For persistent issues, refer to the manual for detailed troubleshooting steps or reset the device to factory settings. Proper alignment of channels and frequencies is also crucial for clear communication. Consult the user manual for additional guidance on resolving these common issues effectively.
Diagnosing Battery and Antenna Problems
To diagnose battery issues, check the power settings and ensure proper charging. Low battery life may indicate a need for recalibration or replacement. For antenna problems, verify proper installation and connection. Use a high-quality antenna like the 42-inch Abbree blade whip with a BNC-to-TNC adapter for optimal performance. Clean connections regularly and reset the device if issues persist. Refer to the manual for detailed troubleshooting steps to resolve battery and antenna-related concerns effectively and maintain reliable communication.

Accessories and Upgrades
Explore essential accessories, including high-quality antennas and chargers, to enhance your President Randy II’s performance, longevity, and ensure optimal communication always.
Recommended Antennas for Improved Reception
For optimal performance, consider the 42-inch Abbree blade whip or the 90-inch Albrecht rubber duck whip. These antennas offer superior signal strength and clarity.
The Abbree blade whip requires a BNC to TNC adapter due to the Randy II’s TNC connector. Both options ensure reliable communication in various environments.
Additional Accessories for Enhanced Functionality
Enhance your President Randy II experience with essential accessories. A drop-in charger base, available for around $35, provides convenient charging. Ensure compatibility with a BNC to TNC adapter for optimal antenna performance. These accessories improve functionality, durability, and user convenience, maximizing your CB radio’s potential. Explore these options to elevate your communication experience and maintain peak performance in various settings.

FCC Compliance and Regulations
Understand and comply with FCC guidelines to ensure legal operation of your President Randy II; This section guides you through regulations and requirements for proper CB radio usage.
Understanding FCC Guidelines for CB Radios
CB radios, like the President Randy II, must comply with FCC regulations to ensure legal operation. The FCC sets specific rules for channel usage, power limits, and equipment standards. Users must operate within the 40 designated CB channels and adhere to power restrictions to avoid interference with other services. Proper licensing and device certification are also required. Familiarize yourself with these guidelines to maintain compliance and prevent legal consequences. This ensures safe and efficient communication for all users on the CB network.
Ensuring Legal Operation of the Randy II
To ensure legal operation of the President Randy II, always use the device as intended and in compliance with FCC regulations. The radio is FCC-approved, but proper usage is essential to avoid legal issues. Operate within designated CB channels and adhere to power limits. Avoid modifying the device to exceed FCC standards, as this can lead to penalties. Regularly review the manual and FCC guidelines to stay informed and maintain compliance. Proper legal operation ensures reliable communication and avoids potential legal consequences.