Saw and Guide Rail: A Comprehensive Guide (Updated 02/11/2026)
Achieving precise, straight cuts with a circular saw demands skill, but guide rails simplify the process significantly. This guide explores maximizing accuracy and efficiency.
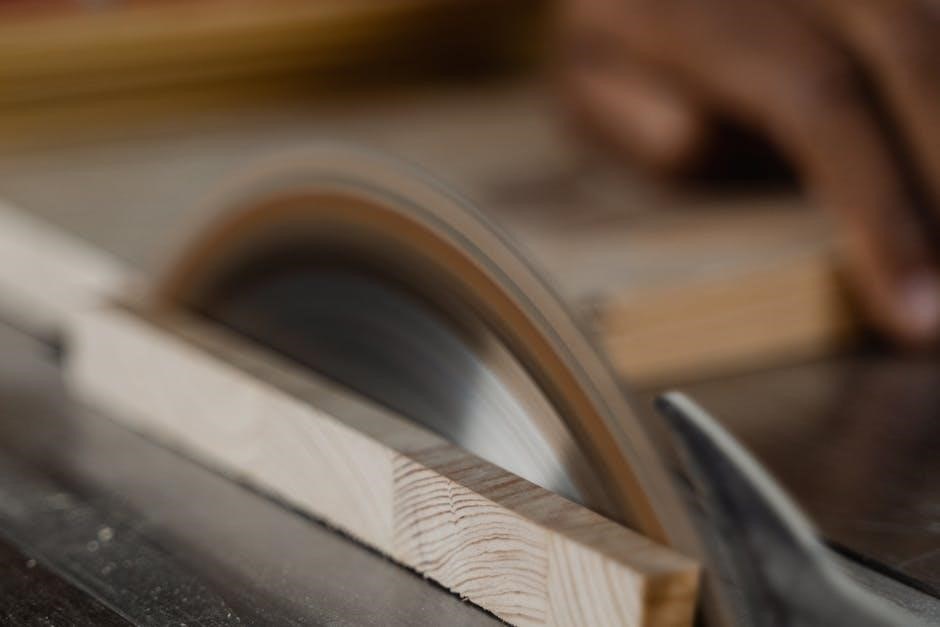
Saw and guide rail systems represent a significant advancement in woodworking and DIY projects requiring accurate cuts. Traditionally, achieving perfectly straight lines with a circular saw relied heavily on operator skill and often involved cumbersome methods like using clamps and straight edges. These systems, however, offer a streamlined and remarkably precise alternative.
Essentially, a guide rail provides a dedicated track for a circular saw to follow, eliminating wandering and ensuring consistent, clean cuts. This is particularly beneficial for long rip cuts or crosscuts where maintaining a straight path is crucial. Modern systems often feature anti-slip materials and adjustable features for versatility.

Why Use a Guide Rail with a Circular Saw?
Employing a guide rail dramatically improves cut accuracy compared to freehand circular saw operation. Following a marked line can be challenging, leading to deviations and wasted material; A guide rail eliminates this guesswork, providing a dedicated path for the saw’s baseplate. This is especially vital for projects demanding precision, like cabinet making or furniture construction.
Furthermore, guide rails enhance safety by reducing the risk of the saw drifting and potentially causing kickback. They also simplify repetitive cuts, saving time and effort. Ultimately, a guide rail transforms a general-purpose tool into a precision instrument.
Benefits of Using a Saw and Guide Rail
The advantages of integrating a saw and guide rail system are numerous, extending beyond simple straight cuts. Users experience significantly increased accuracy, minimizing material waste and rework. Consistent, professional-quality results become readily achievable, even for DIY enthusiasts.
Beyond precision, guide rails offer enhanced safety, reducing the likelihood of blade wandering and kickback. They also streamline repetitive tasks, boosting efficiency in projects requiring multiple identical cuts. This combination of accuracy, safety, and speed makes a guide rail a valuable addition to any workshop;
Types of Circular Saws Compatible with Guide Rails
Not all circular saws are created equal when it comes to guide rail compatibility. Generally, two main types are used: standard circular saws and specialized track saws. Standard saws can be used with guide rails, often requiring an adapter to ensure a snug fit against the rail’s edge for accurate tracking.
However, track saws are specifically designed for guide rail systems. They feature a baseplate engineered to glide seamlessly within the rail, offering superior precision and stability. This integrated design eliminates the need for adapters and provides a more robust cutting experience.
Standard Circular Saws
Utilizing a standard circular saw with a guide rail requires careful consideration and often, an adapter. These saws weren’t initially designed for rail systems, meaning their baseplates don’t inherently fit within the rail’s channel. Adapters bridge this gap, providing a consistent edge for the saw to follow.
The success of this setup hinges on the adapter’s quality and secure attachment. While more affordable initially, achieving the same level of precision as a track saw can be challenging. Consistent pressure and careful alignment are crucial to prevent wandering during cuts.
Track Saws (Specialized for Guide Rails)
Track saws are specifically engineered to work seamlessly with guide rails, offering unparalleled precision and efficiency. Unlike standard circular saws needing adapters, track saws feature a baseplate designed to glide within the rail’s channel, ensuring a consistently straight cut.
This integrated system minimizes wandering and maximizes control, particularly beneficial for large sheet goods or long rip cuts. While generally a higher initial investment, track saws deliver professional-grade results and often include features like plunge cutting capabilities, enhancing versatility.
Guide Rail Types and Materials
Guide rails aren’t one-size-fits-all; they vary in material and construction, impacting performance and cost. The two primary types are aluminum and plastic/composite rails. Aluminum rails are renowned for their rigidity and durability, resisting bending even over longer spans, ensuring consistently accurate cuts.
Plastic or composite rails offer a more affordable option, often sufficient for shorter cuts and lighter-duty applications. However, they may exhibit more flex, potentially compromising precision on larger projects. Choosing the right material depends on your typical project size and desired level of accuracy.
Aluminum Guide Rails
Aluminum guide rails represent the premium choice for serious woodworkers demanding unwavering accuracy. Their inherent rigidity minimizes deflection, even when spanning considerable distances, resulting in exceptionally straight cuts. This robustness makes them ideal for large sheet goods like plywood or MDF.
Many aluminum rails feature integrated measuring scales and anti-slip coatings for enhanced usability and safety. While generally more expensive than plastic alternatives, the long-term benefits of precision and durability often justify the investment. Look for rails with a precisely milled edge to interface seamlessly with your saw.
Plastic/Composite Guide Rails
Plastic or composite guide rails offer a more budget-friendly entry point into the world of guided cutting. Constructed from durable polymers, these rails are lightweight and easy to handle, making them suitable for smaller projects and DIY enthusiasts. While they may not match the rigidity of aluminum, advancements in material science have significantly improved their performance.
Many plastic rails incorporate rubberized backing to prevent slippage and feature clear markings for accurate measurements. They are a practical choice for hobbyists or those who only occasionally require the precision of a guide rail system, providing a good balance of cost and functionality.
Key Features to Look for in a Guide Rail
Selecting the right guide rail involves considering several crucial features for optimal performance. Length is paramount; choose a rail that comfortably accommodates your typical project dimensions, with options for connecting multiple rails for extended cuts. Anti-slip features, like rubberized backing, are essential to maintain stability during operation, preventing unwanted movement and ensuring accuracy.
Furthermore, examine the edge design – a precisely machined edge is vital for a flush fit against your saw’s baseplate, guaranteeing straight, splinter-free cuts. Consider rails with integrated measurement markings for convenience and efficiency.
Length of the Guide Rail
The ideal guide rail length directly correlates with the size of projects you frequently undertake. Shorter rails, typically around 48-55 inches, are suitable for smaller cuts and offer greater portability. However, for larger panels or long rip cuts, a longer rail – 60 inches or more – is highly recommended to minimize repositioning.
Many systems offer modularity, allowing you to connect multiple rails for extended reach. Consider your workshop space and typical material dimensions when deciding; a rail that’s too short necessitates frequent adjustments, impacting accuracy and workflow.
Anti-Slip Features
A crucial aspect of guide rail performance is its ability to remain firmly planted during operation. High-quality guide rails incorporate robust anti-slip features, often in the form of a rubberized backing or strategically placed grip strips. These features create significant friction between the rail and the workpiece surface, preventing unwanted movement.
Without adequate grip, the rail can shift mid-cut, compromising accuracy and potentially leading to dangerous kickback. Look for rails with a substantial contact area and materials designed to maximize friction, even on smoother surfaces.
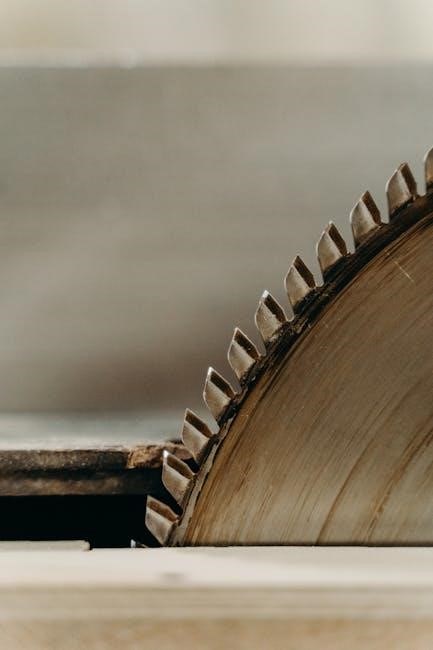
Edge Design for Accurate Cutting
The edge of a guide rail is paramount for achieving precise cuts; it directly interfaces with the circular saw base. Premium rails feature a precisely milled edge, often hardened steel, designed to withstand repeated contact without deformation. This ensures the saw remains consistently aligned throughout the cut.
The edge profile is also critical – a well-defined groove or lip allows the saw’s guide element to track smoothly and securely. Imperfections or wear on the edge translate directly into inaccurate cuts, so quality construction is essential.
Setting Up a Saw and Guide Rail System
Proper setup is crucial for accurate results when using a saw and guide rail. Begin by meticulously measuring and marking your desired cut line on the workpiece. Securely attaching the guide rail to the material is the next step; clamps are highly recommended to prevent shifting during operation.
Before cutting, double-check rail stability and alignment with the marked line. Any wobble or misalignment will compromise the cut’s accuracy. Ensure the saw is properly adjusted to ride along the rail’s edge without binding.
Measuring and Marking the Cut Line
Precision begins with accurate measurement and marking. Utilize a reliable measuring tape or ruler to determine the exact cut length. Clearly mark the cut line on your workpiece using a sharp pencil or marking knife – avoid broad lines for better accuracy.
Consider the saw blade’s width when marking; adjust the line accordingly to account for the kerf (the width of the cut). Double-check your measurements before proceeding, as errors at this stage will propagate throughout the entire cutting process. A square can help ensure a 90-degree line.
Attaching the Guide Rail to the Workpiece
Securely fastening the guide rail is crucial for a straight cut. Most systems utilize clamps to firmly attach the rail to the workpiece. Position the rail precisely along your marked cut line, ensuring it doesn’t shift during operation.
Apply even pressure when tightening the clamps – avoid over-tightening, which could damage the workpiece. For larger pieces, multiple clamps are recommended for optimal stability. Verify the rail’s alignment with the cut line before initiating any cuts; a slight misalignment can ruin the project.
Ensuring Rail Stability and Alignment
Maintaining unwavering rail stability is paramount for accurate cuts. Before cutting, double-check that the guide rail remains firmly secured to the workpiece, resisting any potential movement. Inspect for any wobble or lift, especially on larger panels.
Use additional support, like shims or scrap wood, under the rail if needed to prevent flexing. Re-verify alignment with your marked cut line; even minor deviations can compromise precision. A stable, properly aligned rail is the foundation of clean, straight cuts.
Cutting Techniques with a Saw and Guide Rail
A guide rail unlocks a range of cutting techniques beyond simple straight lines. Mastering these expands your project capabilities significantly. Plunge cuts, ideal for creating openings within a panel, become remarkably clean and controlled. Rip cuts, running parallel to the wood grain, benefit from the rail’s unwavering guidance, ensuring consistent width.
Even bevel cuts are achievable with specialized adapters or by carefully tilting the saw while maintaining rail contact. Consistent pressure and a smooth feed rate are key to optimal results across all techniques.
Plunge Cuts with a Guide Rail
Plunge cuts, creating precise openings within a workpiece, are dramatically improved with a guide rail. Unlike freehand plunging, the rail prevents splintering at the entry and exit points, delivering clean, professional results. Position the rail carefully, aligning it with your desired cut location.
Utilize a circular saw with a plunge lock feature, if available, for enhanced control. Slowly lower the blade into the material, maintaining firm contact with the rail throughout the entire plunge. This technique is invaluable for installing fixtures or creating custom inlays.
Rip Cuts with a Guide Rail
Rip cuts, following the grain of the wood, benefit immensely from the stability and accuracy of a guide rail. Achieving perfectly straight, parallel edges becomes significantly easier, eliminating the wandering often experienced with a circular saw alone. Securely clamp the guide rail to the workpiece, ensuring it’s perfectly aligned with your desired cut line.
Maintain consistent pressure against the rail as you move the saw forward. The rail acts as a steadfast reference, guaranteeing a clean, straight rip cut every time, even across wider boards. This method is ideal for sheet goods.

Bevel Cuts with a Guide Rail
Executing bevel cuts – angled cuts across the wood – with a guide rail requires a bit more setup, but yields remarkably precise results. Many guide rail systems offer dedicated angle adjustment tools or markings to facilitate accurate bevel settings on your circular saw. Ensure the saw base is firmly set to the desired bevel angle before attaching to the rail.
The guide rail maintains directional accuracy while the bevel adds the angled dimension. Double-check alignment and secure the rail before initiating the cut for consistently clean, angled edges.
Popular Saw and Guide Rail Brands
Several brands consistently receive high praise for their saw and guide rail systems, each offering unique features and price points. Festool is renowned for its premium, highly accurate systems, often considered the gold standard, though at a higher investment. Bosch provides excellent quality and performance, offering a more accessible price range for professionals and serious hobbyists.
Kreg, known for its joinery solutions, offers the Rip-Cut guide, a versatile and affordable option for straight-line cutting. Choosing the right brand depends on budget, desired precision, and frequency of use.
Festool Saw and Guide Rail Systems
Festool systems represent the pinnacle of precision cutting technology, though they come with a significant price tag. Their guide rails are exceptionally straight and durable, featuring a unique self-cleaning surface and anti-slip coating. Festool circular saws are designed specifically to work seamlessly with these rails, offering effortless gliding and accurate results.
The modularity of Festool allows for connecting rails for extended cuts, and a wide range of accessories further enhances functionality. While expensive, Festool delivers professional-grade performance and longevity.
Bosch Saw and Guide Rail Systems
Bosch offers a compelling balance of performance and price in the saw and guide rail market. Their systems are well-regarded for their accuracy and ease of use, making them a popular choice for both professionals and serious DIY enthusiasts. Bosch guide rails feature a durable construction and anti-slip properties, ensuring stable and precise cuts.
Compatible Bosch circular saws integrate smoothly with the rails, and the availability of accessories like connecting clamps and angle guides expands versatility. They provide a robust and reliable solution for straight, clean cuts.
Kreg Rip-Cut Guide Systems
Kreg’s Rip-Cut guide is a more affordable alternative to dedicated track saw systems, offering a significant upgrade over freehand cutting. It’s designed to work with standard circular saws, clamping directly to the workpiece for enhanced stability and accuracy. This system excels at repeatable rip cuts, making it ideal for projects requiring consistent board widths.
While not as comprehensive as Festool or Bosch systems, Kreg’s Rip-Cut provides a practical solution for achieving straight cuts without a substantial investment. It’s a great entry point for those exploring guide rail technology.
Accessories for Saw and Guide Rail Systems
Expanding the functionality of your saw and guide rail setup involves several useful accessories. Connecting rails are crucial for longer cuts, allowing you to seamlessly join sections of guide rail for extended reach. Angle adjustment tools ensure precise bevel cuts, while specialized clamps provide rock-solid rail placement, minimizing slippage during operation.
Beyond these essentials, consider dust extraction attachments for cleaner work environments and carrying cases for convenient transport and storage. These additions enhance both the precision and practicality of your system.
Connecting Rails for Longer Cuts
When projects demand cuts exceeding the standard guide rail length, connecting rails become indispensable. These accessories allow you to securely join multiple rail sections, creating a continuous, straight cutting path. Look for connecting hardware that provides a flush, gap-free connection to maintain accuracy.
Proper alignment is key; ensure each rail segment is perfectly level and aligned before tightening the connectors. High-quality connecting rails minimize deflection and wobble, delivering consistently precise results even on extended cuts. This expands project possibilities significantly.
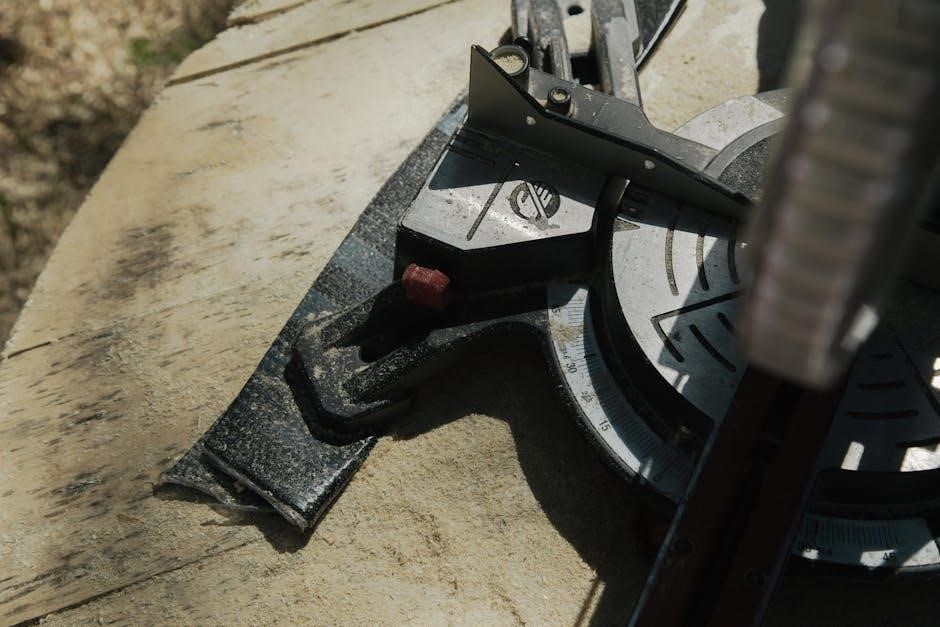
Angle Adjustment Tools

Achieving accurate bevel cuts with a saw and guide rail system requires precise angle adjustments. Dedicated angle adjustment tools, often included with higher-end systems, facilitate setting and locking the rail to specific angles. These tools typically feature a clear scale and locking mechanism for repeatable accuracy.
Alternatively, a reliable protractor or angle finder can be used in conjunction with the rail’s adjustment features. Ensuring the saw blade is perfectly aligned with the desired angle before cutting is crucial for clean, professional results. Careful calibration prevents errors.
Clamps for Secure Rail Placement
Maintaining unwavering stability of the guide rail is paramount for accurate cuts. Specialized clamps, designed specifically for saw and guide rail systems, provide a robust and reliable method of securing the rail to the workpiece. These clamps often feature quick-release mechanisms and non-marring pads to protect the wood surface.
Using multiple clamps along the length of the rail prevents shifting or movement during operation. Proper clamping ensures a clean, straight cut, minimizing the risk of wandering or inaccuracies. Invest in quality clamps for optimal performance.
Safety Precautions When Using a Saw and Guide Rail
Prioritizing safety is crucial when operating a circular saw with a guide rail. Always wear safety glasses to protect your eyes from flying debris and hearing protection due to the saw’s loud operation. Ensure the workpiece is adequately supported to prevent movement during cutting, reducing the risk of kickback.

Be mindful of kickback – a sudden, forceful reaction – by maintaining a firm grip and avoiding binding. Never reach over the blade, and disconnect the power when making adjustments. A safe workspace is a productive workspace!
Wearing Safety Glasses and Hearing Protection
Protecting your senses is paramount when using a circular saw and guide rail system. Flying wood chips and sawdust pose a significant risk to your eyes, making safety glasses absolutely essential. Choose glasses that meet ANSI Z87.1 standards for impact resistance.
Furthermore, the high-pitched whine of a circular saw can cause lasting hearing damage. Hearing protection, such as earmuffs or earplugs, is non-negotiable. Prioritize these safeguards for a comfortable and safe woodworking experience.
Proper Workpiece Support
Adequate support is crucial for clean, safe cuts with a saw and guide rail. The workpiece must be firmly secured to prevent movement during the cutting process. Utilize sawhorses, workbenches, or dedicated support stands to elevate and stabilize the material.
Ensure the support extends beyond the cut line, preventing the offcuts from binding or causing kickback. Never attempt to cut unsupported material, as this dramatically increases the risk of injury and inaccurate results. Stability equals precision and safety!
Avoiding Kickback
Kickback, a sudden and forceful reaction, is a significant hazard when using a circular saw, even with a guide rail; To minimize this risk, always maintain a firm grip on the saw with both hands and ensure a smooth, consistent feed rate.
Never force the saw through the material. If resistance is encountered, slow down or re-evaluate the cut. Proper blade selection and ensuring the workpiece is securely supported are also vital preventative measures. Awareness and control are key to safe operation.
Maintaining Your Saw and Guide Rail
Consistent performance relies on regular maintenance of both your saw and guide rail system. After each use, thoroughly clean the guide rail to remove sawdust and debris, preventing buildup that can affect accuracy. Inspect the rail frequently for any signs of damage, such as bends or cracks.
Periodically lubricate any moving parts on the saw, following the manufacturer’s recommendations. A well-maintained system ensures clean, precise cuts and extends the lifespan of your valuable tools, saving you money long-term.
Cleaning the Guide Rail
Regularly cleaning your guide rail is paramount for maintaining cutting accuracy. Accumulated sawdust and debris can create inconsistencies, leading to wandering cuts. After each use, wipe down the rail’s surface with a soft cloth to remove loose particles.
For stubborn residue, a slightly damp cloth (ensure it’s not overly wet!) can be used, followed by thorough drying. Avoid harsh chemicals or abrasive cleaners, as these can damage the rail’s surface. A clean rail ensures smooth saw travel and precise results.

Inspecting the Rail for Damage
Routine inspection of your guide rail is crucial for safety and accuracy. Before each use, carefully examine the rail’s surface for any dents, cracks, or warping. Pay close attention to the edges, as these are most susceptible to damage from impacts or drops.
Check the anti-slip strips for wear and tear, ensuring they still provide adequate grip. A damaged rail can compromise cut quality and potentially cause kickback. Replace damaged rails or components immediately to maintain optimal performance and prevent accidents.
Lubricating Moving Parts
Maintaining smooth operation of your saw and guide rail system requires periodic lubrication. Focus on any points where the saw interacts with the rail, such as the glide strips or bearing surfaces. Use a silicone-based lubricant, as oil-based products can attract dust and debris, hindering performance.
Apply a small amount of lubricant and wipe away any excess. Avoid over-lubricating, as this can also contribute to build-up. Regular lubrication reduces friction, ensuring accurate cuts and extending the lifespan of your equipment.
Troubleshooting Common Issues
Even with careful setup, occasional issues can arise when using a saw and guide rail system. Saw wandering off the rail often indicates insufficient clamping or a damaged rail edge; inspect and secure accordingly. Rail slippage during cuts suggests inadequate anti-slip features are engaged or the workpiece isn’t properly supported.
Inaccurate cut angles typically stem from improper angle adjustment or a misaligned saw blade. Regularly check calibration and ensure the saw is firmly connected to the rail. Addressing these common problems quickly maintains precision.
Saw Wandering Off the Rail
A common frustration is the saw deviating from the guide rail during a cut, compromising accuracy. This often signals insufficient clamping force, allowing slight movement between the rail and workpiece. Inspect the rail’s edge for damage – nicks or debris can disrupt smooth travel.
Ensure the saw’s anti-plunge mechanism (if equipped) is engaged correctly. Verify the saw base is fully seated against the rail before initiating the cut. A properly maintained and securely fastened system minimizes wandering, delivering consistently straight results.
Rail Slipping During Cuts
If the guide rail itself shifts position mid-cut, it’s a serious problem impacting precision and safety. This usually indicates inadequate clamping – the rail needs to be firmly secured to the workpiece to resist cutting forces. Check the workpiece support; insufficient support can contribute to rail movement.
Anti-slip features on the rail’s underside are crucial; ensure they are clean and making full contact. Consider using additional clamps, especially for larger or heavier workpieces, to prevent unwanted shifting during operation. A stable setup is paramount.
Inaccurate Cut Angles
Achieving precise bevel or angled cuts with a saw and guide rail requires careful attention to detail. Verify your saw’s bevel angle setting is accurate before attaching the rail. Many guide rail systems offer dedicated angle adjustment tools; utilize these for precise setup.
Ensure the rail is firmly clamped and doesn’t shift during the cut. Double-check the rail’s alignment with your marked angle line. Slight discrepancies in rail placement can significantly affect the final cut angle. Consistent practice and careful calibration are key to accuracy.